
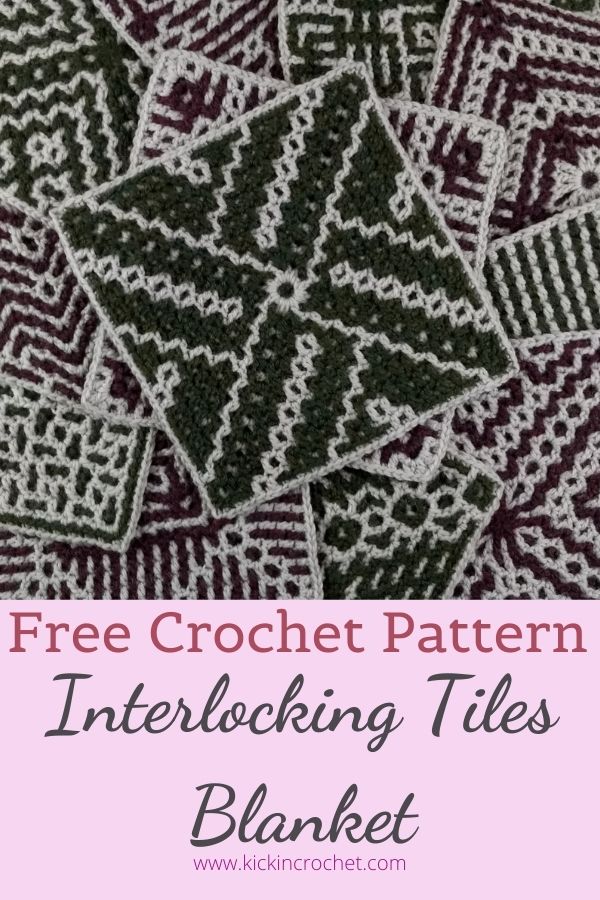
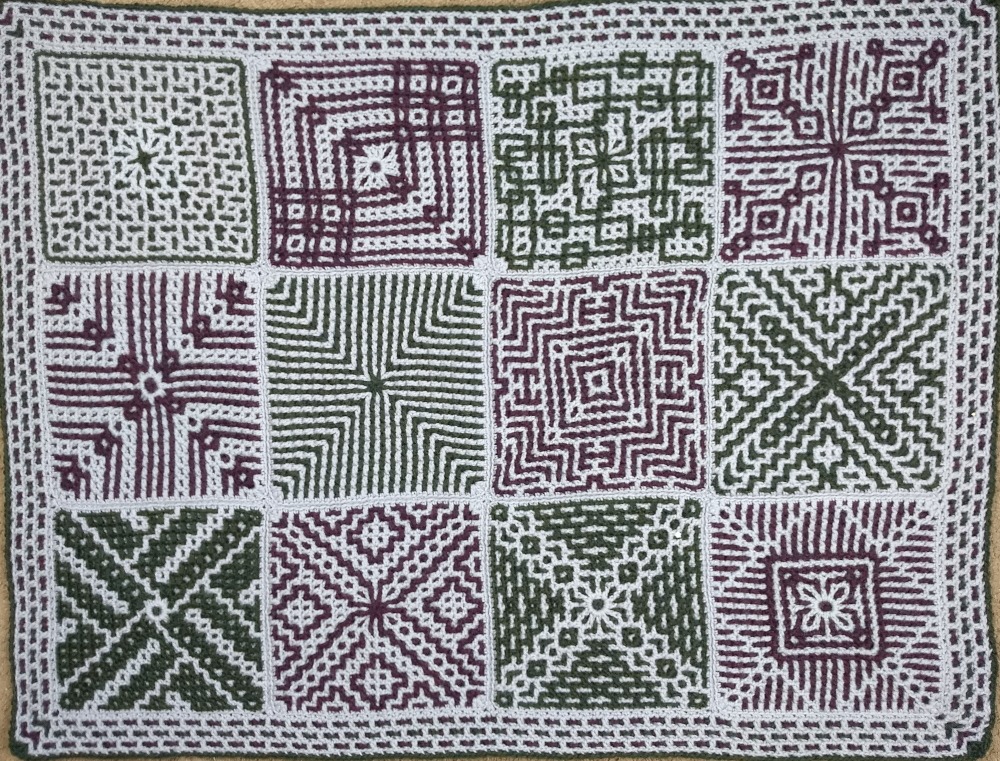
The Interlocking Tiles Blanket was such a fun project, but it was also a huge undertaking! I’m simultaneously sad to see the end of it, and glad to see it go. These twelve squares were released once per month for all of 2021. Now they’ve been joined together to create a beautiful blanket (or two!). I gifted the larger one to my husband for Christmas. He loves how the double-thick interlocking fabric is extra warm. Plus, I mean, the designs can’t be beat!
Read on for links to each of the free patterns, or you can purchase a PDF with all 12 squares. Video instructions for joining the squares and creating the brick-look border are also included below!
*Disclosure: Some of the links in this post are affiliate links, which means if you click on them and make a purchase I may, at no additional cost to you, earn a commission. Read full disclosure here.
About the Interlocking Tiles Blanket
The idea for this blanket sprung up after I created the Synergy Square for the Friendship Blanket CAL. I loved how that square turned out and started drafting up some more ideas. Pretty soon I had a half dozen fun designs and decided to make a year out of it!
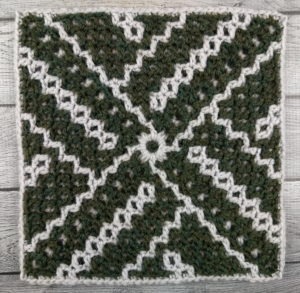
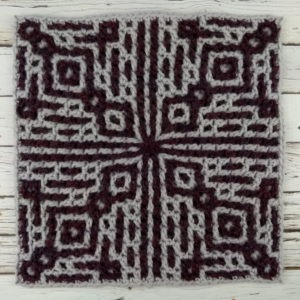
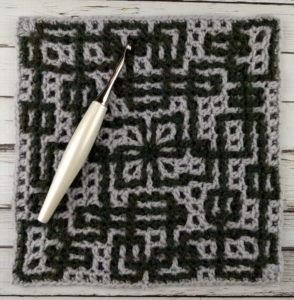
All of these monthly designs are the same size, and all of them use interlocking crochet worked in the round (in fact, you can add the Synergy Square to the set for a bonus 13th design – it’s the same size, too!). All of the patterns are available free on the blog (links below), or you can purchase them individually as PDF for $3 each, or as a complete set of 12 for just $12 from Etsy or Ravelry!
Materials
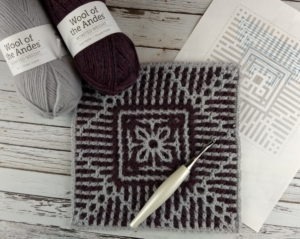
- Worsted weight yarn of your choice. In my samples I used either WeCrochet Wool of the Andes (the gray/purple/green blanket) or Paintbox Simply Aran from Lovecrafts (the yellow/green/gray blanket). You could substitute a different weight yarn, of course, but it will affect your finished size and hook size needed.
- Size H crochet hook, or hook appropriate for your yarn. I love these Odyssey hooks from Furls Crochet!
Sizing
Each square in the Interlocking Tiles Set measures 9-10″. For me, the Wool of the Andes yarn created 9″ squares, and the Simply Aran created 10″ squares. Your finished size will depend on your yarn, hook, and tension.

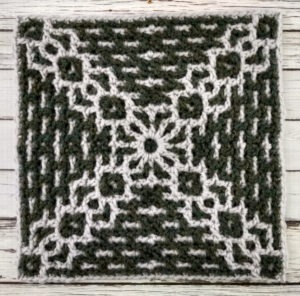
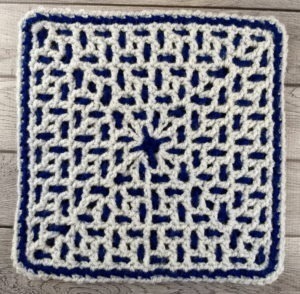
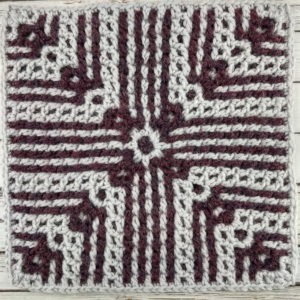
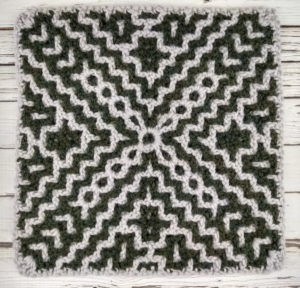
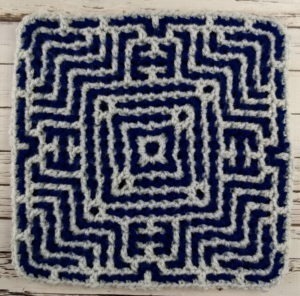
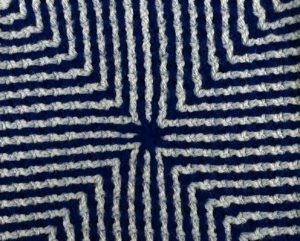
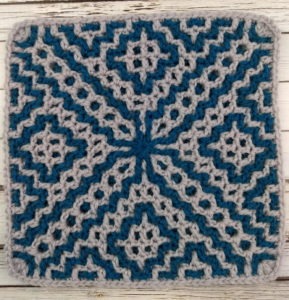
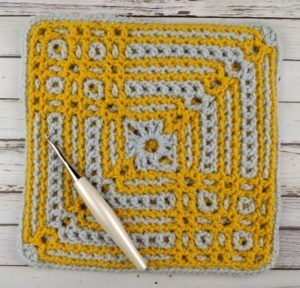
The Interlocking Tiles Blanket Squares
As mentioned, each square is available free on the blog. You can access them by clicking the image for each square, or scrolling down to the links below.. Each post will include written instructions, a video tutorial, and two charts (one annotated, one plain) so you have plenty of help creating these fun squares.
Joining Squares
When you’re ready to join squares, you can use any method you prefer. All of the squares have the same number of stitches and are worked in the round, making them very easy to join. My preferred method for this blanket is to slip stitch the squares together on the “wrong side” of the blanket. If you use this technique, make sure that you go through the corner stitches of the squares each time you come to them (horizontally and vertically). This will make a nice corner join that isn’t too gappy. Also be careful as you join – sometimes the center stitch where you tie off your yarn looks like an extra stitch. Make sure your stitches stay lined up for a nice result!
Check out this YouTube video to see how I joined my squares:
Interlocking Brick Border
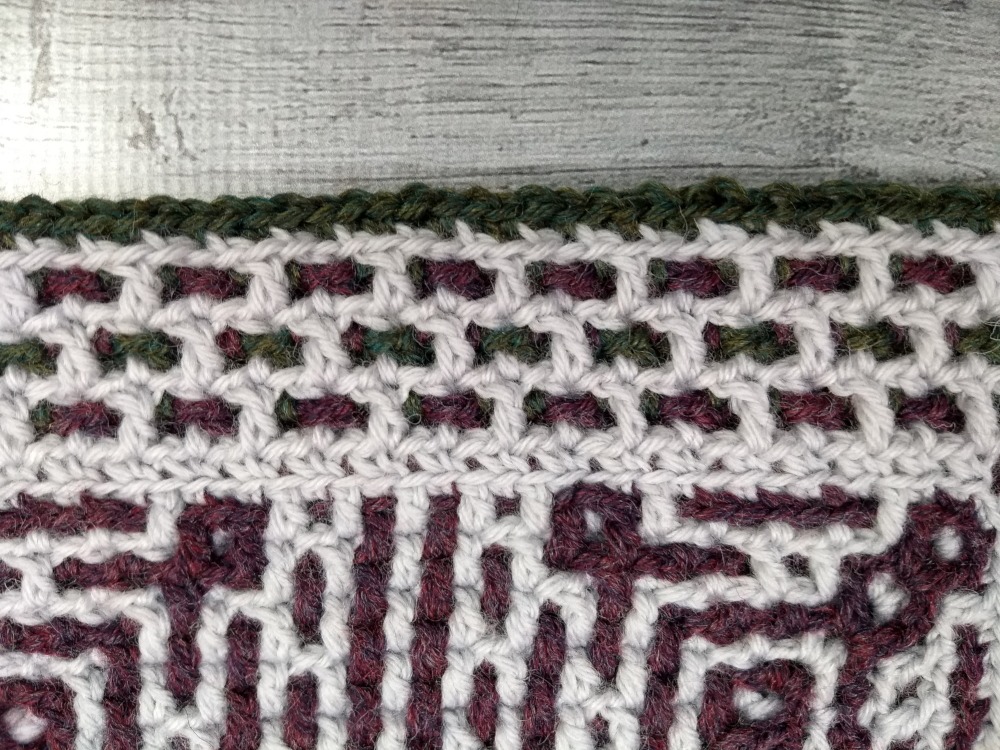
Again, you can use any border technique you like (or none at all!). I decided to make an interlocking crochet border with a fun brick texture. I filmed a video of this, as well!
To start, you’ll need to make a foundation row to re-establish the interlocking design. With your first color, join to the stitch just to the left of the center of one corner. Ch2 (counts as sc and ch1). Sk1. *Sc, ch1, sk1 until you get to the next corner. You should have an sc in the stitch just to the right of the corner, then ch4, sk the center corner, and sc in the stitch just to the left of the center corner. Continue on creating sc’s with ch1 spaces. (see the video for tips on working over the join sections and corners).
With your other color, join to the corner, ch4 (counts as dc and ch1), sk1. *Dc, ch1, sk1 until you get to the next corner, work dc ch4 dc in corner, then continue on.
Now you are ready to create your interlocking border! With your first color, you will alternate front and back stitches, but with your second color, you will always work in the back. Decide whether you want to do front corners or back corners (it is fine either way – I did one way on one blanket and the other for the other one), then always start after the corner the same way, either with front or back stitches (again, you can choose… it will work just fine) when working your first color. Remember, second color is always worked in the back, except the corner if you chose front corners. Check out the video below to see this in action!
Enjoy Your Beautiful Blanket!
I hope you enjoyed this project, and I’d love to see your finished projects – share them with me on instagram @kickin_crochet, or facebook @kickincrochet!
I am having a problem with one of your patterns and the contact form isn’t working. I bought the pattern bundle. Please help.