
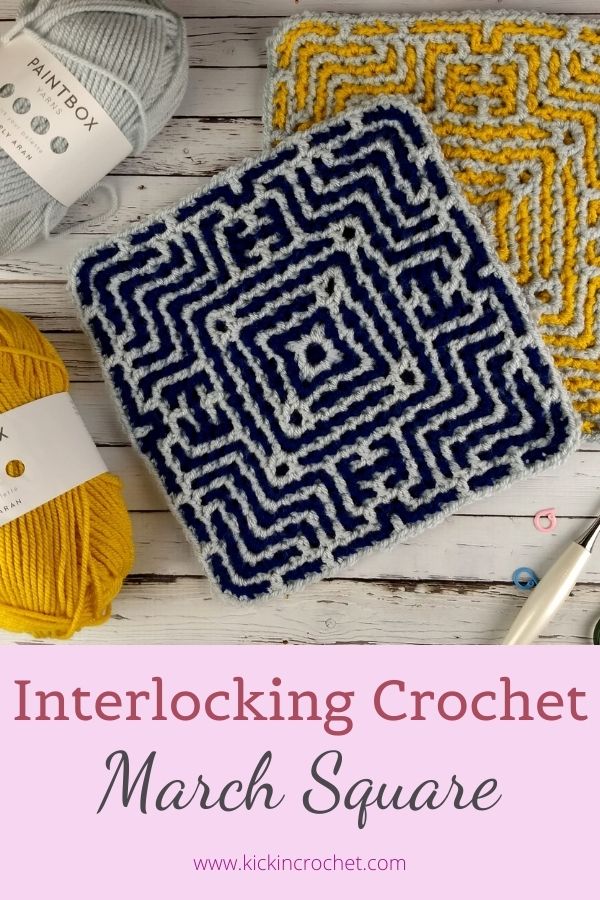
Each month this year, I’ll be releasing a free interlocking crochet square. This month’s square is the first one that is not 100% symmetrical. Most of it is symmetrical, but it’s got some offset corners in the inner section, just for fun. This one always reminds me of a computer chip! All 12 squares in the set are worked in the round, they all include video tutorials, and you can see all of them on the main Interlocking Tiles Blanket page here!
*Disclosure: Some of the links in this post are affiliate links, which means if you click on them and make a purchase I may, at no additional cost to you, earn a commission. Read full disclosure here.
You can get the free pattern below, or you can purchase a printable PDF copy of this pattern from Ravelry or Etsy using the links below!
Supplies
You can use any weight yarn and appropriate hook for these squares, though it will affect the finished size. For reference, my two samples were made in a Worsted or an Aran weight, both with an H hook, and the Aran ended up almost a full inch larger than the worsted. Here’s what I used:
- WeCrochet’s Wool of the Andes Worsted, up to 30g each color
- Lovecrafts’ Paintbox Simply Aran in Mustard Yellow, Midnight Blue, and Stormy Gray
- Size H crochet hook – I love these Odyssey hooks from Furls Crochet!
- Stitch Markers – Seriously, at least 1 stitch marker, preferably 2.
- Yarn/Tapestry Needle
Stitch Abbreviations
- ch chain
- st(s) stitch(es)
- ss slip stitch
- sc single crochet
- dc double crochet
- blsc back loop single crochet
- fdc front double crochet
- bdc back double crochet
- fc front corner
- bc back corner
Pattern Notes
This square uses interlocking crochet in the round. (This technique is also known as interwoven, intermeshing, or double filet crochet). In interlocking crochet, every dc has a ch1 between it and the next dc. Corner stitches will have a ch4 between dc’s.
Except for the last row, each color only ever works into stitches of its own color. This effectively forms two meshes. The meshes are woven around each other as you work by changing whether you work stitches from the front of the work or the back of the work.
For an introduction to interlocking crochet, you can see this tutorial, though it is worked in rows rather than in the round.
There is also a complete video tutorial for this specific square (scroll down) in case you prefer video instruction. Each round in the instructions below also has a note telling what time in the video that round starts.
It is very important as you work to make sure that you are skipping the dc’s of the opposite color rows – 2dcs of the same color will always have a dc of the opposite color worked between them.
I recommend that instead of making your turn ch at the start of the next row, you make it at the end of the previous row so that you can more easily place stitch markers and make sure your starting chains are in the correct location, either in the front or the back of the work (this is noted in the instructions). Placing a stitch marker in the loop that would go on your hook when not in use will help to make sure you don’t accidentally unwind your work when not using that color.
Ch4’s at the start of a row count as either fdc or bdc (they count as the dc and the ch1)
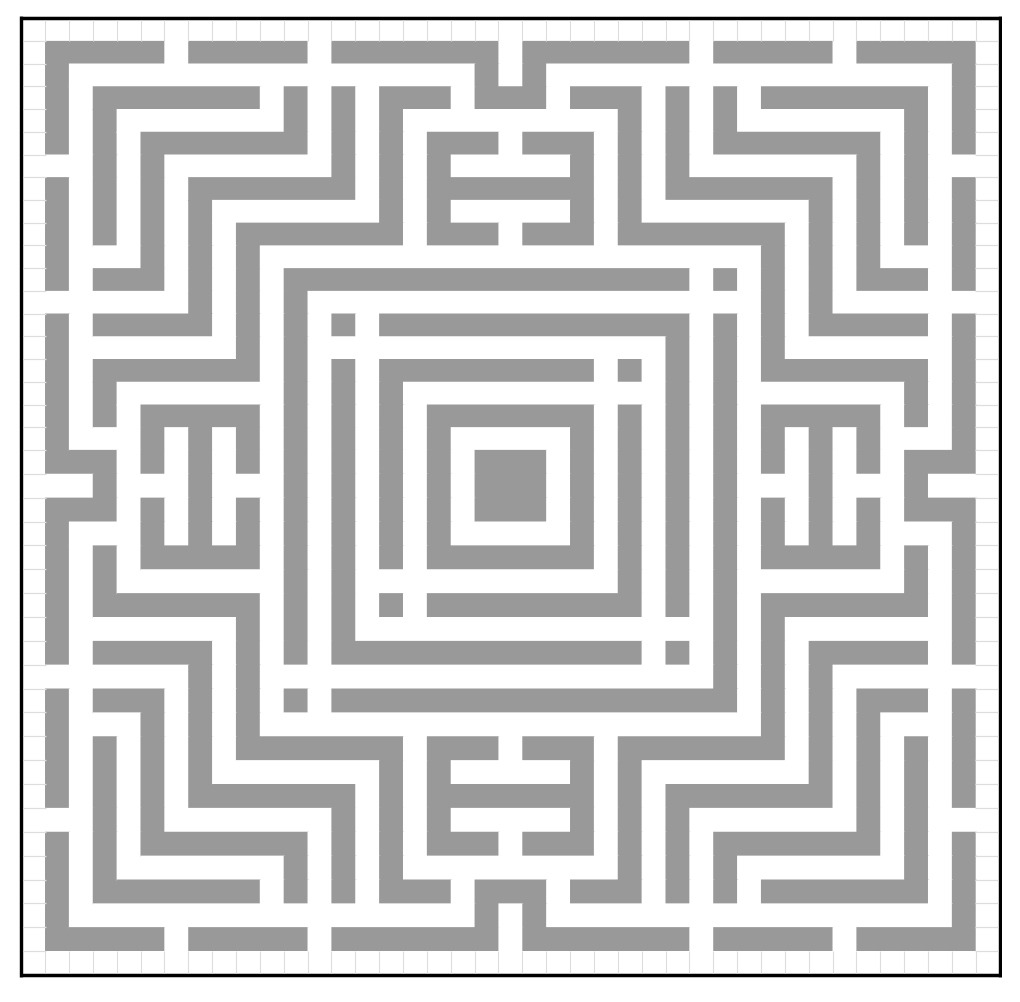
There is a chart at the end of the PDF for you to use. There are two versions – one with letters written on to identify front or back stitches, with row markings in bold every other row, and one that is blank.
In my example, color A is blue or yellow, and color B is gray.
Special Stitches
Front Double Crochet (fdc): Working in front of the other color, double crochet into the dc on the same color row below, then ch1.
Back Double Crochet (bdc): Working behind the other color, double crochet into the dc on the same color row below, then ch1.
Front Corner (fc): Working in front of the other color, work (dc, ch4, dc, ch1) into the ch4 space of the same color row below.
Back Corner (bc): Working behind the other color, work (dc, ch4, dc, ch1) into the ch4 space of the same color row below.
YouTube Video Tutorial
How to Make the March Interlocking Crochet Square

If you like to work with charts, you can download two different versions of this chart. The first version is a blank, color-only chart. The second one has f or b written on each stitch to designate which type of stitch you are doing, as well as having every other row marked in bold to help you keep your place.
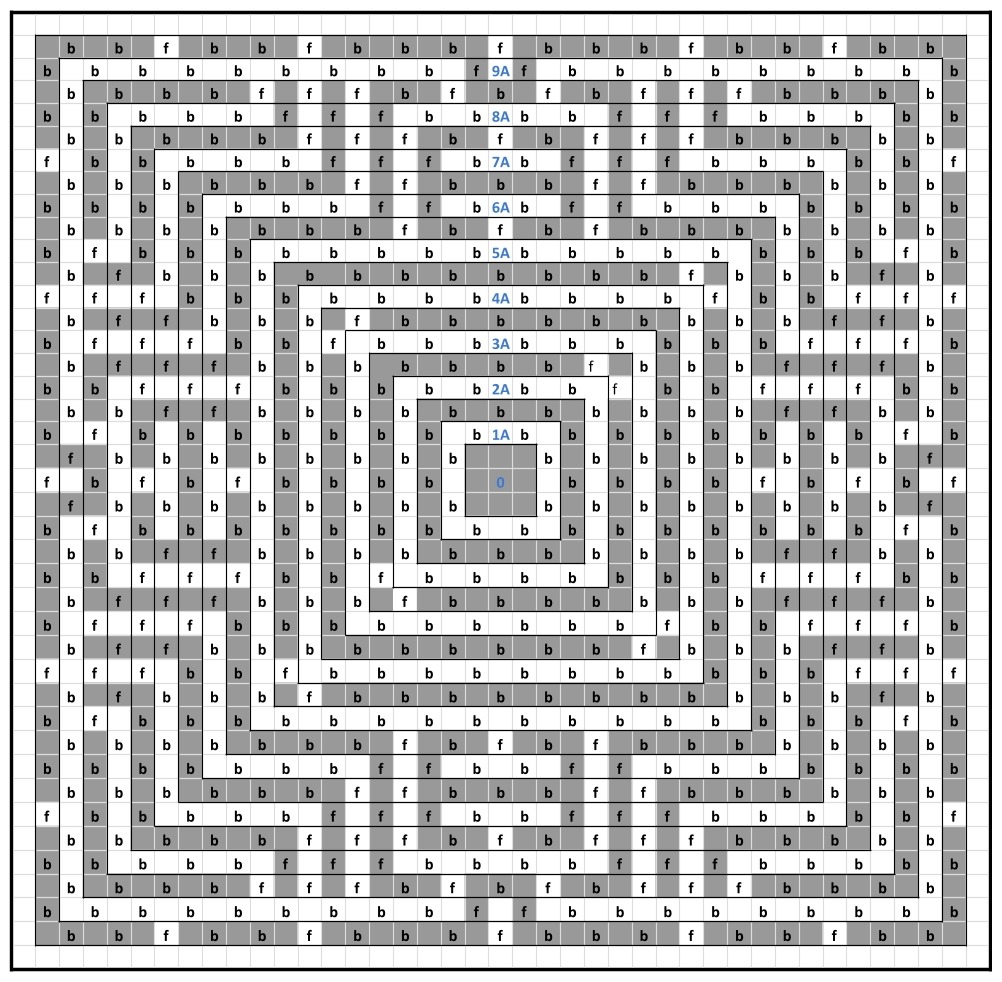
0/1A (set up rounds) [Video 0:30]
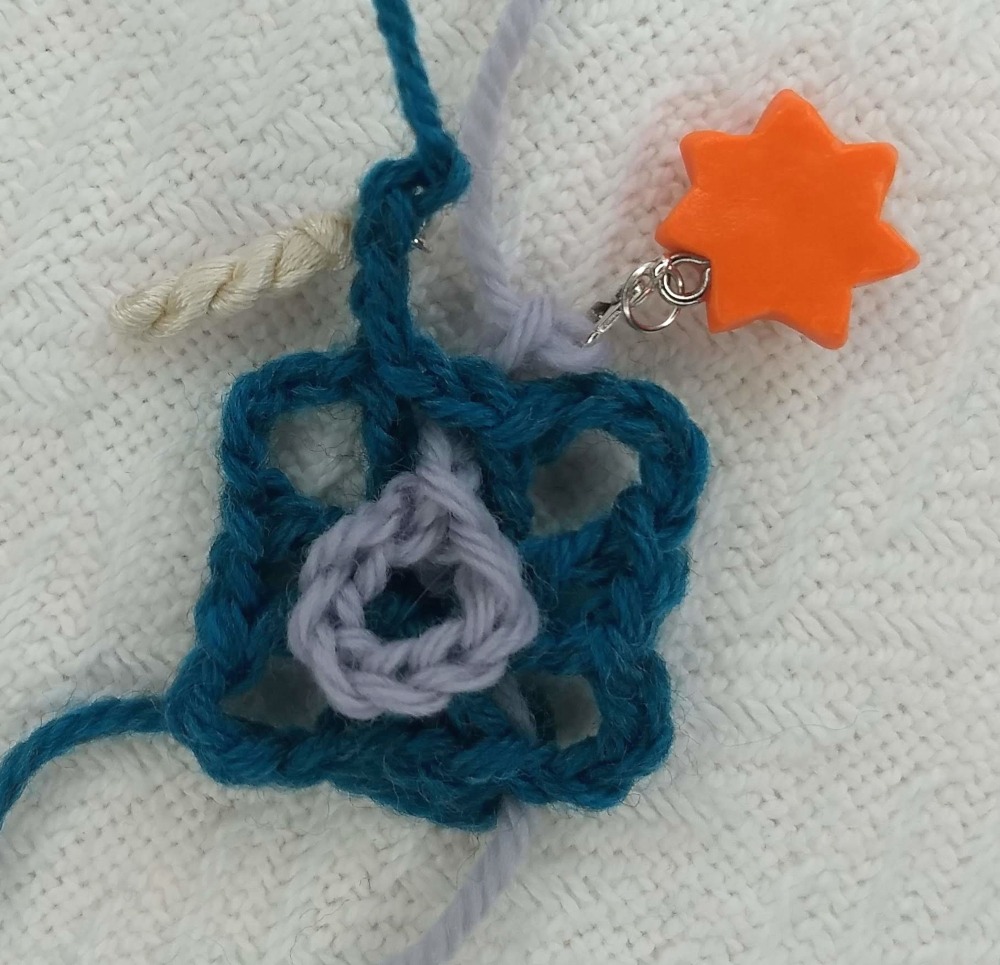
With color A, make a magic ring (or ch3 and join to form a ring). In the ring, ch7 (counts as first dc and ch4), dc, (ch1, dc, ch4, dc) 3 times, ch1, join to third st of starting ch. Ch4, place stitch marker. (8dc and four ch4 spaces for corners).
With color B, ch8, join to form a ring, then ch4.

Insert the ring between the two A color dc’s, just to the right of the working yarn of A color. You may want to pin the ring in place with stitch markers until you have finished row 1B.
Round 1B [Video 4:30]
[place working yarn of color A to the back] Working with color B, in ring, bc, (bdc, bc) three times, join to third st of starting ch. Ch4, place a stitch marker. (12dc)


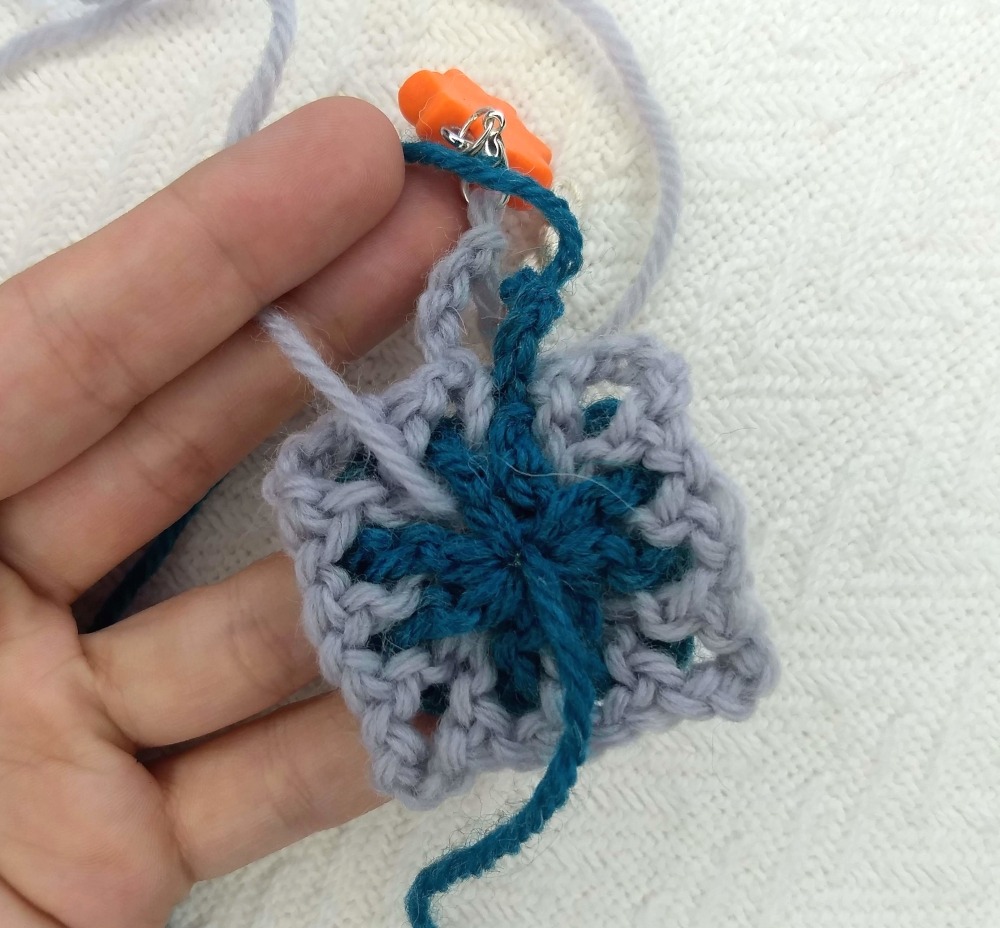
2A [Video 8:15]
[place color B in back] With A, bc, (bdc 2, bc) three times, bdc, join to 3rd st of starting ch. Ch4, place a stitch marker. (16dc)
2B [Video 11:57]
[place color A in back] With B, bdc, bc, bdc 3, fc, bdc 3, bc, bdc 3, fc, bdc, join to 3rd st of starting ch. Ch4, place a stitch marker. (20dc)
3A [Video 14:52]
[B in back] With A, bdc, bc, (bdc 4, bc) three times, bdc 2, join to 3rd st of starting ch. Ch4, place a stitch marker. (24dc)
3B [Video 16:32]
[A in back] With B, bdc 2, fc, bdc 5, bc, bdc 5, fc, bdc 5, bc, bdc 2, join to 3rd st of starting ch. Ch4, place a stitch marker. (28dc)
4A [Video 18:52]
[B in back] With A, bdc 2, bc, (bdc 6, bc) three times, bdc 3, join to 3rd st of starting ch. Ch4, place a stitch marker (32dc)
4B [Video 19:40]
[A in back] With B, bdc 3, bc, bdc 7, fc, bdc 7, bc, bdc 7, fc, bdc 3, join to 3rd st of starting ch. Ch4, place a stitch marker (36dc)
5A [Video 21:55]
[B in front] With A, bdc 3, bc, (bdc 8, bc) three times, bdc 4, join to 3rd st of starting ch. Ch4, place a stitch marker (40dc)
5B [Video 22:57]
[A in back] With B, bdc, fdc, bdc 2, bc, [bdc 2, (fdc, bdc) twice, fdc, bdc 2, bc] three times, bdc 2, fdc, bdc, join to 3rd st of starting ch. Ch4, place a stitch marker (44dc)
6A [Video 28:15]
[B in back] With A, fdc 2, bdc 2, bc [(bdc 2, fdc 2) twice, bdc 2, bc] three times, bdc2, fdc2, bdc, join to 3rd st of starting ch. Ch4, place a stitch marker (48dc)
6B [Video 33:44]
[A in back] With B,bdc, fdc 2, bdc 2, bc (bdc 2, fdc 2, bdc 3, fdc 2, bdc 2, bc) three times, bdc 2, fdc 2, bdc, join to 3rd st of starting ch. Ch4, place a stitch marker (52dc)
7A [Video 39:31]
[B in front] With A, fdc 3, bdc 2, bc, [(bdc 2, fdc 3) twice, bdc 2, bc) three times, bdc 2, fdc 3, bdc, join to 3rd st of starting ch. Ch4, place a stitch marker (56dc)
7B [Video 45:41]
[A in back] With B, bdc, fdc 3, bdc 2, bc, (bdc 2, fdc 3, bdc, fdc, bdc, fdc 3, bdc 2, bc) three times, bdc 2, fdc 3, bdc, join to 3rd st of starting ch. Ch4, place a stitch marker (60dc)
8A [Video 52:20]
[B in back] With A, bdc, fdc 3, bdc 2, bc, (bdc 2, fdc 3, bdc 4, fdc 3, bdc 2, bc) three times, bdc 2, fdc 3, bdc 2, join to 3rd st of starting ch. Ch4, place a stitch marker (64dc)
8B [Video 59:32]
[A in front] With B, fdc, bdc, fdc 3, bdc 2, bc, [bdc 2, fdc 3, (bdc, fdc) twice, bdc, fdc 3, bdc 2, bc] three times, bdc 2, fdc 3, bdc, fdc, join to 3rd st of starting ch. Ch3, place a stitch marker (68dc)
9A [Video 1:07:12]
[B in front] With A, bdc 7, bc, (bdc 7, fdc 2, bdc 7, bc) three times, bdc 7, fdc, join to 3rd st of starting ch. Tie off A color. (72dc)
9B [Video 1:10:13]
This row is the last row of the square (hooray!). At the end of row 8B you should have done a ch3 instead of a ch4. Instead of making a chain between each double crochet, you are going to work blsc into the opposite color dc. So for this row, all dc’s are worked in pattern into the B color dc below, and all blsc’s are worked into the A color dc below. This connects the two colors and makes a smooth edge!
Note: For this row only, do not do a chain after the dc for fdc and bdc stitches, since you will be doing blsc in between the dc’s.
Here’s row 9B: blsc, (bdc, blsc) three times, fdc, blsc, (bdc, blsc) twice, fdc, blsc, bdc, blsc. To work corner – bdc over B color chain, blsc in 2nd st of A color corner ch, bdc over B color chain, blsc in 4th st A color ch, bdc over B color chain (there should be five stitches total over the corner), *blsc, bdc, blsc, fdc, blsc, (bdc, blsc) twice, fdc, blsc, (bdc, blsc) 3 times, fdc, blsc, (bdc, blsc) three times, fdc, blsc, (bdc, blsc) twice, fdc, blsc, bdc, blsc, work corner as above. Repeat from * twice more, blsc, bdc, blsc, fdc, blsc, (bdc, blsc) twice, fdc, blsc, (bdc, blsc) three times, join to top of starting ch, finish off and weave in ends.
Congratulations, you’re done with your March interlocking crochet square! Make a bunch into a unique blanket, or find other creative uses. I’d love to see your creations! (tag me @kickin_crochet on instagram!)
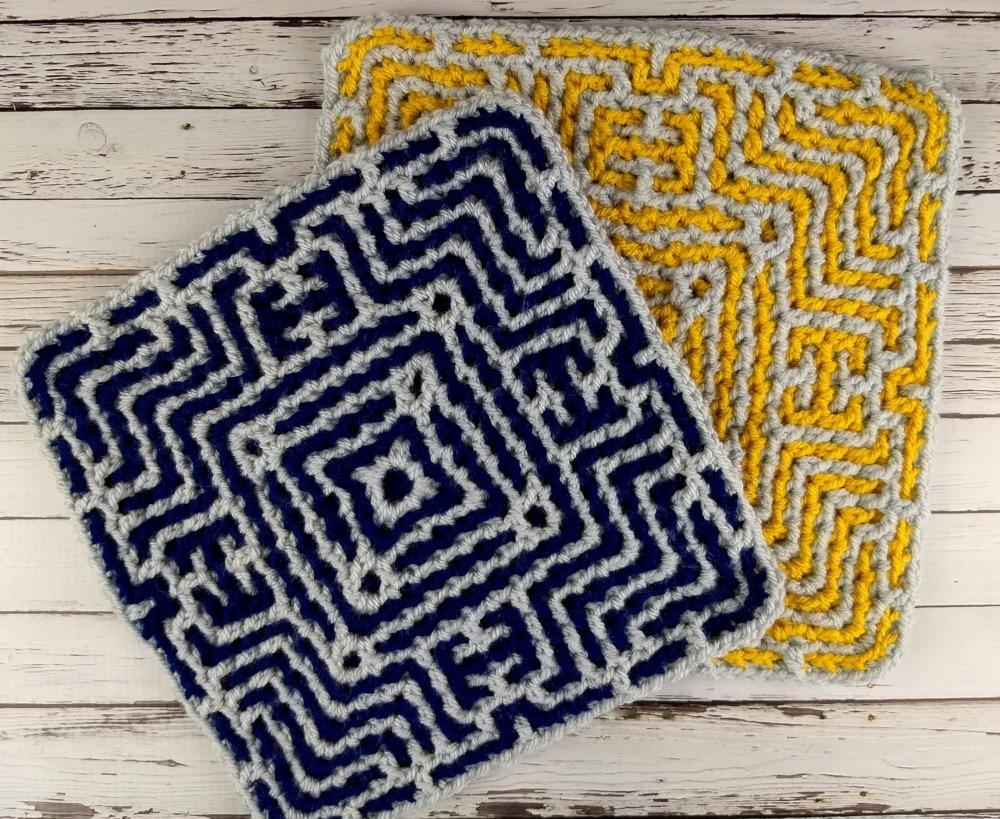
If you liked this interlocking crochet square pattern, you may also like the January Square or the Synergy Square. Stay tuned for the rest of the squares – subscribe to the email list below to get notified when the latest squares are released!
This pattern and all associated images are copyrighted. If you would like to use this pattern in a roundup blog post, you may use 1 image and link to this blog post. You may not copy the pattern instructions. Thank you for supporting Kickin Crochet!