
If you’ve wondered how to crochet Lover’s Knot, look no further! This beautiful, stretchy, lacy stitch is much easier than it appears. Also called Solomon’s Knot, this stitch is basically a funky, stretched out version of a single crochet. Below, I’ll walk you through the stitch step-by-step, with photos and a video tutorial to guide you on your way.
*Disclosure: Some of the links in this post are affiliate links, which means if you click on them and make a purchase I may, at no additional cost to you, earn a commission. Read full disclosure here.
Supplies
For this tutorial, you’re welcome to use whatever you’d like, but here’s what I used:
- Paintbox Simply Aran Yarn (gray in photos below).
- Size I crochet hook – I love these Odyssey hooks from Furls Crochet!
- Yarn/Tapestry Needle for weaving in ends.
- Also Pictured – WeCrochet Stroll Fingering used in Lover’s Cowl Pattern
Lover’s Knot Crochet Video Tutorial
How to Crochet Lover’s Knot
Lover’s Knot lace is actually made using pairs or sets of lover’s knot stitches. These stitches are always worked in pairs, except for the start and end of every second row (you’ll see what I mean soon!). To make the lover’s knot fabric, you’ll end up working a 2-row repeat. Once you get the hang of it, it’s super simple and works up surprisingly quickly.
You should also be aware that there are some variations on the Lover’s Knot, especially with the starting chain. In some versions, you start with a row of lover’s knot stitches instead of a chain. That method is also totally great, but I’m going to teach you the chaining method because I think it’s easier for beginners.
A few quick tips before we get started – It can be helpful to place a stitch marker at the end of each row so you know where you’ll be joining to when you finish the next row. It can also be easy to accidentally join to the wrong place as you’re getting started, so double check your work frequently as you’re learning this stitch. OK, here we go!
Starting Row
1 – Begin with a chain. This can be as long as you want to make it as long as it is a multiple of 4 stitches plus 2. I made a chain of 18 for this sample.
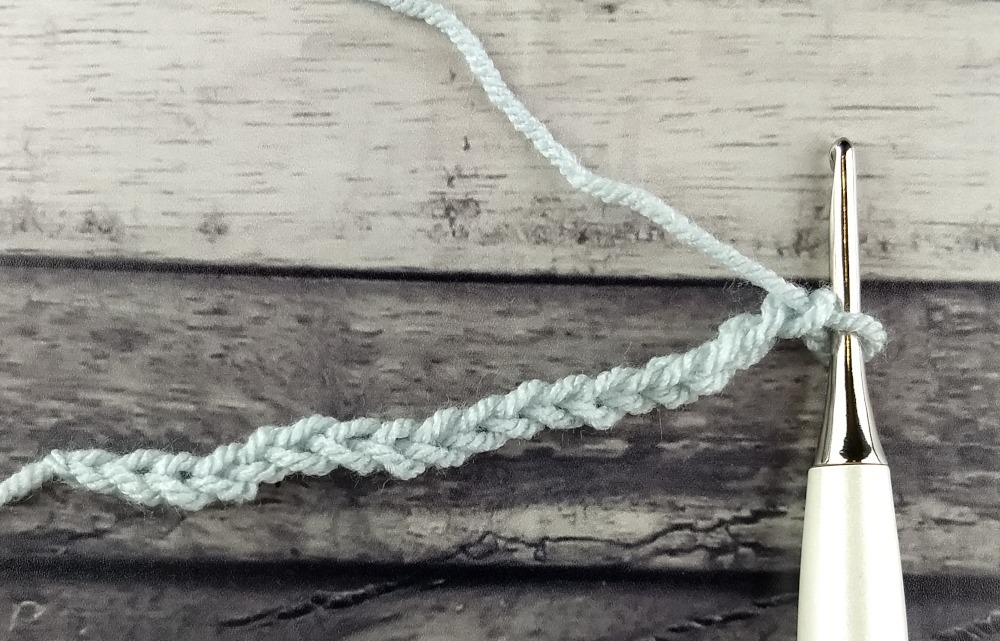
2 – Single Crochet in the 2nd chain from the hook
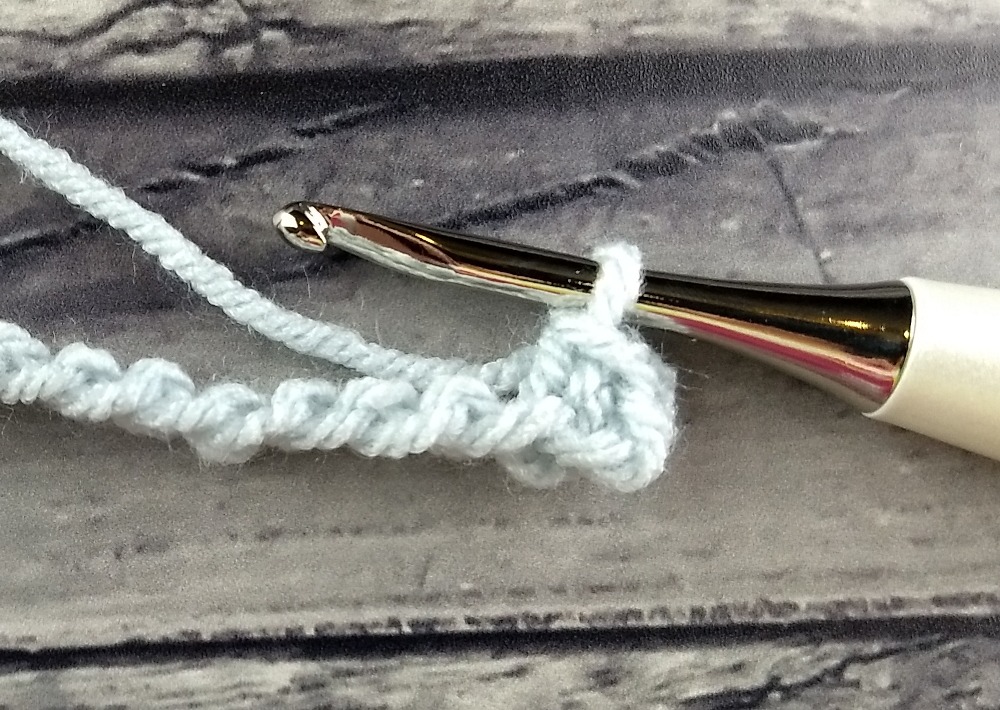
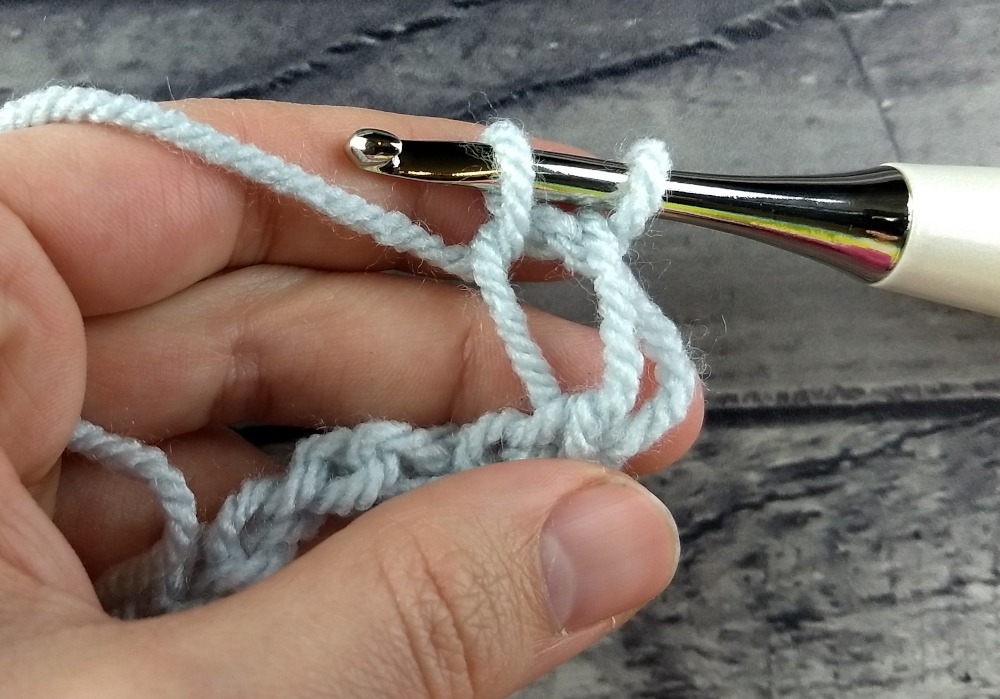
3 – Now it’s time to work your first Lover’s Knot. Pull up a loop about 1″ long (you can experiment with the length of the loops to create different fabrics).
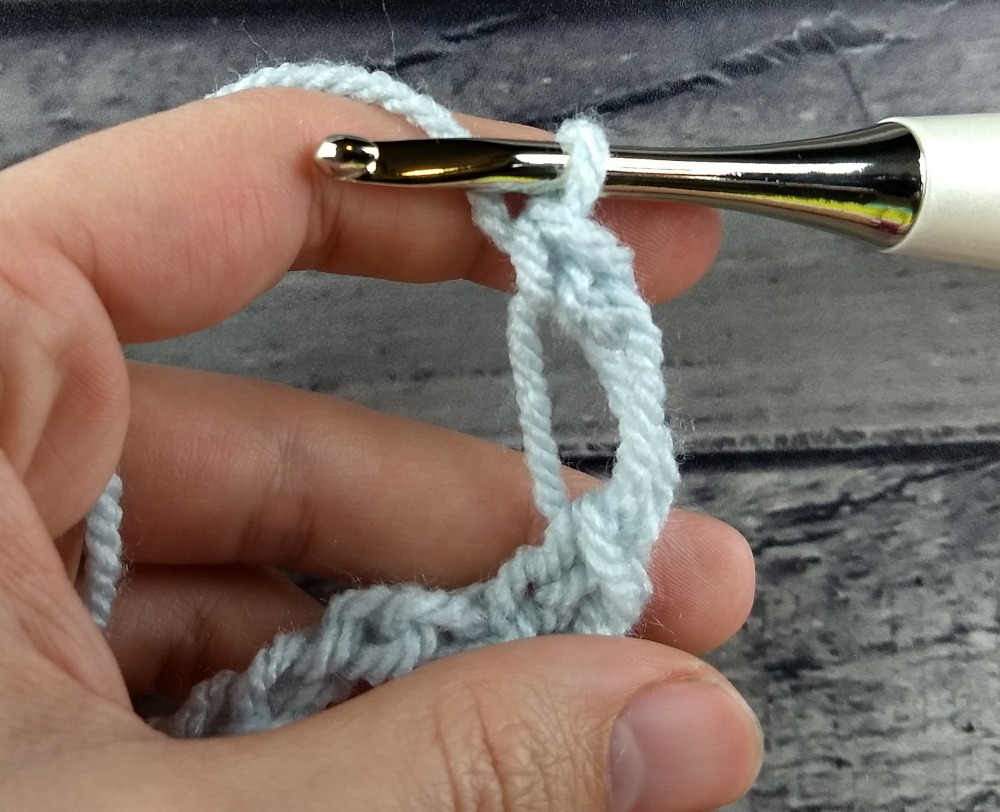
4 – yo and pull through a loop. This basically creates a long, stretched out chain stitch.

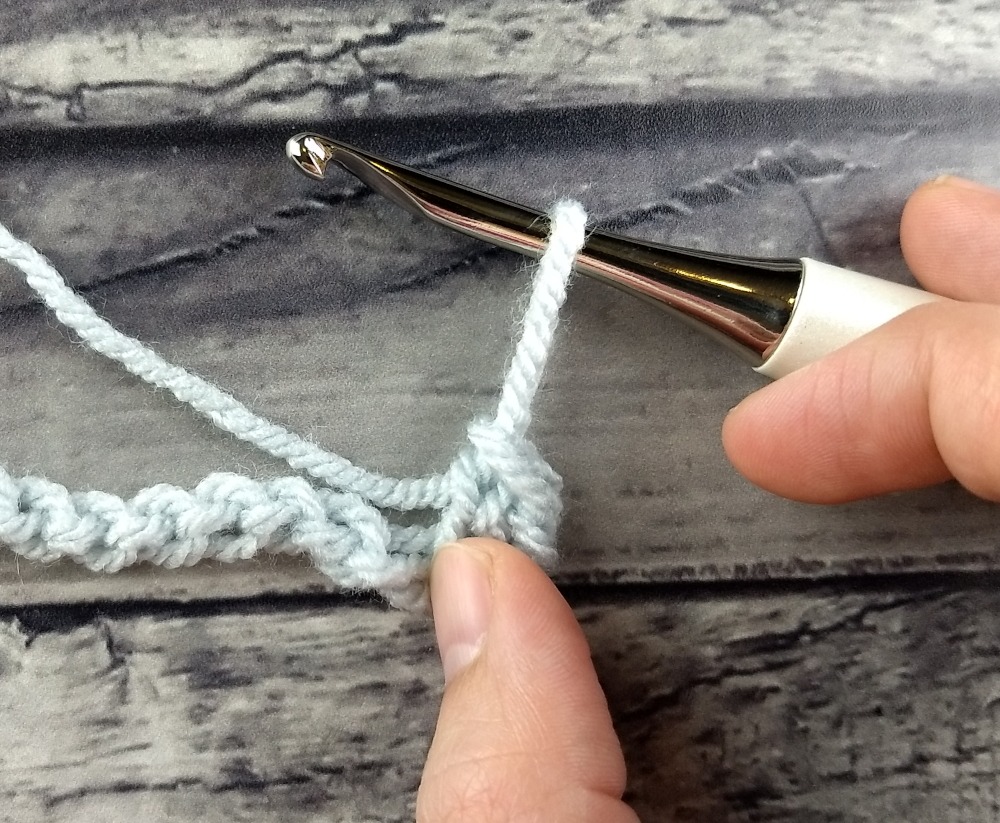
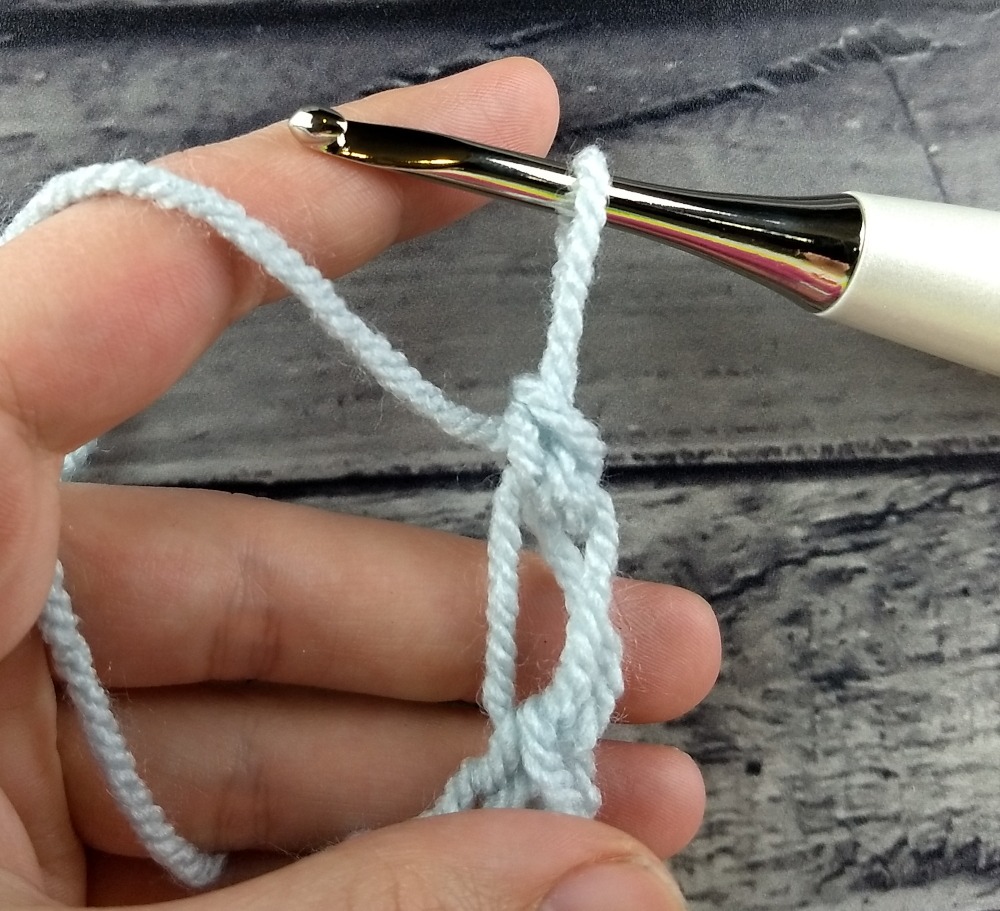
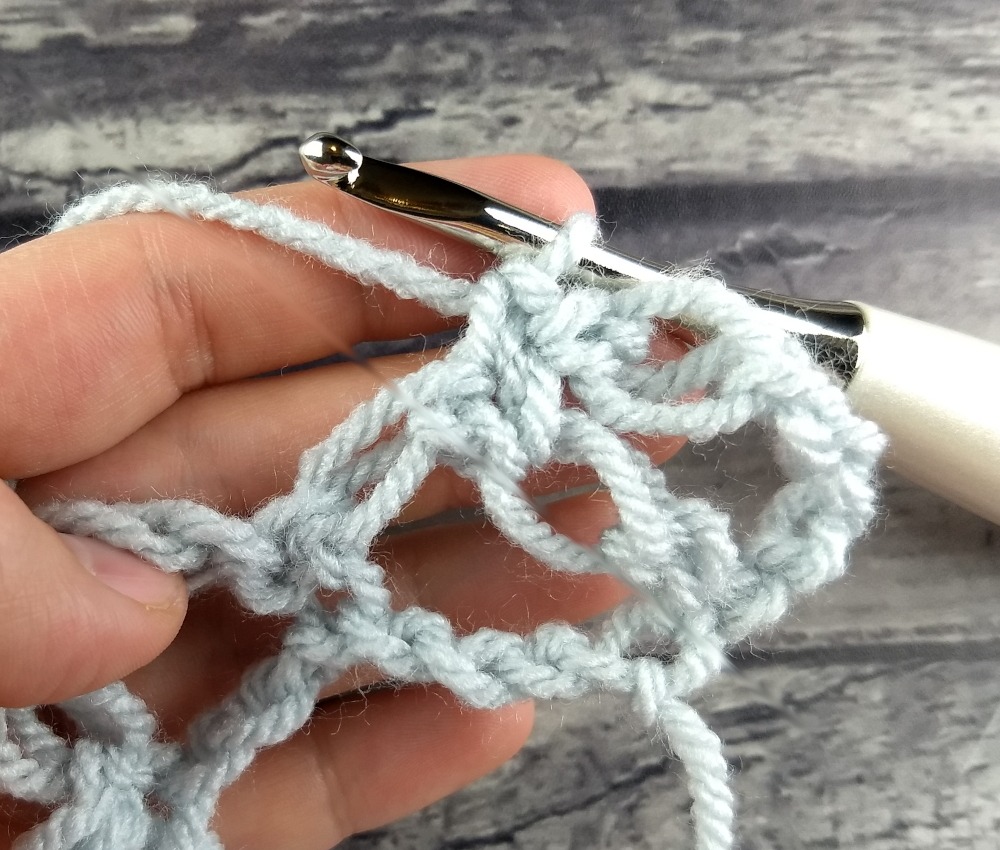
5 – Insert your hook in the back bump of the long chain stitch you just made, then yo and pull up a loop. In the photo above, I pulled the back bump loop out farther than normal to make it very obvious for you.

6 – yo and pull through both loops on your hook. Congrats! You just made your first lover’s knot!
7 – Since you’ll usually need a pair of lover’s knots, it’s time to make a second one. Make your second lovers knot in the same manner – pull up a loop, yo, pull through, insert hook in the back bump, yo, pull up a loop, yo and pull through both loops on your hook.

Pull up a 1″ loop 

yo and pull through 

Insert hook in back bump, yo and pull up a loop 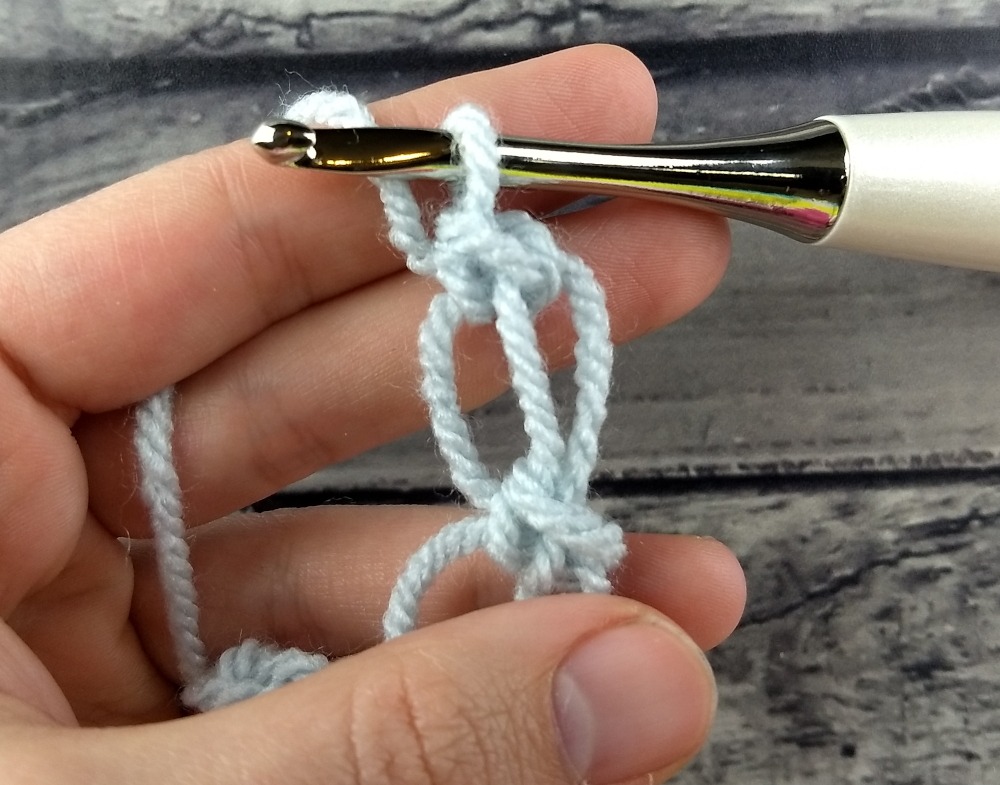

yo and pull through two loops to finish stitch 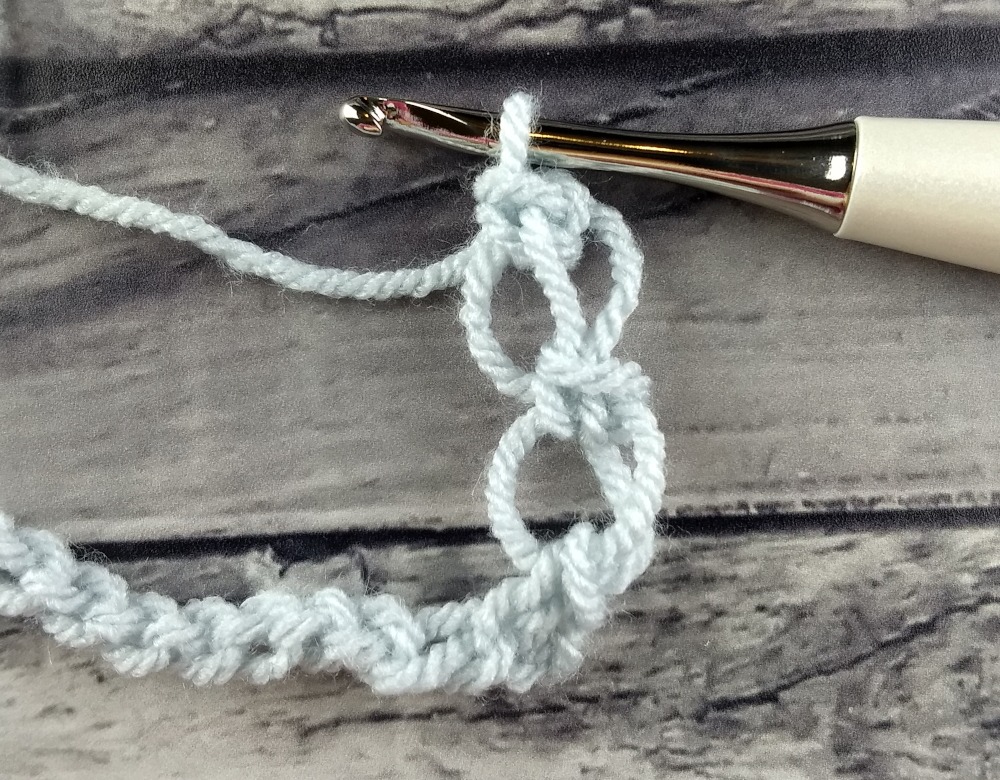

two lover’s knot stitches in a row
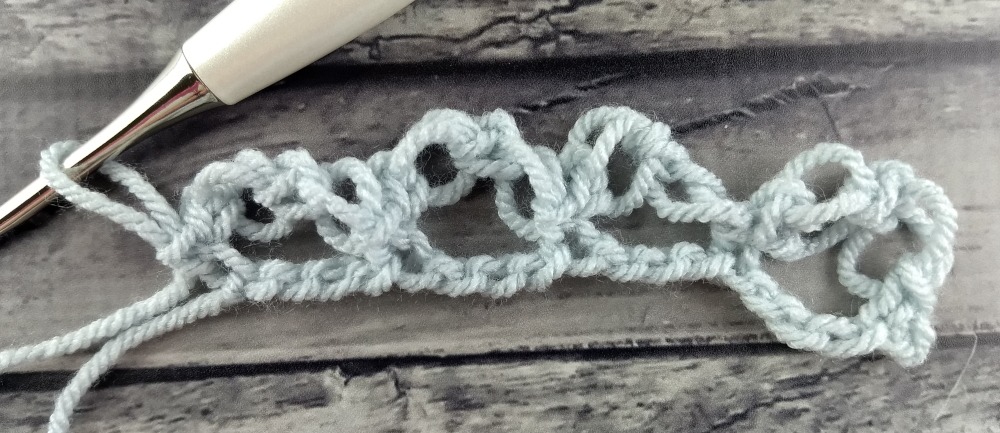
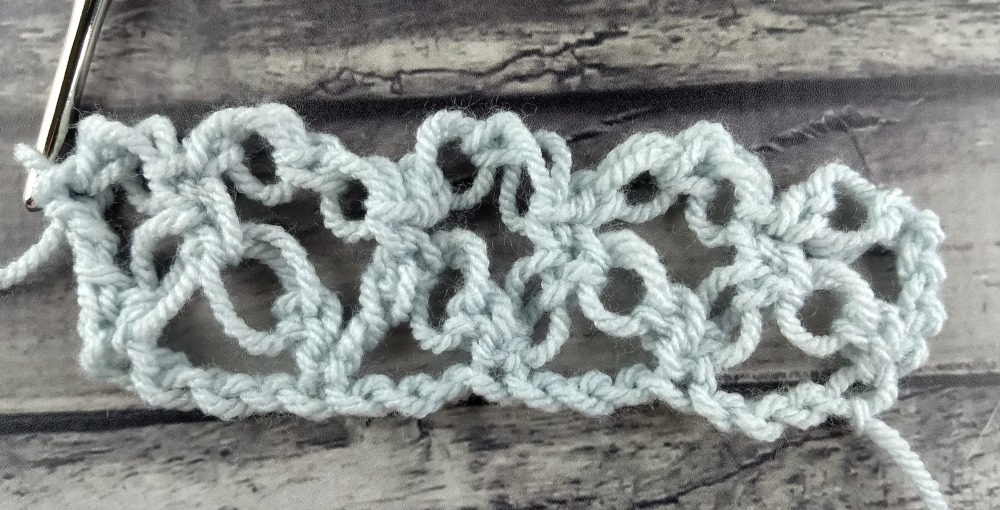
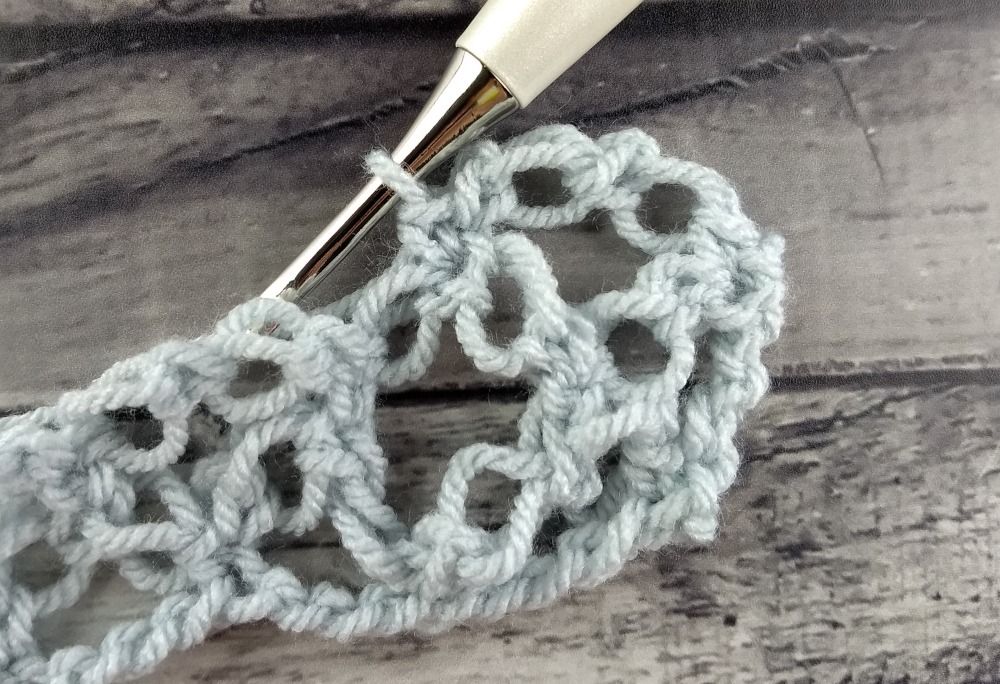
8 – Now it’s time to connect your pair of lover’s knots back to the starting chain. Skip three chain stitches, and work an sc in the next ch.

9 – To finish the first row, work 2 Lover’s knots, sk 3, sc in next st until you get to the end of the row.
Lover’s Knot Row 2
1 – Chain 4 and turn. This counts as a triple crochet.
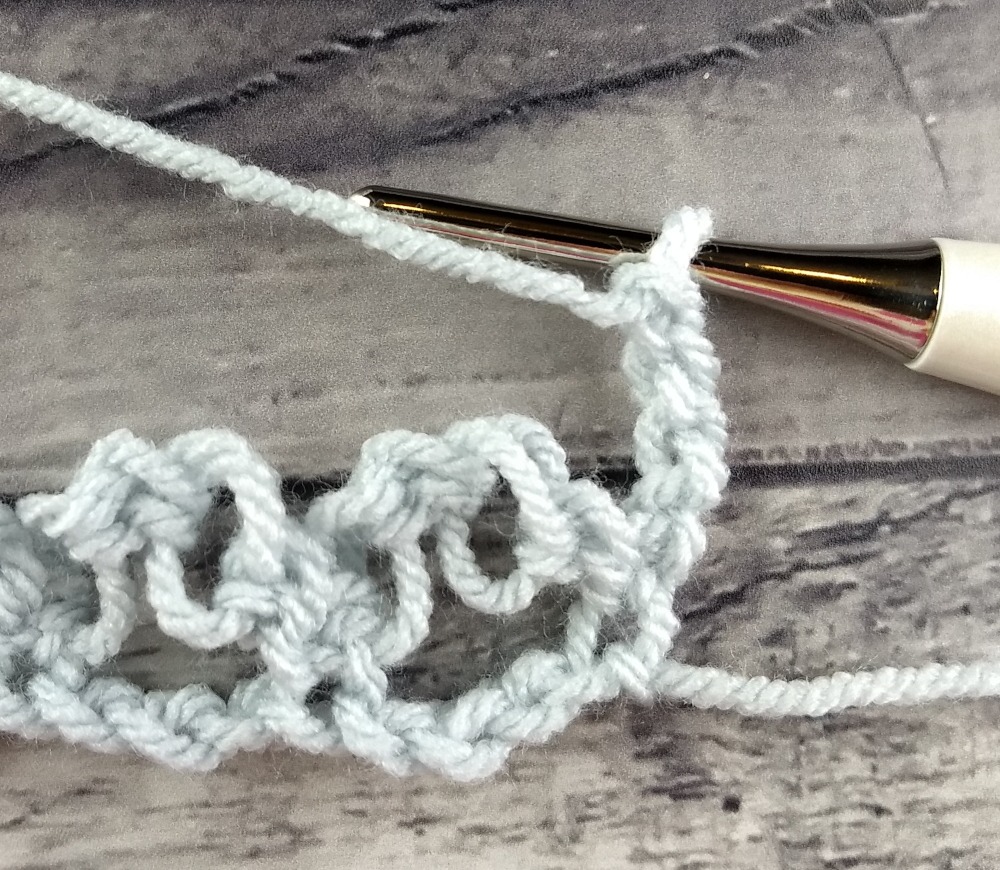
2- Make one lover’s knot
3 – work a single crochet in the place where your set of two lover’s knots met (I think of this as the top of the arch or top of the diamond)
4 – continue across the row by making 2 lover’s knots, then working a single crochet in the join between the next pair of lover’s knots from the row below. Continue like this until you get to the last pair of lover’s knots in the row. You will end the row by making a single lover’s knot, then working a triple crochet in the last sc of the previous row.
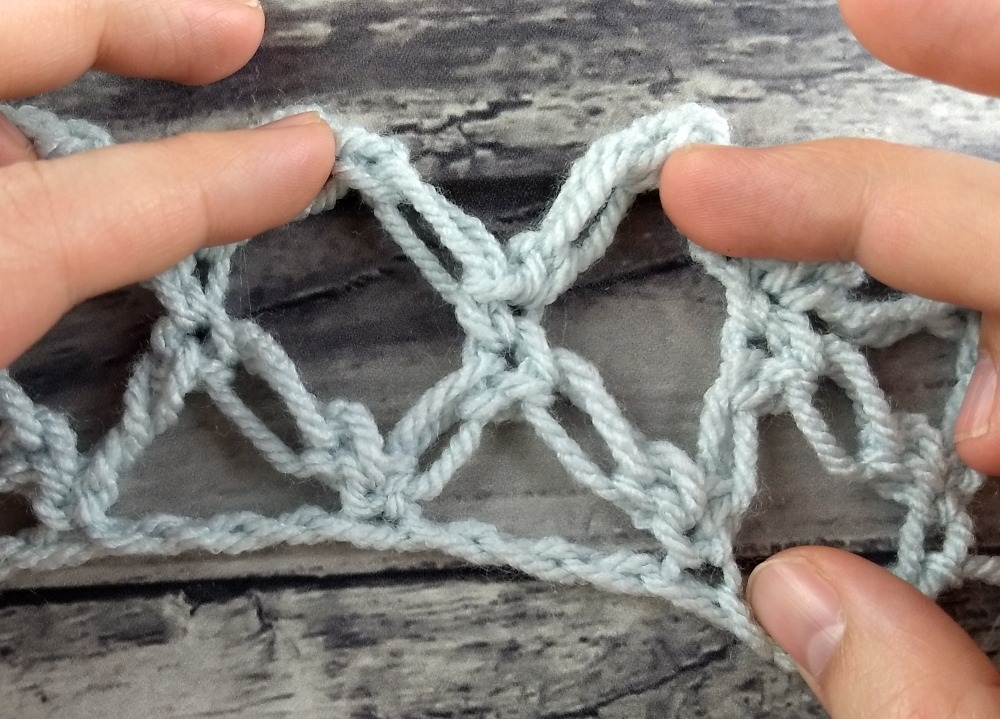
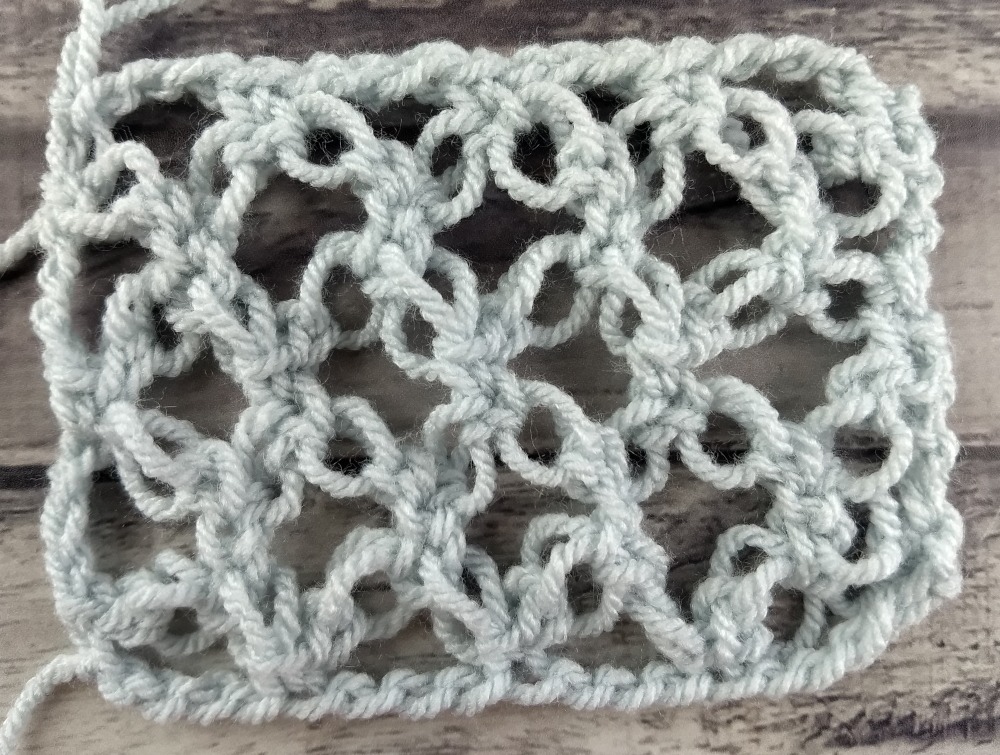
You can see that the first setup row had 4 pairs of Lover’s Knots. The second row only has three pairs of lover’s knots, with single lover’s knots at the beginning and end of the row. If you stretch this fabric out, you can begin to see the lover’s knot design taking shape. Some people think of it as a series of diamonds. I often think of it as a bunch of X’s. Either way, it looks pretty cool!
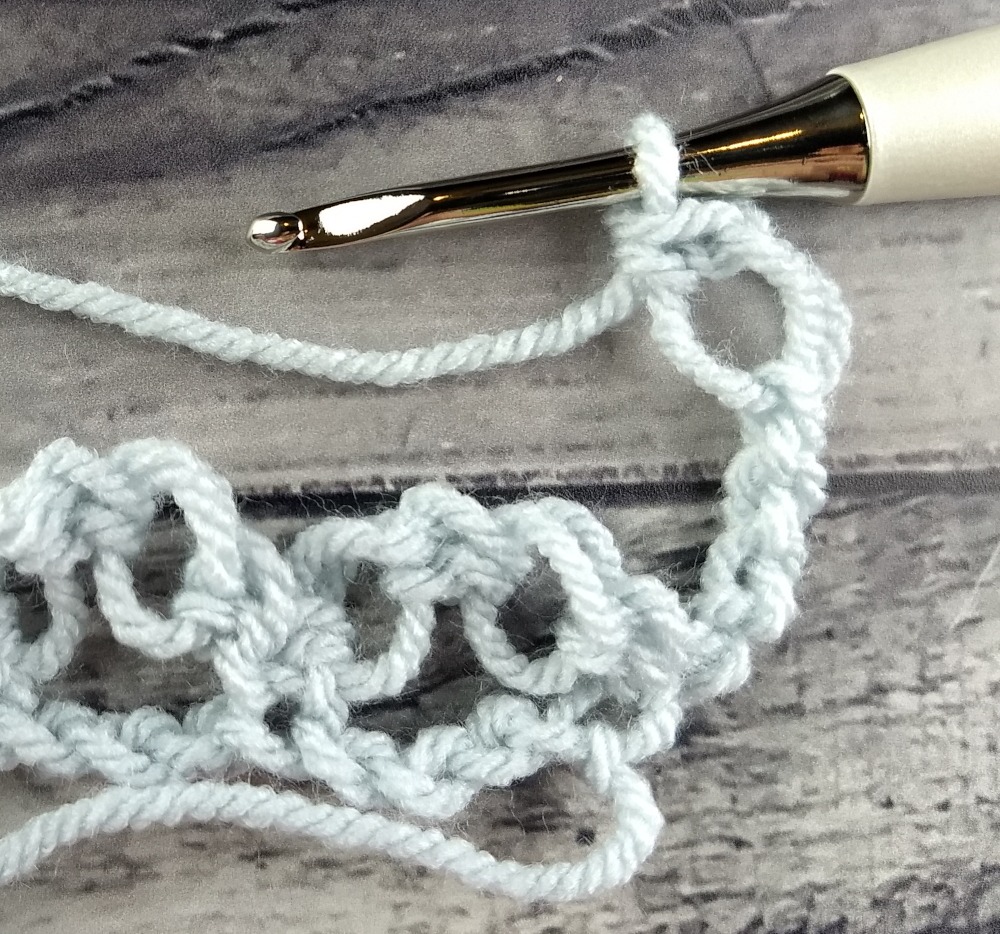
Lover’s Knot Row 3
The third row is very similar to the starting row. The only difference is that you’ll be connecting to the previous lover’s knot stitches instead of to your starting chain.
1 – To work this row, you’ll start by making a ch1 (which does not count as a stitch), turning, and working an sc in the first stitch
2 – Now make 2 lover’s knots, then sc at the center of the next pair of lover’s knots
3 – continue across the row, making 2 lover’s knots, then sc in the center of the next pair of lover’s knots on the previous row. you’ll finish with an sc in the last stitch and, if you started with a ch of 18 like I did, you’ll have 4 pairs of Lover’s Knots, just like the first row.
Finishing Lover’s Knot Fabric
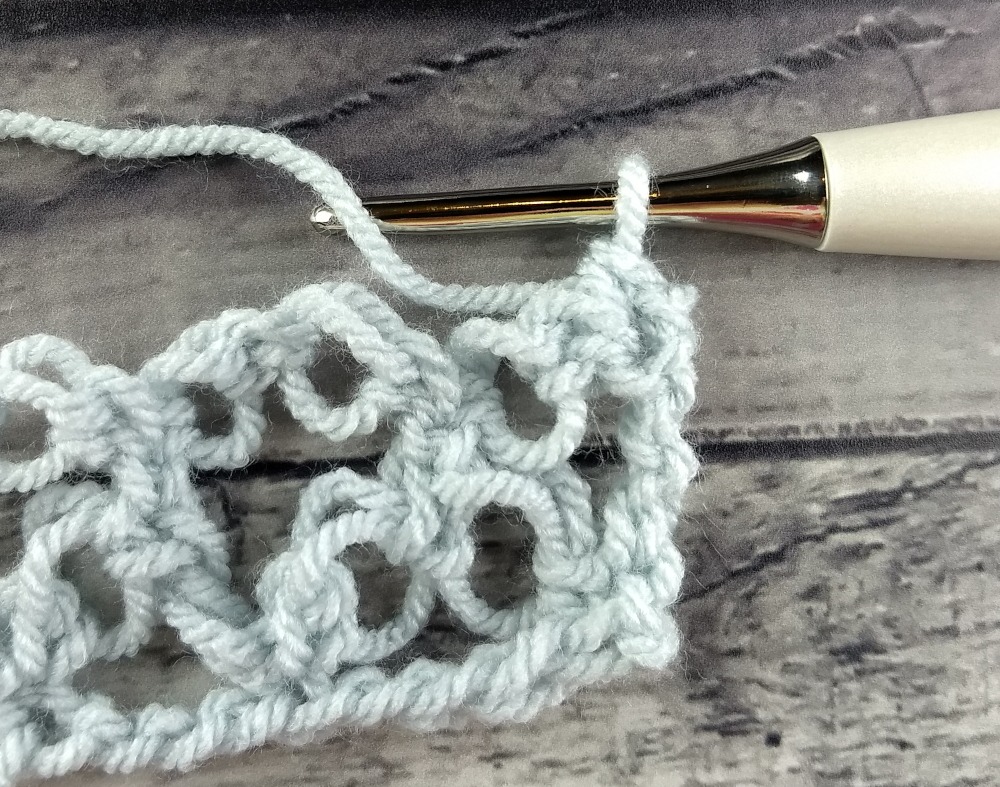
Now you’ll just continue repeating rows 2 and 3 until your fabric as long as you’d like it to be, ending with row 2. To finish your fabric, you’ll work a chain along the top. This gives it a nice finished loop, especially since we worked chains along the bottom and sides.
Ch1 and turn, then sc in the first stitch, like you normally would if you were working row 3. Instead of working lover’s knots, chain 3, then sc in the center of the next pair of lover’s knots. Continue across in this fashion – ch3, sc in the center of the next pair of lover’s knots, ending with an sc in the last stitch.

This fabric can usually benefit from blocking, or being used in bags or shawls that will be a little stretched out to show off the lace pattern.

If you’d like to practice the lover’s knot/solomon’s knot with a pattern, stay tuned for the release of the lover’s cowl that you got a peak of in the video – coming later this month! You may also like the Jasmine Stitch Ripple Blanket or How to Crochet Spiderweb Lace.