
The Broomstick Lace Fingerless Gloves were the second pattern I ever designed. I think they just go to show how much I like to try new things – why, yes, for my brand new Etsy shop I would like to use a technique I’ve never done before with a complete photo tutorial. Easy, right? Lol! Today, for the first time, I’m putting this classic up and offering it as a free pattern for all you lovely crocheters out there!
*Disclosure: Some of the links in this post are affiliate links, which means if you click on them and make a purchase I may, at no additional cost to you, earn a commission. Read full disclosure here.
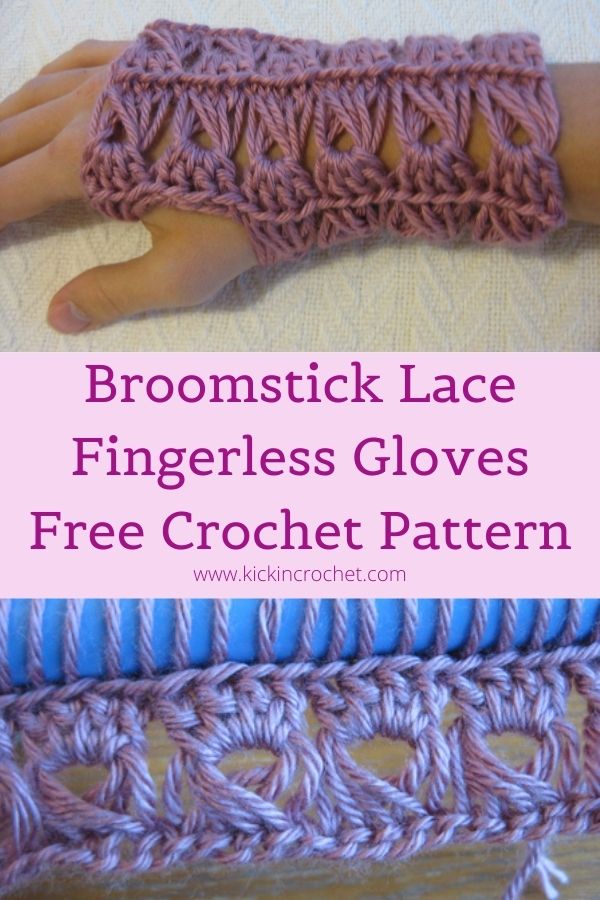
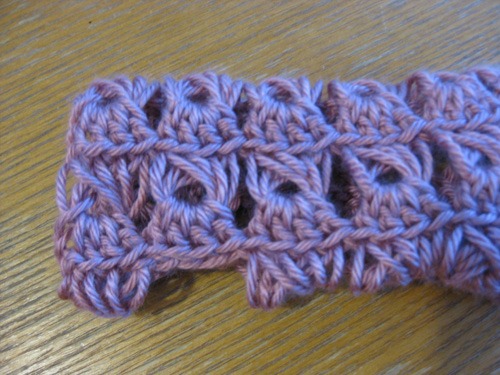
Broomstick Lace is a crochet technique unlike any other. It has some elements of Tunisian crochet, some elements of Hairpin Lace, but it is really it’s own little beast – but fun! The first time I saw this technique was on an earring holder (and it was the inspiration behind these DIY earring holders. Though I didn’t end up using broomstick lace on those, it would look fantastic!). This pattern is available for free below, or you can purchase a PDF copy of the pattern using the links below.
Supplies
- Worsted Weight yarn of your choice. For my sample, I used Caron Simply Soft, a basic acrylic yarn. Since this project is worked flat and then seamed, you could easily substitute different yarn weights if you’d like.
- Size H crochet hook – or size needed for your yarn – I love these Odyssey hooks from Furls Crochet!
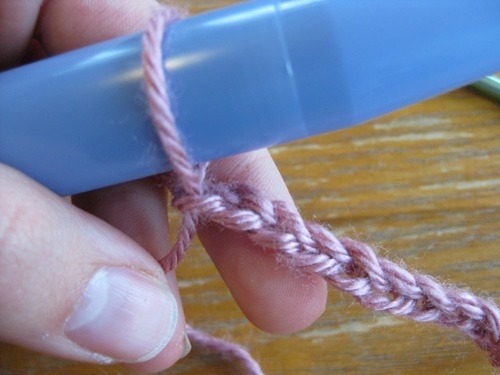
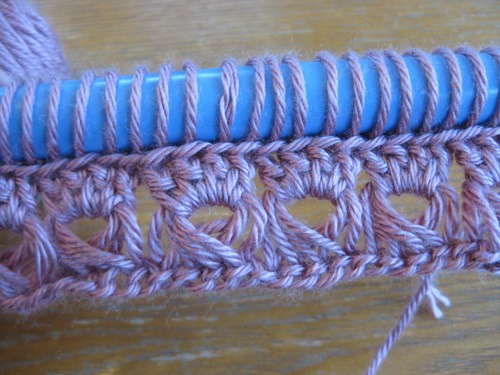
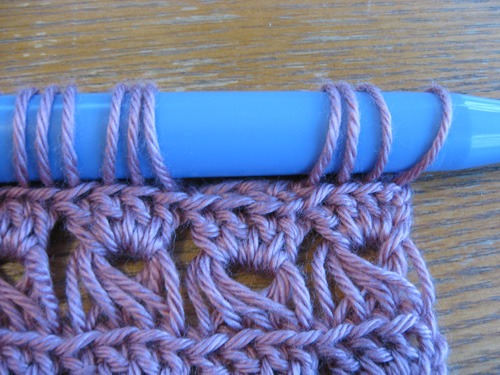
- A size 35 knitting needle or some other cylinder with a circumference of approximately 2.5″
- Yarn/Tapestry Needle for weaving in ends.
Stitch Abbreviations
- ch chain
- st(s) stitch(es)
- ss slip stitch
- sk skip
- sc single crochet
- dc double crochet
Pattern Notes
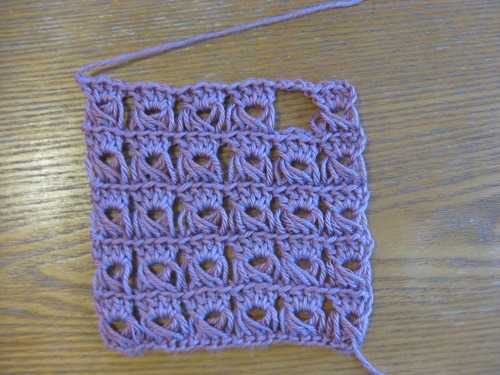
These gloves are made as flat rectangles and then seamed together to form gloves.
Broomstick Lace Fingerless Gloves – Right Glove
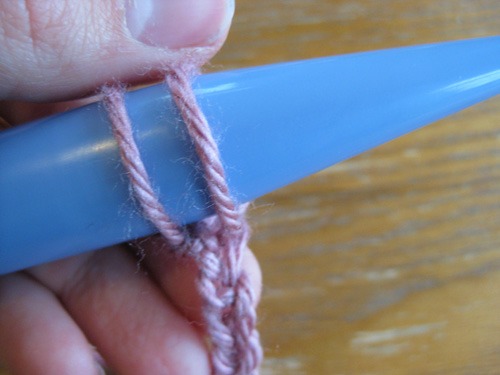
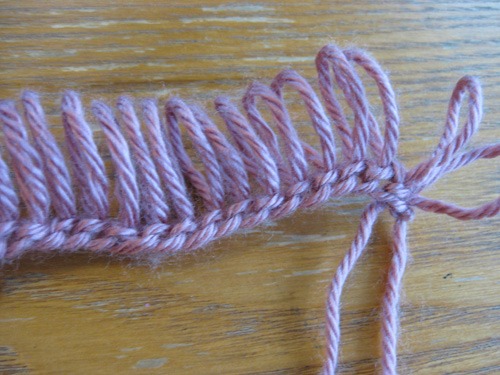
1. ch24. With hook (without turning), pull end loop up and over the end of the knitting needle. Insert hook into next ch, yo and pull loop through ch and up over knitting needle. Repeat to the end of the row. There should be 24 loops on the knitting needle (one for each ch stitch)
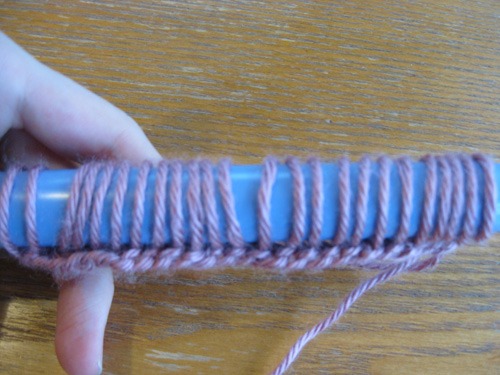
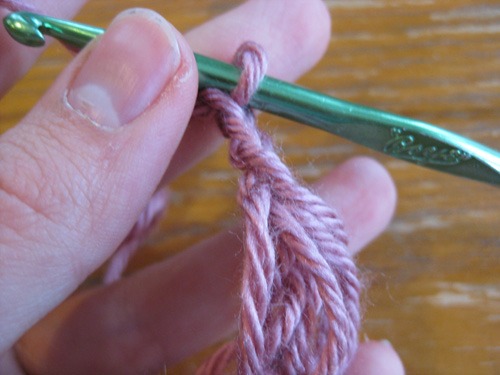
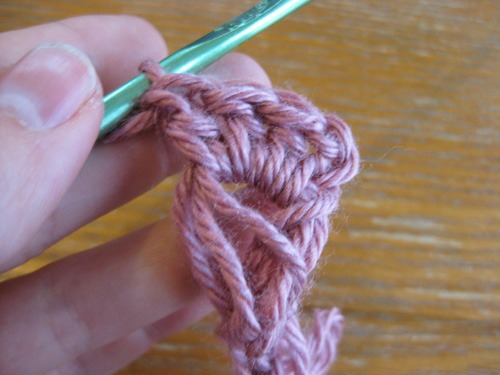
2. Being careful not to pull or twist the yarn, remove the knitting needle. Insert your hook through the first four loops, yo and pull up a loop (make sure you do not pull the tail yarn too tightly as it will ‘deflate’ the first loop). ch3 (counts as first dc), 3 dc in same space. Continue in this fashion across, working 4dc in each group of four loops (6 clusters total).
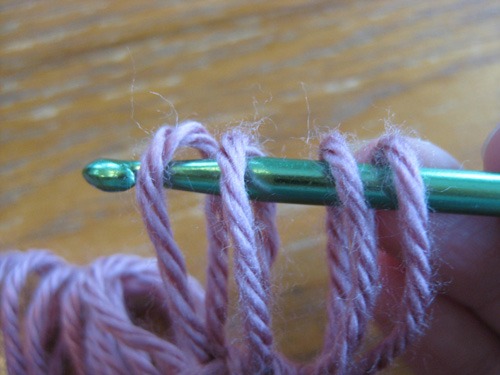
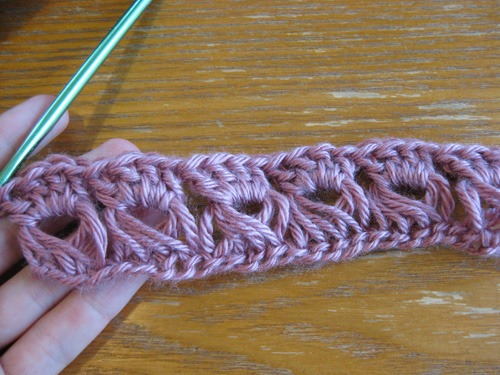
3. Now it’s time to “re-load” the knitting needle. Without turning, pull up the loop on your hook over the knitting needle. Working in the back loops only, pull up a loop through each stitch working back along the row.
4. Repeat row 2
5. Repeat rows 3-4 two times more (four rows total broomstick lace clusters).
6. Pull up loops over knitting needle as usual for first 16 stitches. ss in next five stitch (going to the right – this feels awkward at first since you’re working backward along the row). Pull up the loop on your hook from the 5th slip stitch and place it over the needle, then pull up loops in the last three stitches as usual.
7. Work first cluster as normal, ch4, then work remaining four clusters as normal. Tie off, leaving a long tail for weaving in ends. Sew together to form a glove.
Left Glove
Work in the same manner as the right glove, except for rows 6 and 7
6. Pull up loops for the first four stitches over the knitting needle, then ss in the next five stitches. Pull the loop on your hook after the fifth ss up over the knitting needle, then continue pulling up loops as normal across.
7. 4dc in every four loops for four clusters, ch4, 4dc in last four-loop group. Finish off, leaving long tail for sewing, then seam together to form a glove.
If you liked this pattern, you may also like the Kait’s fingerless gloves or the Hairpin Lace Shirt
This pattern and all associated images are copyrighted. If you would like to use this pattern in a roundup blog post, you may use 1 image and link to this blog post. You may not copy the pattern instructions. Thank you for supporting Kickin Crochet!