
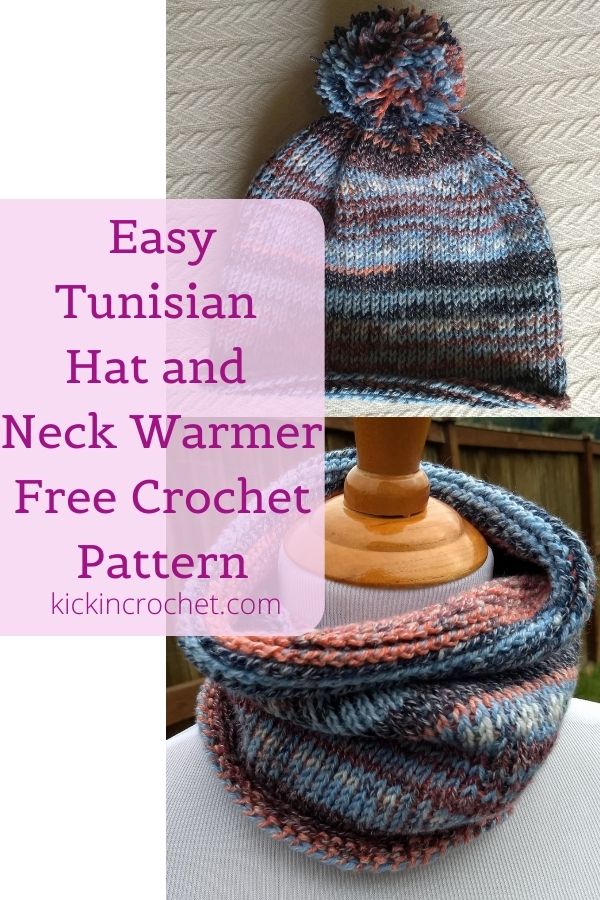
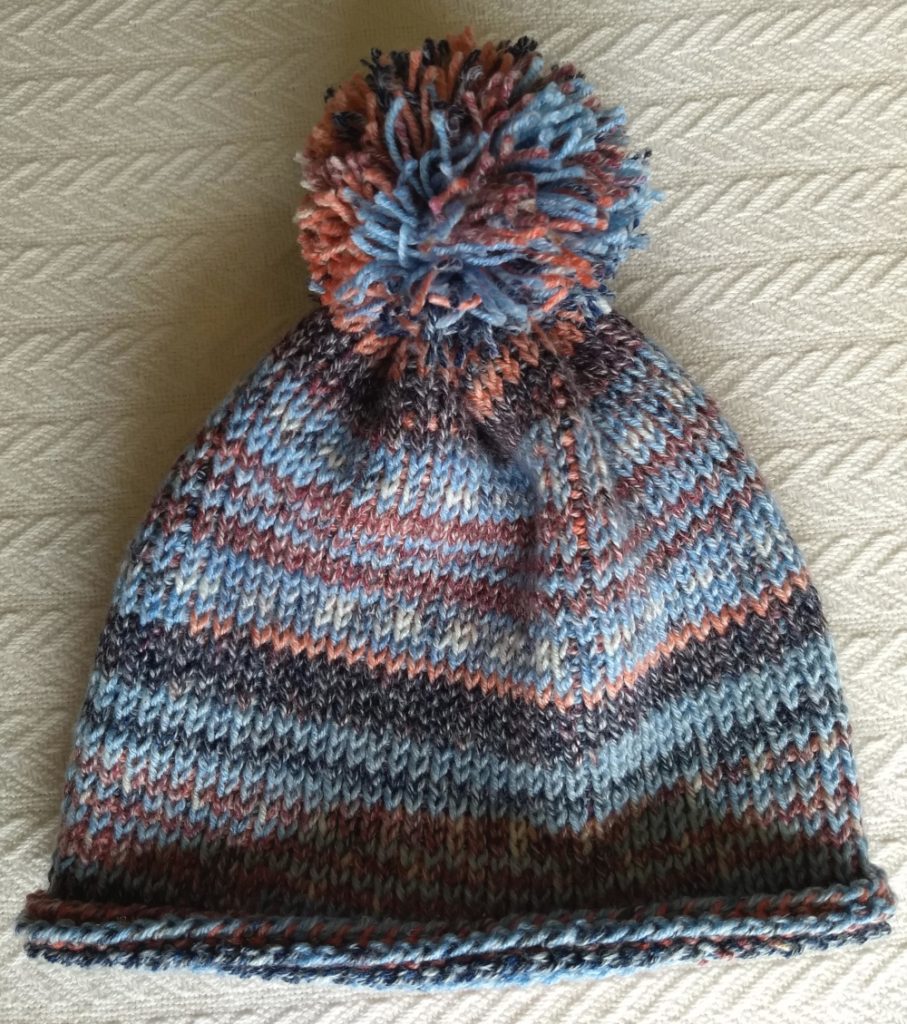
The Easy Tunisian Hat is a simple Tunisian crochet in the round project that creates a knit-look seamless finished product. This pattern also creates a great neck warmer if you want to create a matching set!
*Disclosure: Some of the links in this post are affiliate links, which means if you click on them and make a purchase I may, at no additional cost to you, earn a commission. Read full disclosure here.
I think one of my favorite things about this hat is that it is seam-less. Crochet seams, in my opinion, are the worst. They’re hard to keep straight when working in the round, and they’re always obvious – I’ve tried so many of the tricks, and I have never found a joining technique that’s easy, quick, and effective at hiding crochet seams. This project has zero seams – hooray! – because it’s worked continuously in the round!
Supplies
- 1 ball Drifter DK yarn from King Cole Yarns (or similar)
- Double-ended crochet hook size J -or- Tunisian crochet hook with extender cables and Size I and J hooks on either end.
- Optional: pom pom (I made my own and had plenty of yarn to make the hat adult large size and pom with 1 ball of Drifter)
- Yarn/Tapestry Needle
Stitch Abbreviations
- ch chain
- st(s) stitch(es)
- ss slip stitch
- tks Tunisian Knit Stitch
Gauge/Sizing
Unstretched, the gauge is 8 sts and 10 rows in 2″ in tks. Hat sizes are based on craft yarn council guidelines. Head circumferences are as follows:
- Adult large – 23″
- Adult small – 21″
- Child – 19″
- Toddler – 17″
Pattern Notes
This hat is worked continuously in the round as a flat tube, then sewn together at the top to form a hat. If you are using the Tunisian extender cable option for your hooks, use the J hook for the forward pass and the I hook for the return pass, being sure not to work the return pass too tightly.
For tips on how to work TUnisian crochet in the round, see this video (it uses Tunisian simple stitch instead of knit stitch, but otherwise the technique is the same):
How to do Tunisian Knit Stitch video.
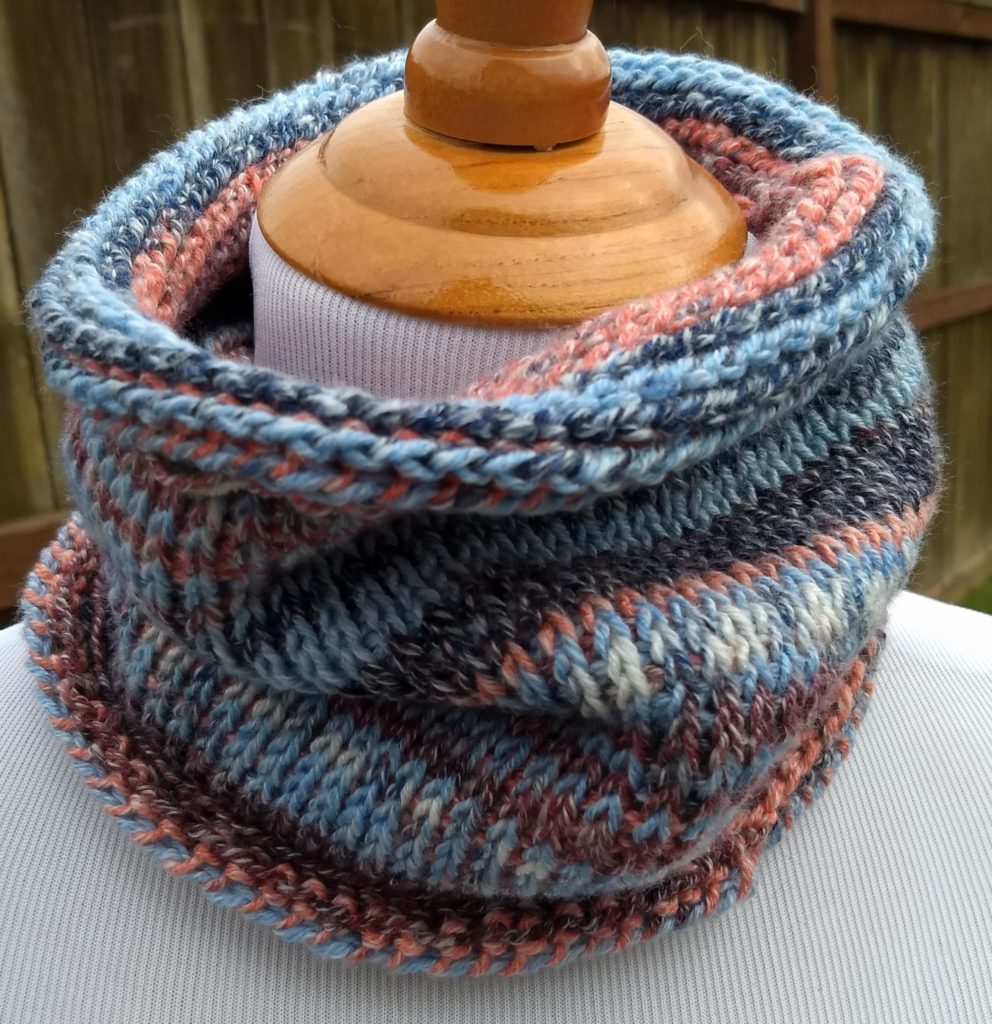
Bonus – if you want a super comfy, cute neck warmer, stop at the tube stage without cinching the top, or make a hat and neck warmer for a set! I love the natural Tunisian curl on the neck warmer!
Instructions are written smallest to largest, so toddler is first, then in parentheses (in order) comes child, adult small, and adult large. To adjust your sizing, increase/decrease your stitch count by 3-4 stitches per inch.
How to Make The Easy Tunisian Hat
- 1. Ch 58 (64, 70, 76) loosely. Join with ss to form a circle, being careful not to twist the starting chain.
- 2. Insert hook in next ch, yo and pull up a loop as for a Tunisian foundation row. Continue picking up loops along the chain until you can’t pick up more.
- 3. Turn the work around to start working the return pass. You can use either a different ball of yarn or the other end of the same ball of yarn. Pull the new yarn through the first stitch on your hook, then yo and pull through two loops – repeat until you have 3-4 loops left on your hook.
- 4. Turn back tot he forward direction and pick up more loops. When you get all the way around the circle the first time, you will begin to pick up loops as for tks by inserting your hook from front to back between the vertical bars of the previous row (see video, if needed). Continue the return pass as normal.
- 5. Continue around until your hat measures 7″ (7.5″, 8″, 8.5″).
- 6. To prepare to bind off, work the return pass until there are two loops left on your hook, then switch back to the forward direction and pull the last forward loop through the last return pass loop. You can now trim off your return pass yarn.
- 7. Binding off – insert your hook in the next stitch as for tks, yo and pull through the stitch and the other loop on your hook. Continue in this fashion until you have completed one full round. Finish off, weave in end.
- 8. Cinching the top closed – choose which end you want to be the top of your hat. With a yarn needle, weave a strand of yarn through the stitches, working in and out every two stitches around the top of the hat.
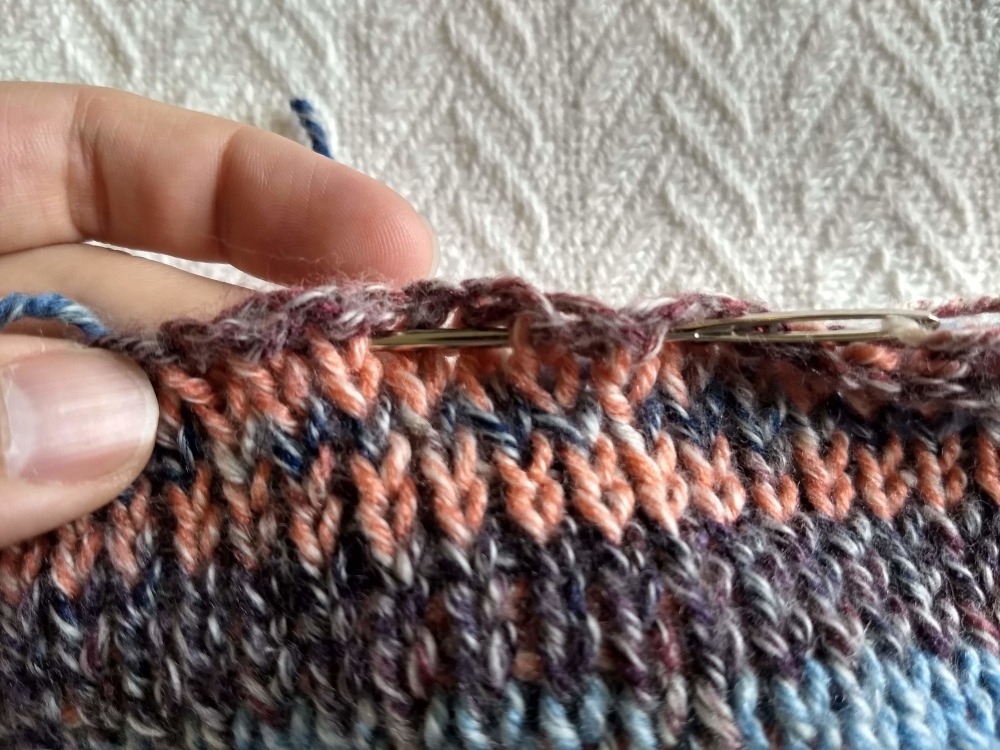
- 9. When you’ve gone all the way around, pull the two ends of the yarn to close the top. Turn the hat inside out to finish tightening. Tie the two ends of your finishing string in a knot and weave in the ends. You can sew across the hole a few more times if you want some extra security.
- 10. Turn the hat right side out again and you’re done! Attach optional pom pom, if desired. (See this video to make your own pom pom without a pom pom maker)
If you like this design, you may also like the Geometric Tunisian Blanket or the Waffle Hat
This pattern and all associated images are copyrighted. If you would like to use this pattern in a roundup blog post, you may use 1 image and link to this blog post. You may not copy the pattern instructions. Thank you for supporting Kickin Crochet!