
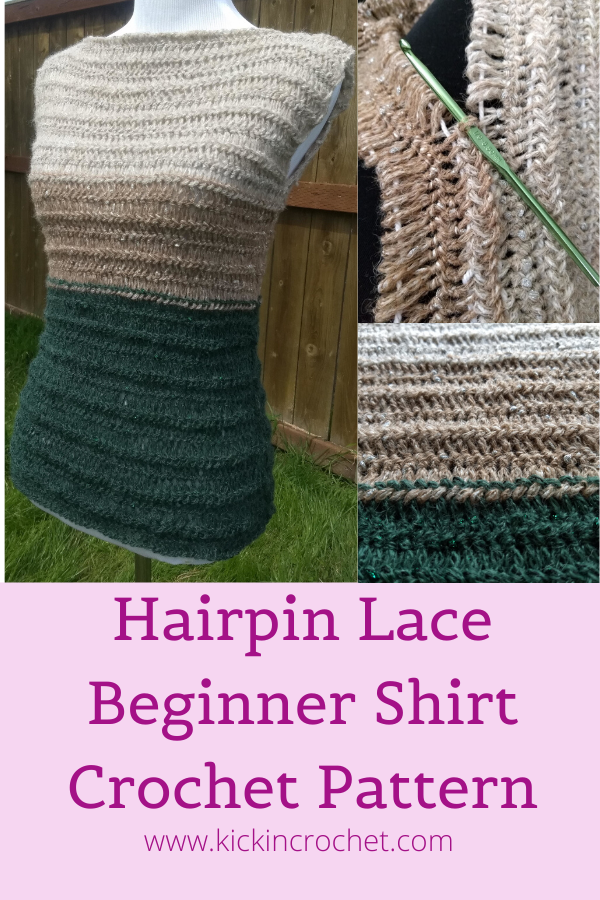
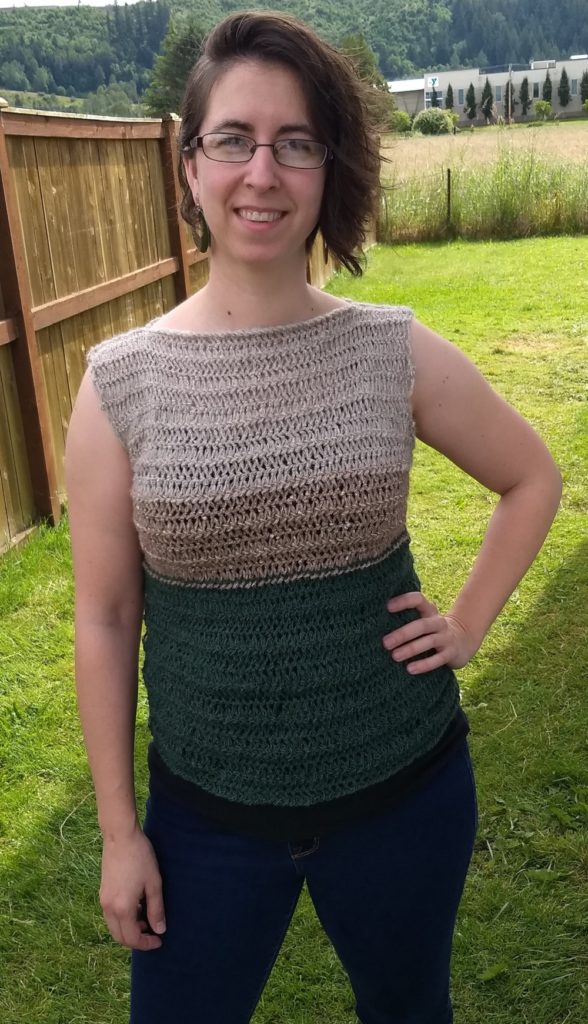
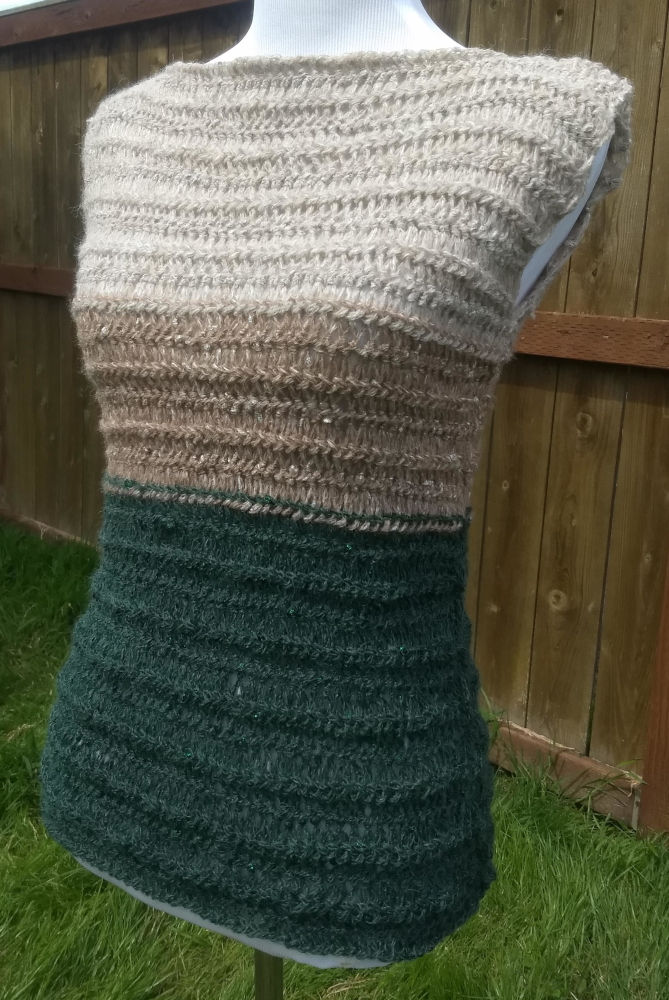
This simple hairpin lace sleeveless top is a beginner-friendly hairpin lace design. It features straight strips of hairpin lace joined together with a basic braid join, then seamed along the sides. It’s a great intro to hairpin, and it’s relatively easy to manage, with short strips that won’t turn into a huge tangled mess for a new lacer!
*Disclosure: Some of the links in this post are affiliate links, which means if you click on them and make a purchase I may, at no additional cost to you, earn a commission. Read full disclosure here.
Supplies
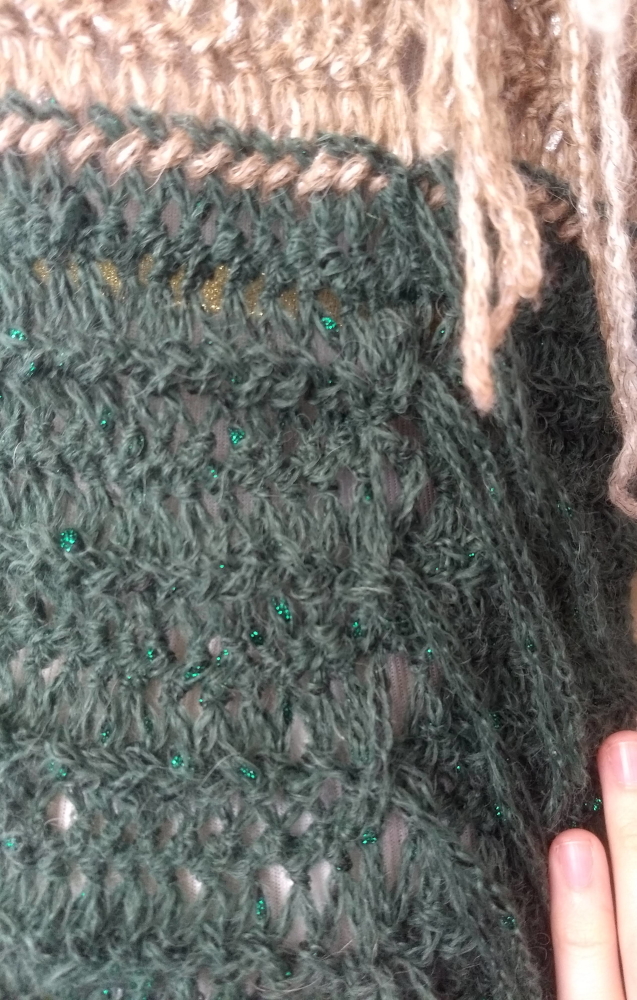
- I used Cascade Yarn Juli (50g/101y per ball), 2 balls A color (top of shirt), 1 ball B color (middle of shirt), and 2-3 balls C color (bottom of shirt, size L and XL require 3 balls instead of 2) for this project. Unfortunately, I’ve discovered that this yarn has been discontinued! Lion Brand’s Boogie Nights is a similar, chainette-constructed yarn that will work well as a substitute!
- Size I crochet hook – I love these Odyssey hooks from Furls Crochet!
- A Hairpin Lace Loom
- A Tapestry/Yarn Needle for weaving in ends
Pattern Notes
This is a beginner-friendly hairpin lace top. It uses straight strips of hairpin lace seamed together, then sewn together on the sides and shoulders to form a sleeveless top.
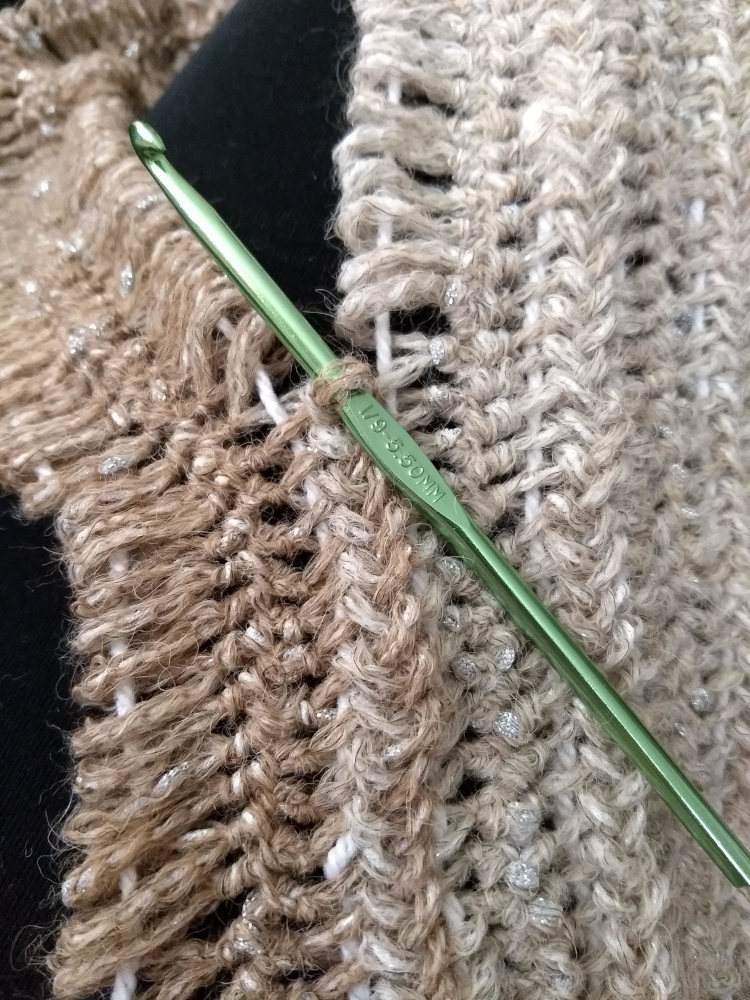
The pattern instructions assume you know how to make and join strips of hairpin lace. However, in case this is your first foray into the world of hairpin, the video tutorial below shows you how to make and join strips of lace. Please note that in the video I show joining three loops at a time. In this project, however, you will join each loop one at a time, though the basic technique is exactly the same.
This video shows a simple tip for keeping your strips of lace straight until you’re ready to join them together. It also is using the actual yarn and hook I used for this shirt project, with the loom set at the 2.5″ necessary for these strips.
Gauge and Sizing
2 strips is approximately 3” in length, and 10 loops is approximately 3” in width when worn.
Sizes are based on the Craft Yarn Council Guidelines’ Women’s chest measurements (sample shown in images is size Medium):
- XS: 29″
- S: 33″
- M: 37″
- L: 41″
- XL: 45″
To adjust size further, you may add or remove loops on each strip. Please keep in mind that the total length around the body is the combined length of two strips. So, for example, a size Medium uses two 60-loop strips to reach all the way around. If I wanted to make this top 1” smaller, I would want to remove 4 loops total – 2 loops on each strip to evenly distribute the 1” of change, so each strip I made would be 58-loops long. You may also add or remove rows of lace to adjust length. This pattern is very flexible!
How to Make The Hairpin Lace Sleeveless Top
- Set hairpin lace loom so bars are 2.5” apart. On my loom, this is the 2nd hole in from each edge. You will work using basic sc hairpin lace loops, as shown in the video linked above and the tutorial attached to this pattern. Each strip you make will have the same number of stitches/loops. XS – 47 loops, S – 54 loops, M – 60 loops, L – 66 loops, XL – 73 loops
- With color A (top of shirt): Make 10 strips
- With color B (middle): Make 6 strips
- With color C (bottom): Make 14 strips
- Front panel – starting at the bottom, join 7 C color strips by braiding the loops together one loop at a time, then join 3 B color strips, then 5 A color strips. You will have a row of loops remaining at the top of the panel.
- Repeat step 5 to create the back panel. The front and back panels are identical.
- To join the front and back panel together at the top, start at one edge of the top and begin joining together the two strips as normal. Join for 2.5” (2.5, 3, 3.5, 4) over the shoulder, then continue braiding loops together along only one strip, working until you have about three inches remaining. Remove your hook from the loop and leave it for a moment. Go back to where you stopped joining over the shoulder, and weave the loops on the other strand until you have the same number of loops left as the first strip (approximately 2.5” (2.5, 3, 3.5, 4). Continue joining the two strips together until you reach the end of the strip. Sew/weave in the remaining loop securely to keep it front unraveling.
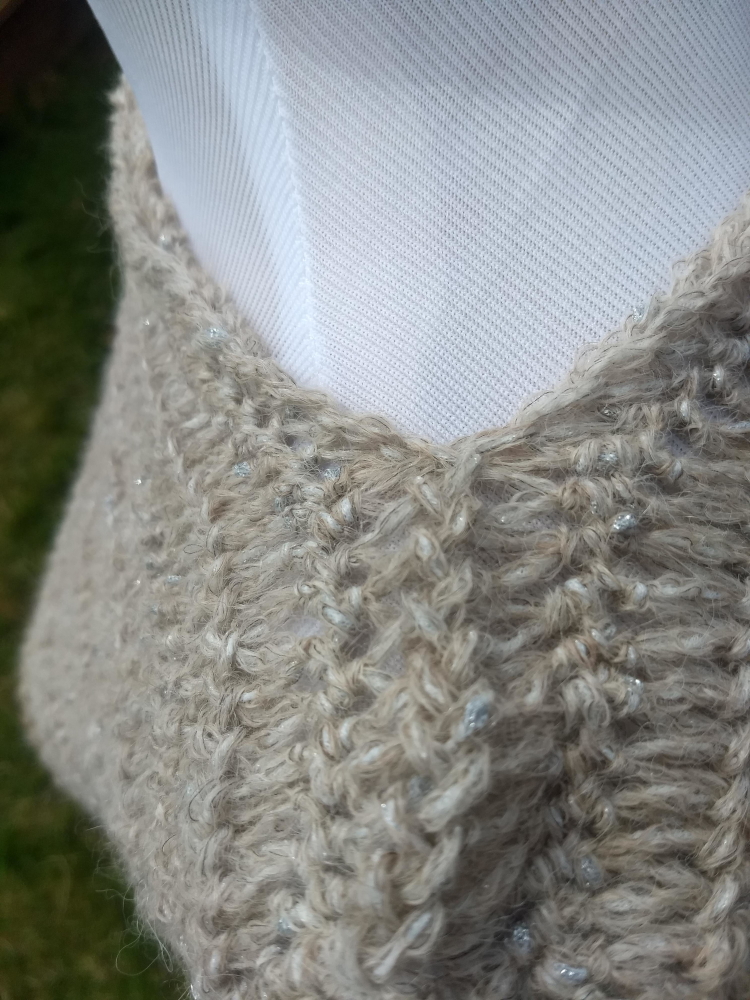
- To join the sides of the shirt, there are two options. You may either sew up the sides with yarn and a tapestry needle, or you may simply tie the loose ends of your rows together. Whichever method you choose, make sure your ends are secured so your strips of lace do not unravel! Sew the two sides together until you reach the top of the middle section, leaving space for armholes in the top section.
- Weave in all ends.
If you liked this design, you may also like the Hairpin Lace Baby Blanket, which is another beginner-friendly hairpin lace design.
This pattern and all images are copyrighted. You may use one image, if properly attributed and linked to this blog post, in pattern roundups and such. Cheers!
I love hairpin lace!!!