
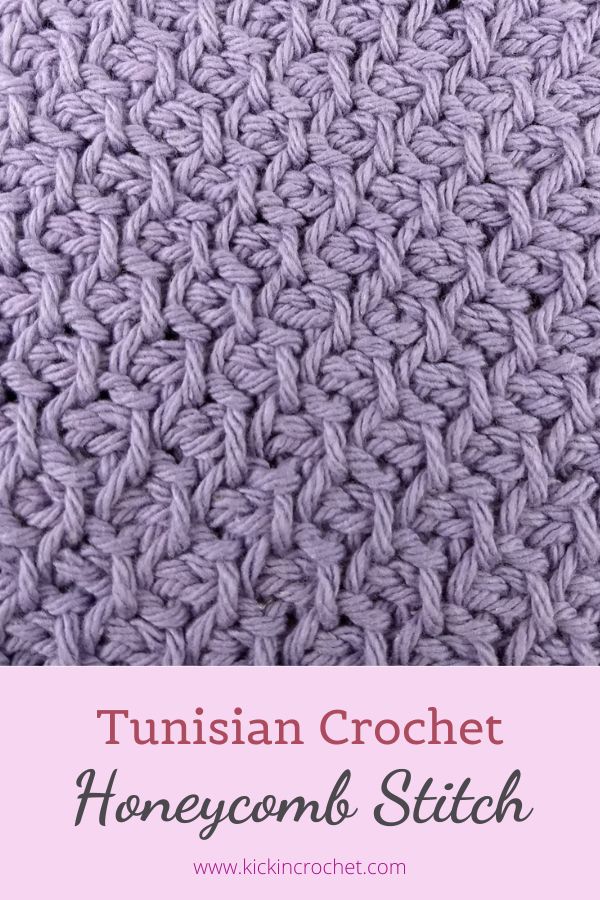
The Tunisian crochet honeycomb stitch is another one of those stitch patterns that looks way more complicated than it is! You only need to know two stitches to create this fabric – the Tunisian simple stitch and the Tunisian purl stitch! Read on to get the instructions for this beautiful, but easy Tunisian stitch, including a video tutorial!
*Disclosure: Some of the links in this post are affiliate links, which means if you click on them and make a purchase I may, at no additional cost to you, earn a commission. Read full disclosure here.
Supplies
You can use any Tunisian hook and yarn you have handy to give this stitch pattern a try. Remember that you’ll want to choose a hook 2 sizes bigger than what you would normally choose for your given yarn. In this sample, I actually went all the way up to a K, when I would normally use an H or I for worsted. (You could even try it out with a standard, non-ergonomic crochet hook if you don’t have a Tunisian one handy – just make sure your sample is small enough to not fall off the end of the hook!). Here’s what I used:
- Tunisian Crochet Hook Size K 6.5mm (Padauk hook from Furls crochet)
- Lily Sugar n Cream or any worsted weight yarn
- Yarn/Tapestry Needle for weaving in ends, if you want to create a finished item rather than just a swatch.
- A stitch marker (not required, but highly recommended for marking your left hand stitches)
If you want to start off a little more boldly, check out the free Honeycomb Hand Towel and Washcloth set, which features this stitch (in fact, the picture shown is a section of the handtowel!)
Tunisian Crochet Honeycomb Video Tutorial
Instructions
The Tunisian crochet honeycomb stitch is actually a simple 2-row repeat. You’ll start with a regular foundation row, just like you would for any standard Tunisian crochet project:
Chain any even number of stitches, then pick up a loop in the 2nd stitch from your hook and each stitch across. You should have the same number of loops on your hook as the number of stitches in your starting chain. Return normally – ch1 (I like to place a stitch marker here so that I know exactly where to place my hook for the last stitch on the next row!), then yarn over and pull through 2 loops on your hook until you get back to the beginning of the row, with just one single loop left on your hook.
Now that you’ve got the foundation row, the honeycomb pattern can begin!
Row 1: (tss, tps), repeat across
Row 2: (tps, tss), repeat across
It really is that easy! You’ll repeat those two rows over and over to create the honeycomb design. Need a refresher on Tunisian Simple Stitch (tss) or Tunisian Purl Stitch (tps)? Check out the video above where I show you how to do the honeycomb stitch, or you can see video tutorials specifically for purl stitch and simple stitch.
I hope you found this tutorial helpful – for more fun Tunisian goodness, check out the Easy Tunisian Hat or the Autumn Chill Sweater!