
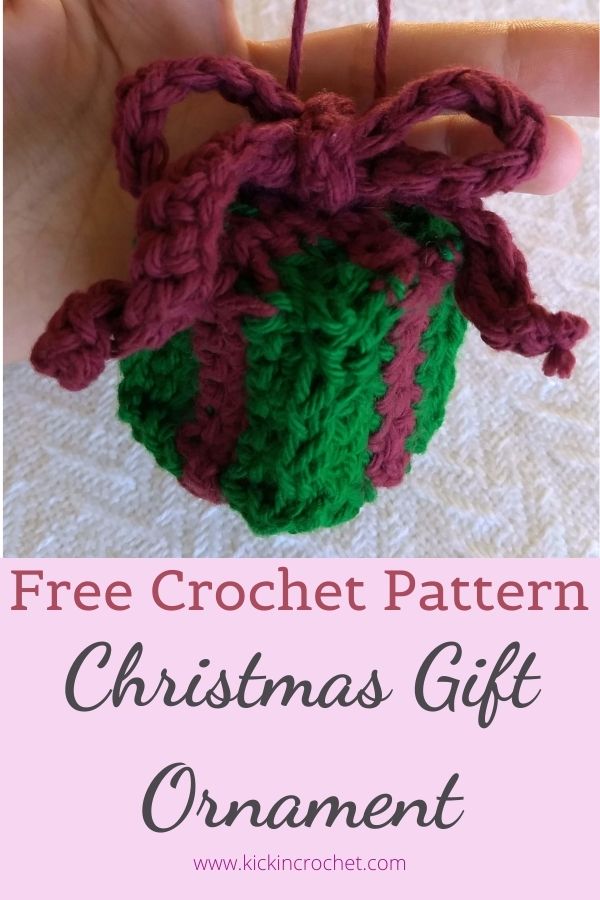
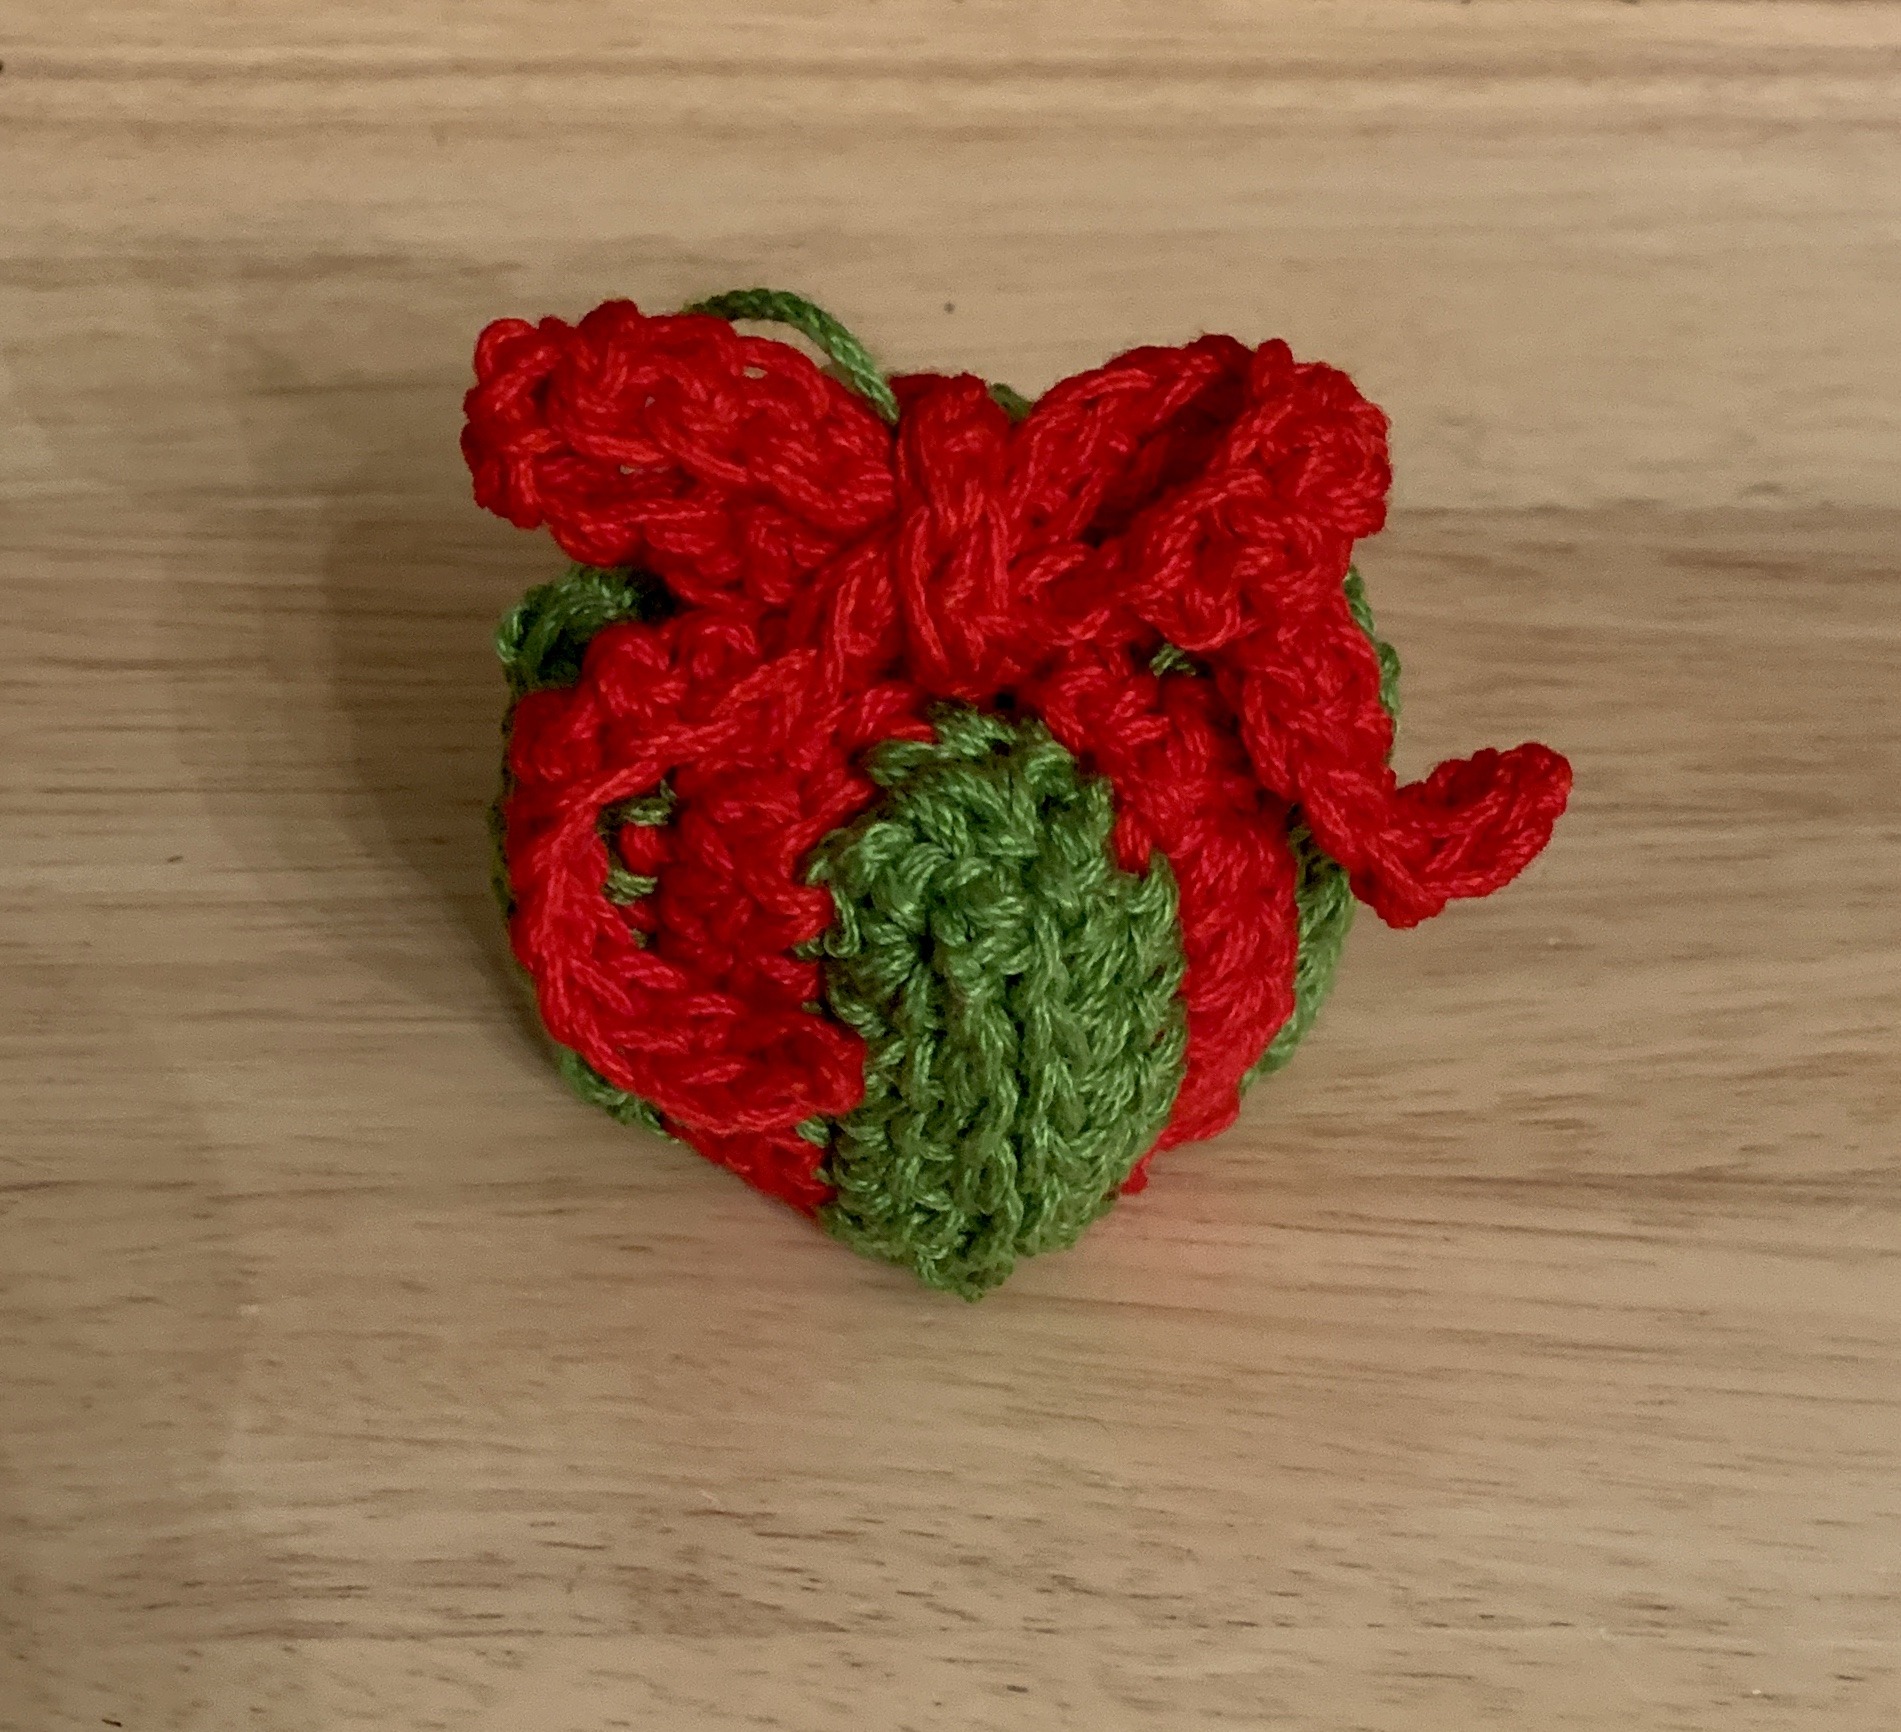
This little Christmas gift crochet ornament is sure to brighten up your tree. It’s a great stash-busting project, and it comes with a video tutorial to walk you through the colorwork and assembly.
*Disclosure: Some of the links in this post are affiliate links, which means if you click on them and make a purchase I may, at no additional cost to you, earn a commission. Read full disclosure here.
This pattern is available for free below, or you can purchase an ad-free printable PDF copy from Ravelry or Etsy using these buttons:
Supplies
- WeCrochet Dishie or similar worsted weight cotton yarn.
- Size I crochet hook – I love these Odyssey hooks from Furls Crochet!
- Yarn/Tapestry Needle for weaving in ends.
Stitch Abbreviations
- ch chain
- st(s) stitch(es)
- fsc foundation single crochet
- sc single crochet
Pattern Notes
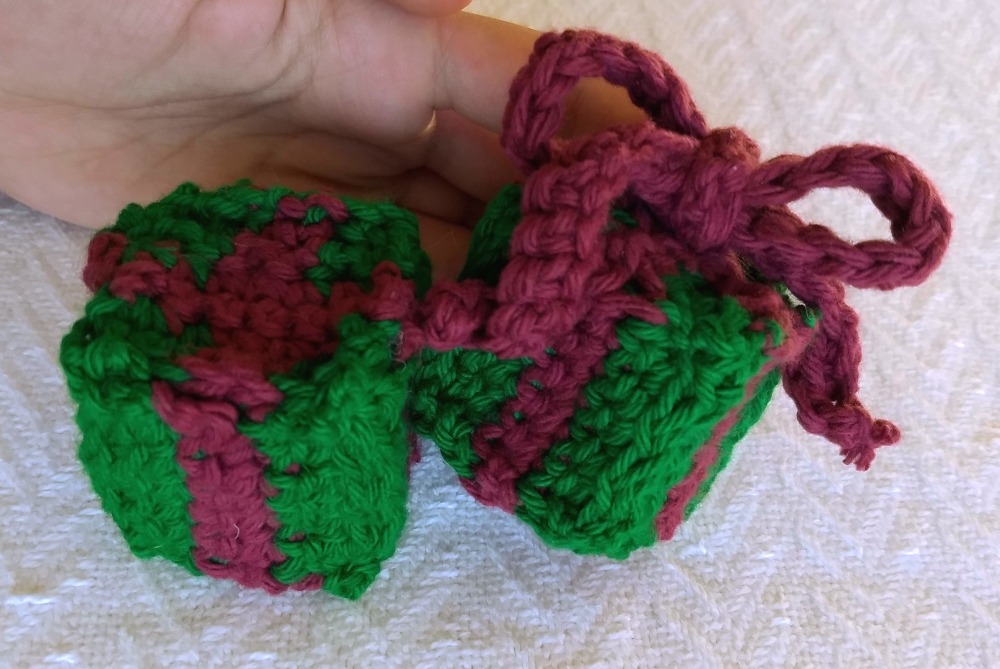
This ornament is completed in six panels and then sewn together. The bow on top is added last and secured to the top of the finished cube.
Turn chains do not count as stitches.
Christmas Gift Ornament Video Tutorial
How to Make The Christmas Gift Crochet Ornament
Side Panels – Make 4
- 1. With green, either fsc 6 -0r- ch7, sc in 2nd ch from hook and across (6sc)
- 2. ch1, turn, sc across, switch to red (6sts)
- 3. ch1, turn, sc across (6sts)
- 4. ch1, turn, sc across, switch to green (6sts)
- 5. ch1, turn, sc across (6sts)
- 6. repeat row 5, finish off, leaving tail for sewing panels together (6sts)
Top/Bottom – Make 2
Note – make sure any float strands left from color changes are all on the same side of the square (this will be the inside of the box).
- 1. With green, ch1, drop green, yo with red and pull through the loop on your hook, ch1 more with red, yo with green and pull through the loop on your hook, ch2 more with green. Still working with green, sc in 2nd ch from hok, sc in next st, switch to red, sc in next 2 sts, switch to green, sc 2 – or – with green, fsc2, switch to red, fsc2, switch to green, fsc2 (6sc) – this is the hardest row, see video for help, if needed!
- 2. ch1, turn, sc 2, switch to red, sc 2, switch to green, sc 2, switch to red (6sts)
- 3. ch1, turn, sc across (6sts)
- 4. ch1, turn, sc across, switch to green (6sts)
- 5. ch1, turn, sc 2, switch to red, sc 2, switch to green, sc 2 (6sts)
- 6. repeat row 5, finish off, leaving tail for sewing panels together (6sts)
Bow – Make 1
- 1. With red, fsc 50+ stitches -or- chain 50+, sc in second ch from hook and back across to the first chain. The exact stitch count here does not matter, but I would not make fewer than 50 stitches. The ornament pictured on the title page has a bow made using 50 stitches. In the video, I did 70. I felt like 70 was a little too long. You can use your discretion here!
- 2. Tie a bow (make two loops like bunny ears, fold one over the other, then wrap the top one around the bottom one and back up through the center). The tails will naturally curl a little, but you can spin them to help encourage the curl.
Assemble the Christmas Gift Ornament
- 1. Using yarn tails or another strand of yarn, sew each of the four side panels together along the solid green sides.
- 2. Sew the bottom of the box on. I do not switch colors to sew the red vs green portions of the bottom, but I do hide the stitches a little bit inside the box so that the green yarn doesn’t show too much on the red portions. If you don’t want any green color to show in the “ribbon” sections, you can sew those sections with red yarn. Make sure the side of the bottom with the yarn floats is on the inside of the box.
- 3. Sew the top on in the same manner as the bottom, pausing before finishing so that you can add stuffing, if desired. Do not overstuff the box, or it will end up looking more like a ball than a box! Tuck any remaining spare ends into the box before you finish sewing the top of the box closed.
- 4. To attach the bow and create a hanging loop, thread a fresh strand of red yarn onto your tapestry needle.
- 5. Insert your needle under the knot on the back side of the bow, then go under the middle ‘X’ of the top of the box and pull the thread about halfway through. Now thread the other side of the yarn strand onto the needle, and go under the middle ‘X’ of the top from the opposite direction.
- 6. Tighten the ends of the string you used to attach the bow to snug the bow against the box, then tie the ends together at the top to form your hanging string.
If you liked this pattern, you may also like the free Santa Hat crochet pattern or Star Dish Cloth!
This pattern and all associated images are copyrighted. If you would like to use this pattern in a roundup blog post, you may use 1 image and link to this blog post. You may not copy the pattern instructions. Thank you for supporting Kickin Crochet!