
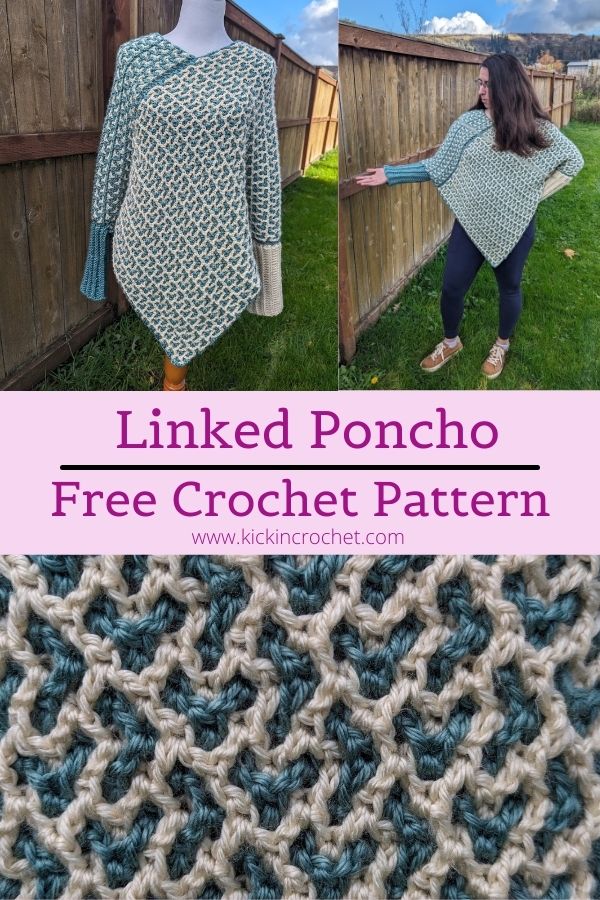
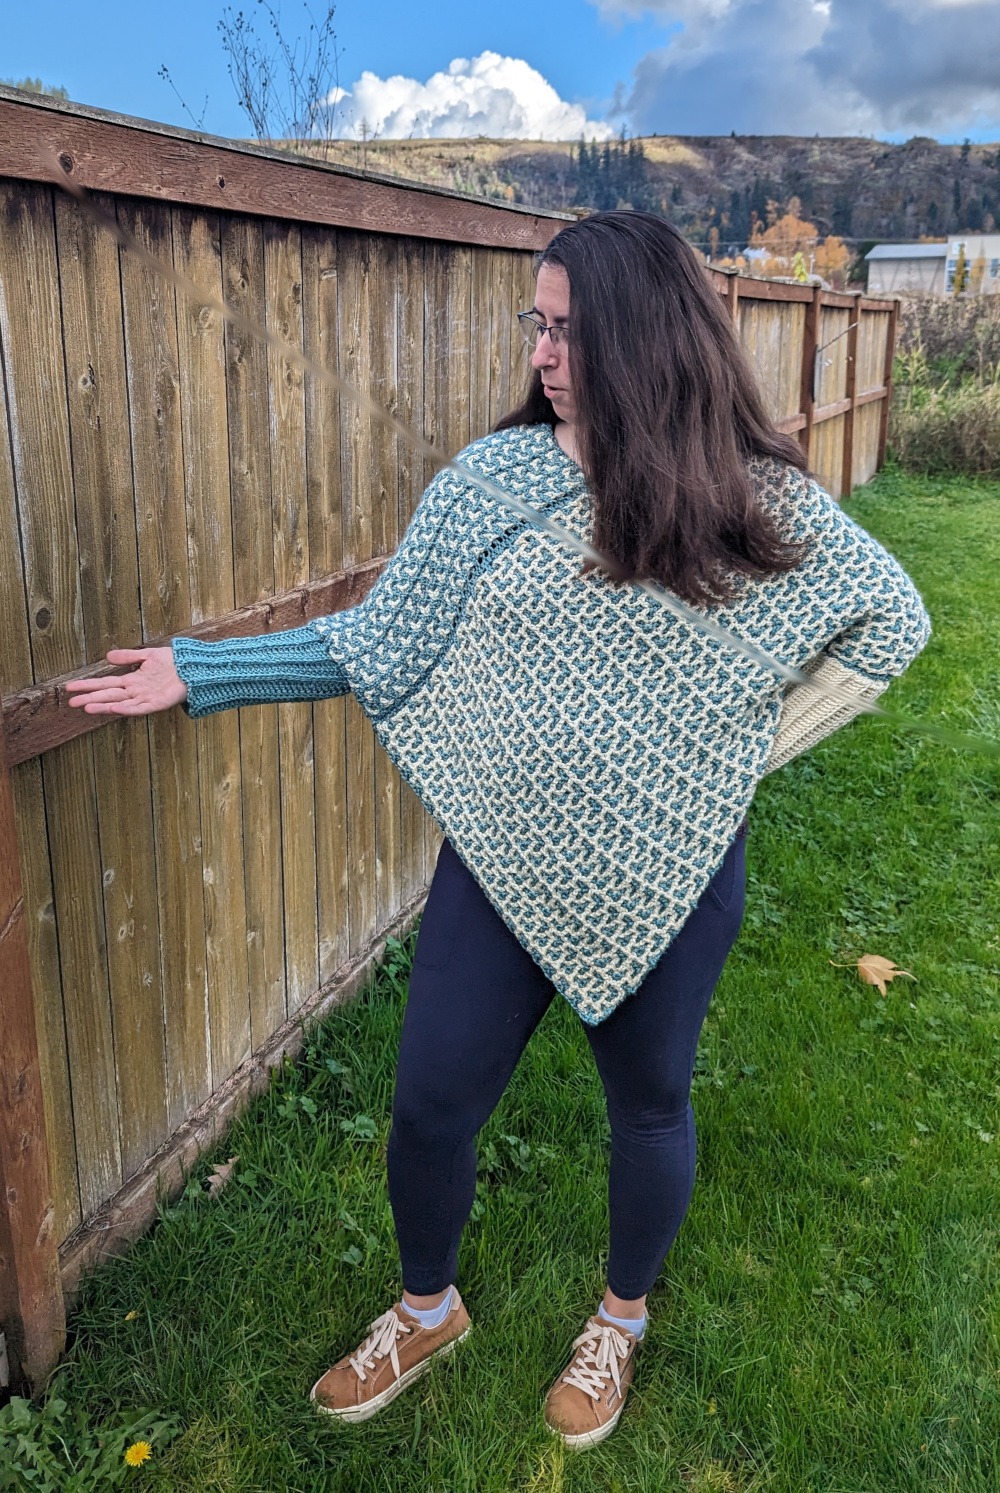
The Linked Poncho is a free interlocking crochet pattern using worsted weight yarn. The pattern includes full written instructions and a free full video tutorial to walk you through the pattern step by step. The woven pattern creates a warm, thick fabric, and creates a beautiful colorwork design with minimal weaving of yarn ends. Nobody likes weaving in ends! This pattern is also released as part of the Crochet Foundry Crochet Blog Hop, and I’m thankful for their support in providing materials for this pattern.
*Disclosure: Some of the links in this post are affiliate links, which means if you click on them and make a purchase I may, at no additional cost to you, earn a commission. Read full disclosure here.
This pattern is available completely free below, or you can also purchase an ad-free PDF copy from Etsy or Ravelry.
Supplies
- Furls Wander Yarn in Agave and Snow, 6 balls each (or similar worsted weight yarn)
- Size J (6.0mm) crochet hook – I used a Streamline hook from Furls Crochet!
- Yarn/Tapestry Needle for weaving in ends.
Gauge/Size
8dc and 7 rows in 4” worked in pattern
This pattern is written as unisex one-size adult. To adjust the size, increase or decrease the starting count in multiples of 4 sts. Increase the length of each rectangle by the same amount if you do not want to change the size of the head opening.
Stitch Abbreviations
- ch chain
- st(s) stitch(es)
- fdc foundation double crochet
- dc double crochet
- bpdc back post double crochet
- dc double crochet
- F Front dc
- B Back dc
Special Stitches
Front Double Crochet (F): Working in front of the other color, double crochet into the dc on the same color row below, then ch1.
Back Double Crochet (B): Working behind the other color, double crochet into the dc on the same color row below, then ch1.
bpdc: https://youtu.be/llS_Lqvr7zc
fdc: https://youtu.be/44mjihi7YvI
Pattern Notes
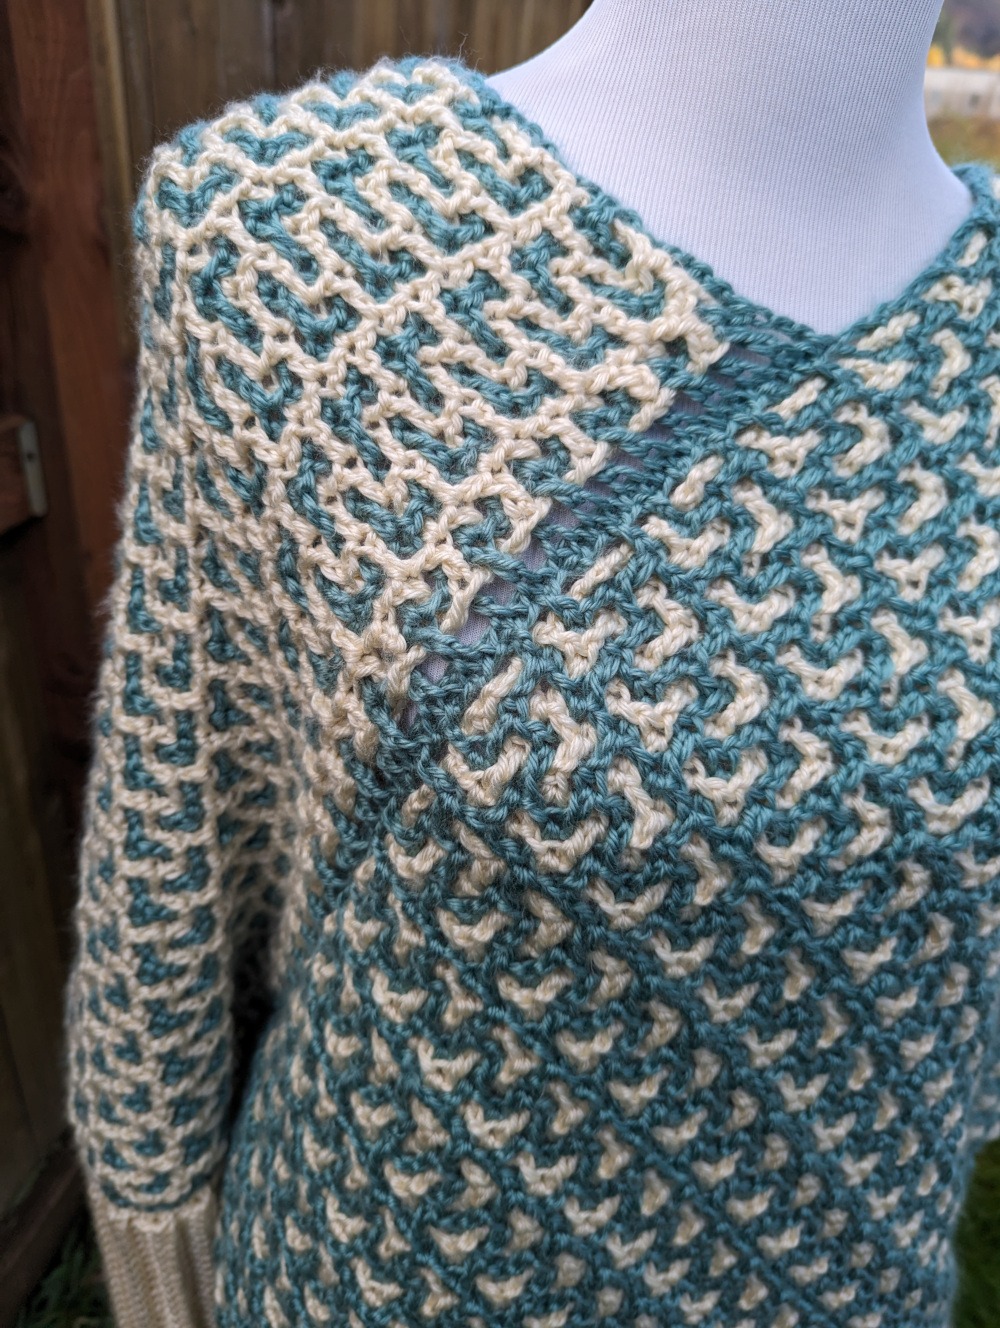
This poncho uses interlocking crochet to create a fabric with two colors at once. (This technique is also known as interwoven, intermeshing, or double filet crochet). In interlocking crochet, every dc has a ch1 between it and the next dc. Each color only ever works into stitches of its own color. This effectively creates two meshes that are woven around each other as you work by changing whether you work stitches from the front of the work or the back of the work. It is very important as you work to make sure that you are skipping the dc’s of the opposite color rows – 2dcs of the same color will always have a dc of the opposite color worked between them.
I recommend that instead of making your turn ch at the start of the next row, you make it at the end of the previous row so that you can more easily place stitch markers and make sure your starting chains are in the correct location, either in the front or the back of the work (this is noted in the instructions). Placing a stitch marker in the loop that would go on your hook when not in use will help to make sure you don’t accidentally unravel your work when not using that color.
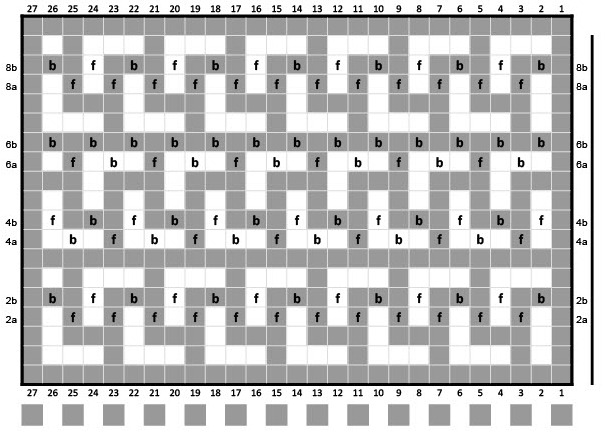
There are two charts at the end of the pattern for you to use. The first chart shows what the pattern looks like from the front, and the second chart shows the back. For odd numbered rows, use the Front Chart. For even numbered rows, refer to the Back Chart. In my example pictured, MC is Agave (green), and CC is Snow (off-white).
ch4’s count as B or F (dc + ch1)
Linked Poncho Video Tutorial
How to Make The Linked Poncho
0/1A Setup [Video 1:30]
MC- ch78, dc in 6th ch from hook (the 73rd ch of your starting ch), *ch1, sk1, dc, repeat from * across. ch4. You should have 38 dc including your starting ch
0/1B Setup [Video 5:00]
– CC- ch76, optional – place a stitch marker in 6th ch from hook (71st ch of starting ch) – this is the stitch you will work your first dc into. Before you can do that, you need to weave the CC starting chain into the MC base.
– (Video 6:41) Lay out your MC starting mesh with the working yarn on the top left. Go to the right side of the MC mesh (there should be no yarn tails coming off this side). Take the starting end of your CC chain. Starting from behind/underneath the MC mesh, bring the CC tail up through the hole between the second and third MC dc from the right (remember that the MC turn chain counts as a stitch). Now you’ll weave the CC tail through each MC hole so that the MC dc’s alternate being in front of or behind the CC yarn chain. When you get to the end, the CC yarn should end in the back of the work.
– Now, with CC, F in 6th ch from hook. This stitch should be just to the left of the 2nd MC dc from the right. *B, F, repeat from * to last st, ending with B. ch4. Remember to skip a chain between each dc, and that there should be a MC dc in between each CC dc. You should have 37 CC dc’s
2a [Video 13:28]
[CC Back] With MC, F across, ch4
2b [Video 18:33]
With CC, *F, B, repeat from * across, ch4
3a [Video 21:49]
[CC Front] With MC, *B, F, repeat from * across, ch4
3b [Video 23:32]
With CC, F across, ch4
4a [Video 24:48]
[CC Front], With MC, *F, B, repeat from * across
4b [Video 26:25]
With CC, *B, F, repeat from * across
5a [Video 27:30]
[CC Front] With MC, B across
5b [Video 28:42]
With CC, *B, F, repeat from * across
6a [Video 29:26]
[CC Back] With MC, *B, F, repeat from * across
6b [Video 30:47]
With CC, B across
7a [Video 31:28]
[CC Back] With MC, *F, B, repeat from * across
7b [Video 33:18]
With CC, *F, B, repeat from * across
8-end
Repeat 2a-7b eight times, then 2a-3a once. (or repeat 2a-7b to desired length, ending with row 3a or any “a”/MC row)
Sew Rectangles Together [Video 35:37]
Join short end of one rectangle to right side of long edge of second rectangle. Join Short side of 1st rectangle (the short side farthest away from the first join section) to the long side of the 2nd rectangle to form the poncho/head hole.
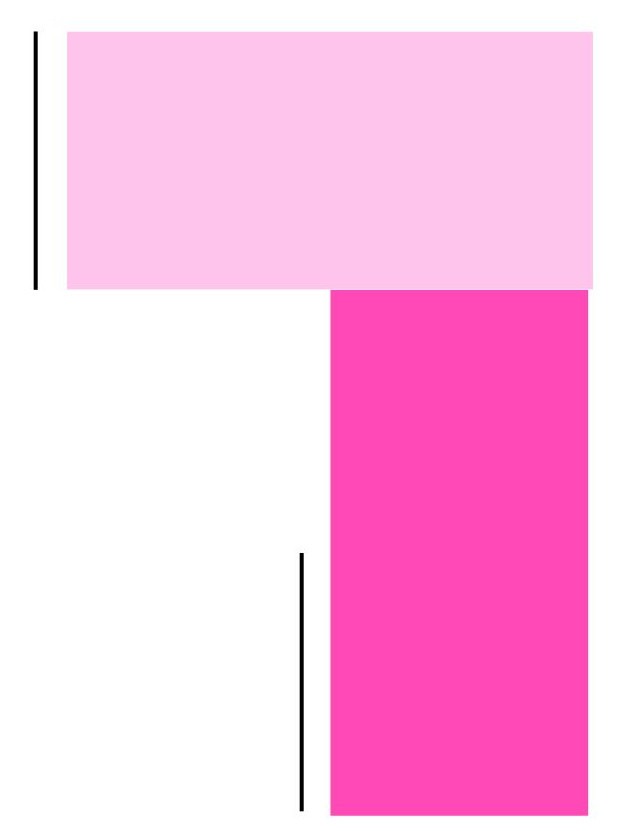
Image above is not to scale. The black bars show where the second short edge is attached to the long edge to complete the poncho. Do not twist the rectangles when you join these edges.
Optional Sleeves – Make 2 (I made one of each color)
- fdc 30 (or to desired arm length)
- ch3, turn, bpdc across
- Repeat previous row 20 times or until you reach your desired arm circumference (the sleeve section should fit comfortably up to the elbow)
- Sew or crochet sleeve together lengthwise to form a tube. Find the middle of the side of your poncho and sew or crochet the sleeve to attach it, being careful not to sew the sleeve closed.
- Repeat with second sleeve.
If you like this design, you might also like the Interlocking Tiles Blanket set or the A-Maze-Ing Placemats!
Linked Poncho Charts

This pattern and all associated images are copyrighted. If you would like to use this pattern in a roundup blog post, you may use 1 image and link to this blog post. You may not copy the pattern instructions. Thank you for supporting Kickin Crochet!