
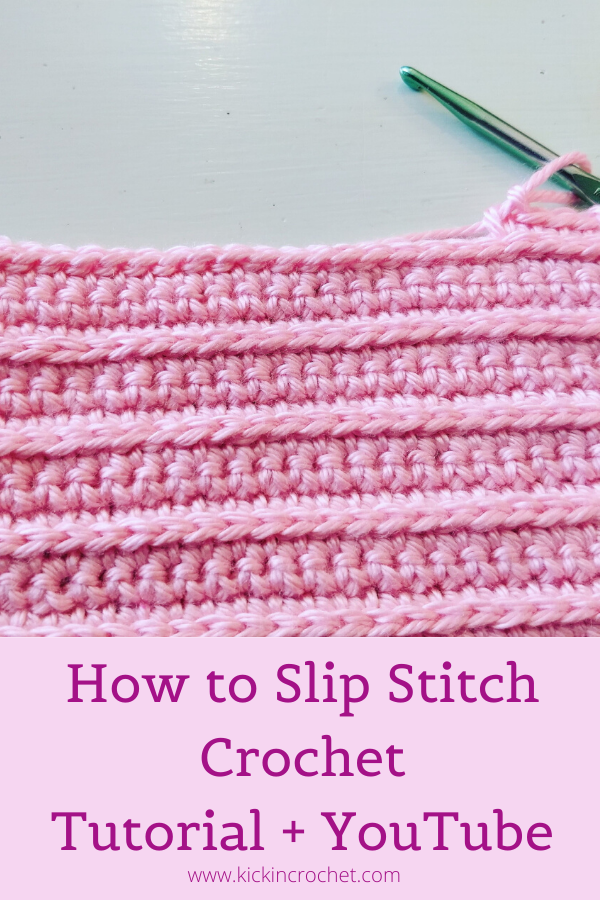
It’s time to learn to slip stitch! I’ve you’re brand new to crochet and missed our first lesson, hop over to How to Single Crochet to get started from the beginning. In this lesson, I’ll teach you how to slip stitch crochet. Our blanket square for this lesson will be a combination of single crochet and slip stitch!
*Disclosure: Some of the links in this post are affiliate links, which means if you click on them and make a purchase I may, at no additional cost to you, earn a commission. Read full disclosure here.
Slip Stitch Crochet YouTube Video Tutorial
How to Slip Stitch Crochet
Supplies
If you’re following along with the blanket blocks, you should use the same or similar yarn and hook that you used in the first lesson – here’s what I used:
- Worsted weight yarn of your choice – I used Caron Simply Soft
- Size H crochet hook – I love these Odyssey hooks from Furls Crochet!
- Yarn/Tapestry Needle for weaving in ends.
Hopefully you’ve gotten some practice from lesson one. You should be pretty comfortable with tying a slip knot and single crochet. You’re probably still having a little trouble with tension and holding your yarn comfortably, and that’s okay! Just keep practicing, and you’ll get the hang of it. 🙂
Slip Stitch Crochet – Let’s Go!
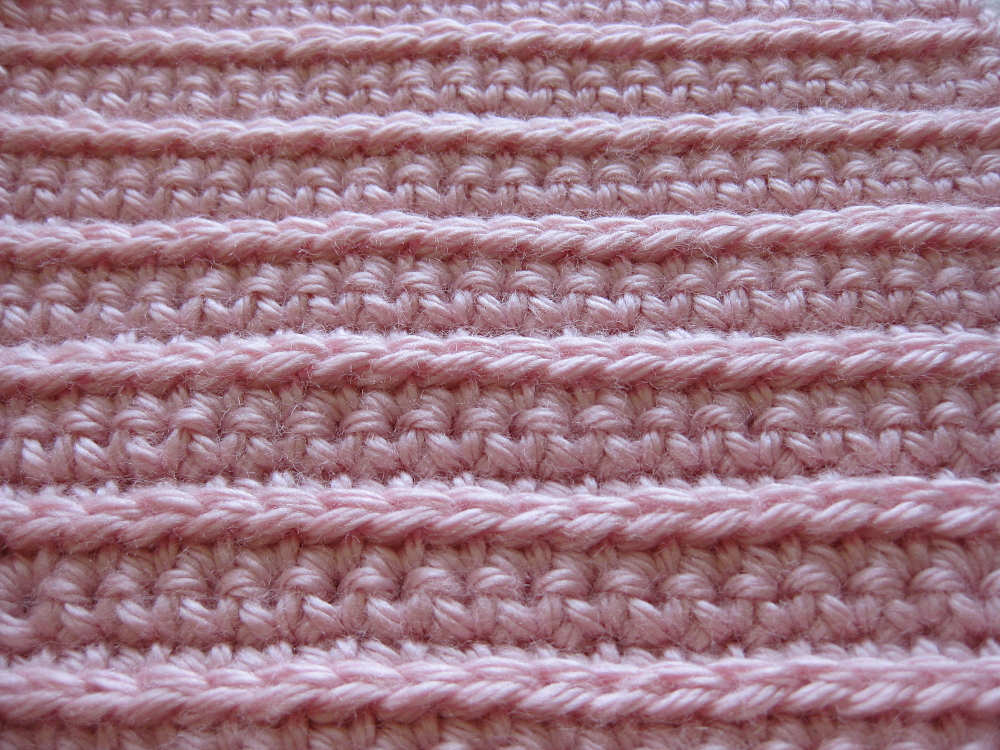
The Slip Stitch is actually easier than single crochet in some ways. It’s really similar to single crochet, but with one fewer step. However, it actually can be a little harder to do, because it’s so easy to make slip stitch too tight. This will be a great practice for you to work on tension. You may get frustrated, trying to get your hook into tight stitches, but with practice, you’ll loosen up your stitches enough that you can work into the slip stitches.
Okay, so here’s how to do it! Insert your hook into the next stitch just like for single crochet.
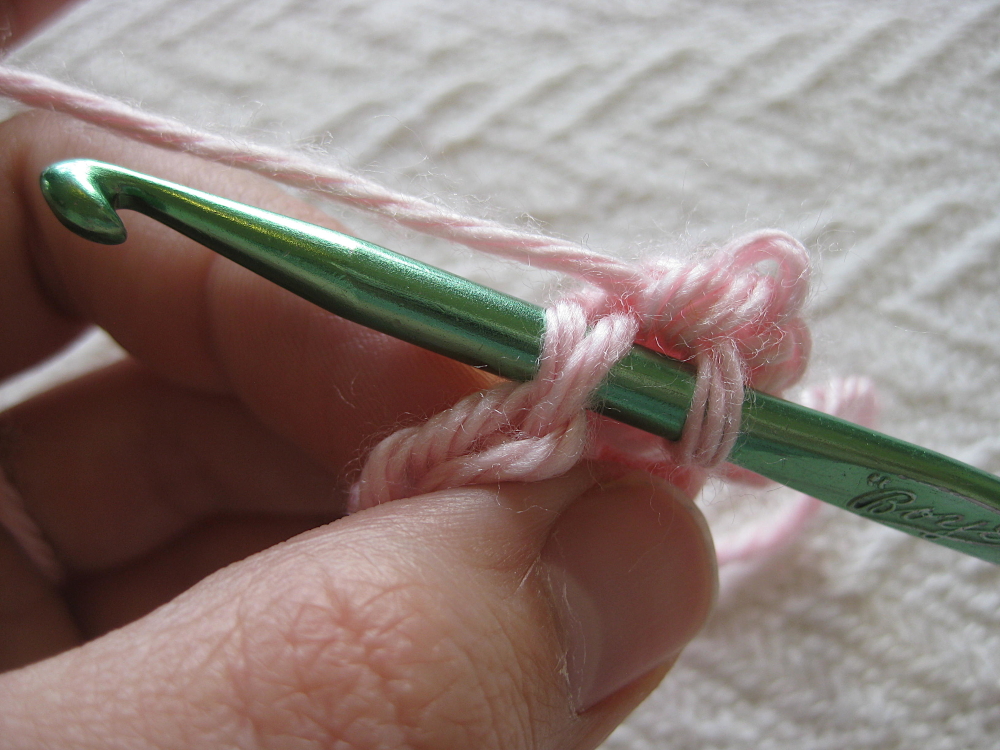
Now, yarn over, just like you did for the single crochet
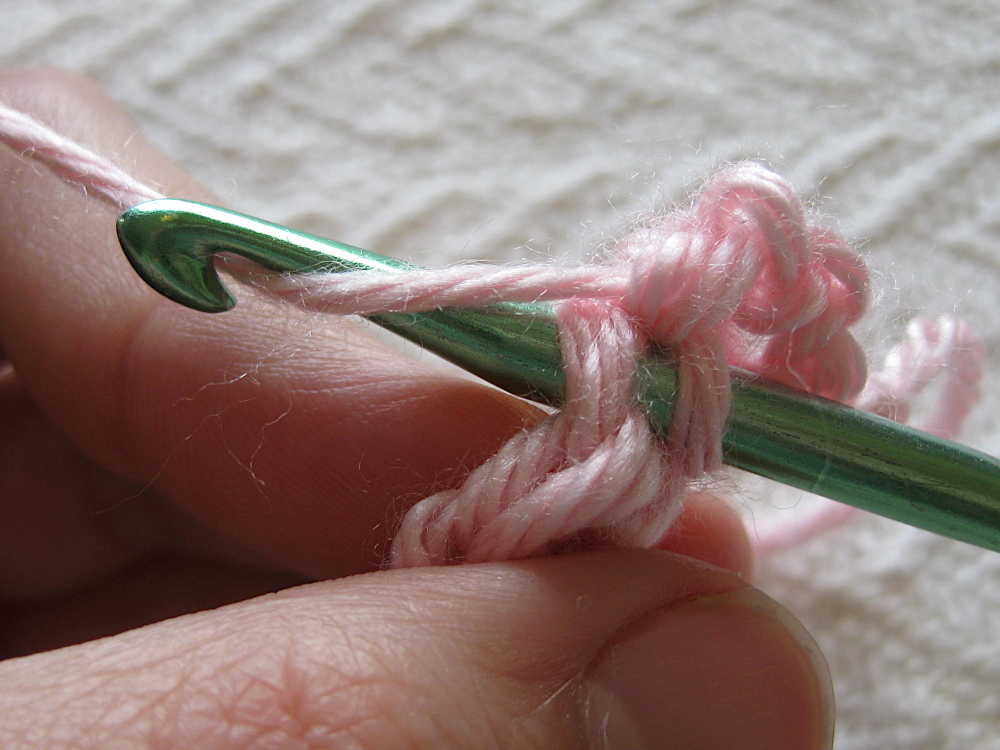
Now you’re going to pull that yarn through the stitch AND through the other loop on your hook. That’s it!

Slip stitch makes a short, tight stitch, which is why tension is so important. Let’s review really quickly – for the single crochet, you insert your hook into the stitch, yarn over, and pull the yarn through the stitch, then yarn over and pull through both loops on your hook. For slip stitch, you insert your hook into the stitch, yarn over, and pull the yarn through the stitch and the other loop on your hook.
Making Your Blanket Square
Because slip stitch is so tight, I didn’t want you to have to make a whole 6″ square with slip stitch. So for this square, you’ll work one row of single crochet (sc), then one row of slip stitch (ss), then three rows of single crochet, then one row of slip stitch. Keep going with that pattern – 3 rows sc, 1 row ss – until you have a 6″ square. I think it looks nice to end on an sc row, but it’s up to you! It took me eight repeats of that pattern to make my square, and it is 26 or 27 stitches wide. This number might be different for you, so make sure you measure!
I recommend watching the YouTube video linked above to make sure you are working into the right place for the first single crochet row after the slip stitch row. If you’re ready for the next lesson, check out lesson 3, How to Crochet in Front Loop and Back Loop only. Have fun, and happy crocheting!