
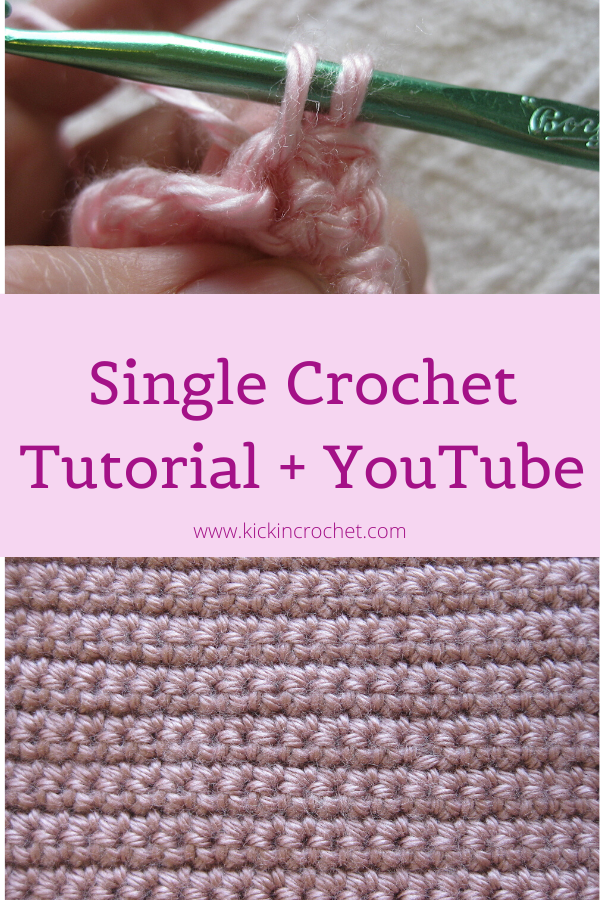
If you’ve always wanted to learn to crochet, well, you’re in luck! This is the first lesson in my new how to crochet series. Every lesson will include a video tutorial and instructions. In this lesson, you’ll learn basics of crochet, including how to hold the hook and yarn and how to weave in ends at the end of a project, plus, of course, how to single crochet.
I plan to have a new video for you every week. For each new stitch, I’ll be making a 6″ crochet square. If you follow along with me, at the end of the project, you’ll have plenty of squares to sew together into a fun sampler blanket! I’ll even throw in a few free patterns for you to practice the techniques you’ve been learning. Ready? Let’s go!
*Disclosure: Some of the links in this post are affiliate links, which means if you click on them and make a purchase I may, at no additional cost to you, earn a commission. Read full disclosure here.
How to Single Crochet Video Tutorial
If you’d like to follow along with a video tutorial, check out the video below. I’ll walk you step by step through the basics and how to single crochet. Don’t forget to Subscribe to the YouTube channel to get updates on the new weekly videos!
Getting Ready to Crochet
Supplies used in this tutorial are listed below. I’ll be sticking to the same type of yarn for all of the tutorials. I chose Caron Simply Soft because it is available in most craft stores or online, it’s pretty soft, relatively inexpensive, comes in many colors, and is easy to work with. It’s also machine washable since it’s acrylic. You’re welcome to choose a different type of yarn if you’d like!
- Worsted weight yarn of our choice- I used Caron Simply Soft
- Size H crochet hook – I love these Odyssey hooks from Furls Crochet!
- Yarn/Tapestry Needle for weaving in ends.
Before you can learn to do a single crochet, you need to learn a few set-up steps. First, you’ll have to be able to tie a slip knot to attach your yarn to your crochet hook. Then you need to figure out how to hold a crochet hook and your yarn.
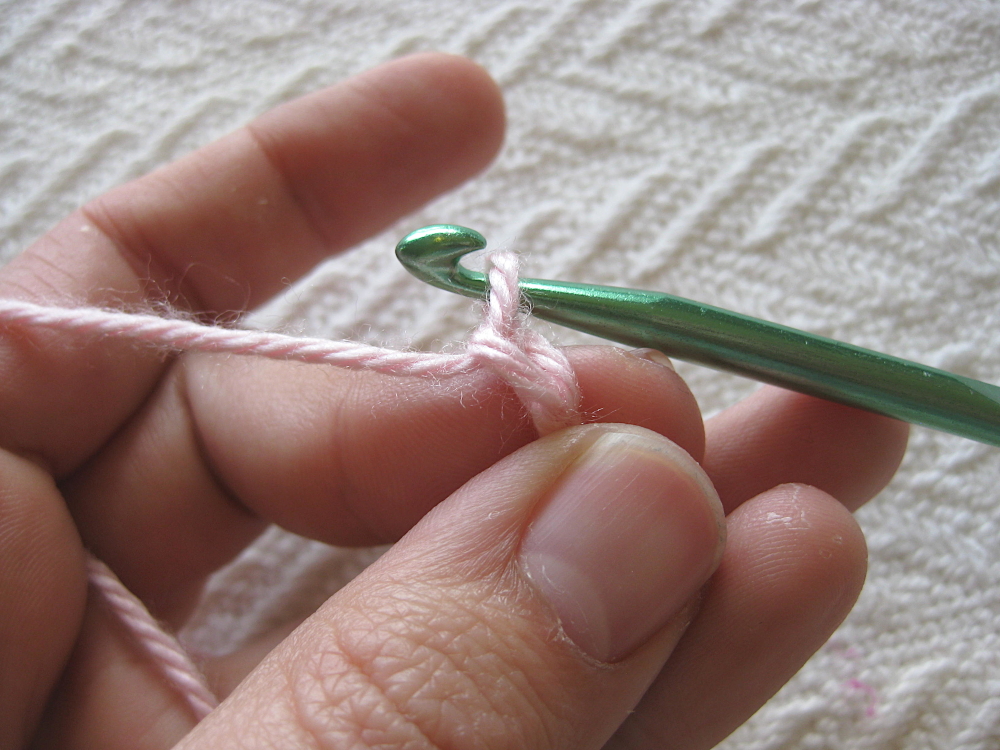
How to tie a slip knot
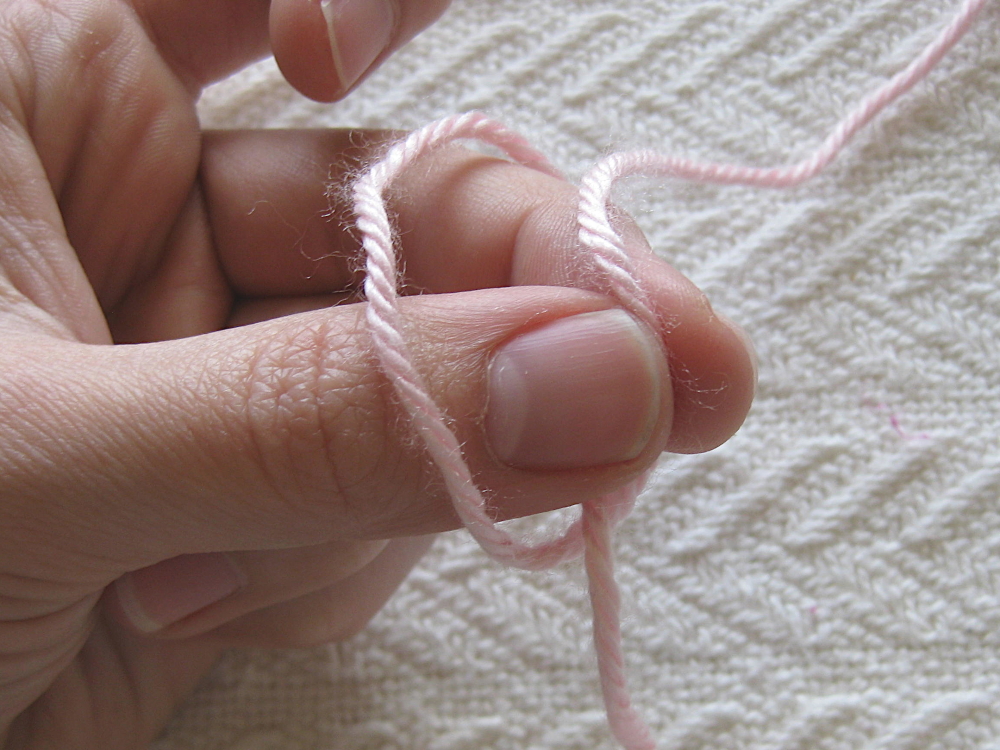
With a little practice, you’ll be a slip-knot tying master. Pull the end of your yarn from your ball. The end attached to the ball is called the “working yarn”. The other end is called the “free end” or “free yarn”. Twist the yarn so that the free end is over the working end.

Reach through the loop and grab the working yarn.
Pull the working end through the loop, tightening the loop as you pull. You should have a loop of yarn with a knot at the end.
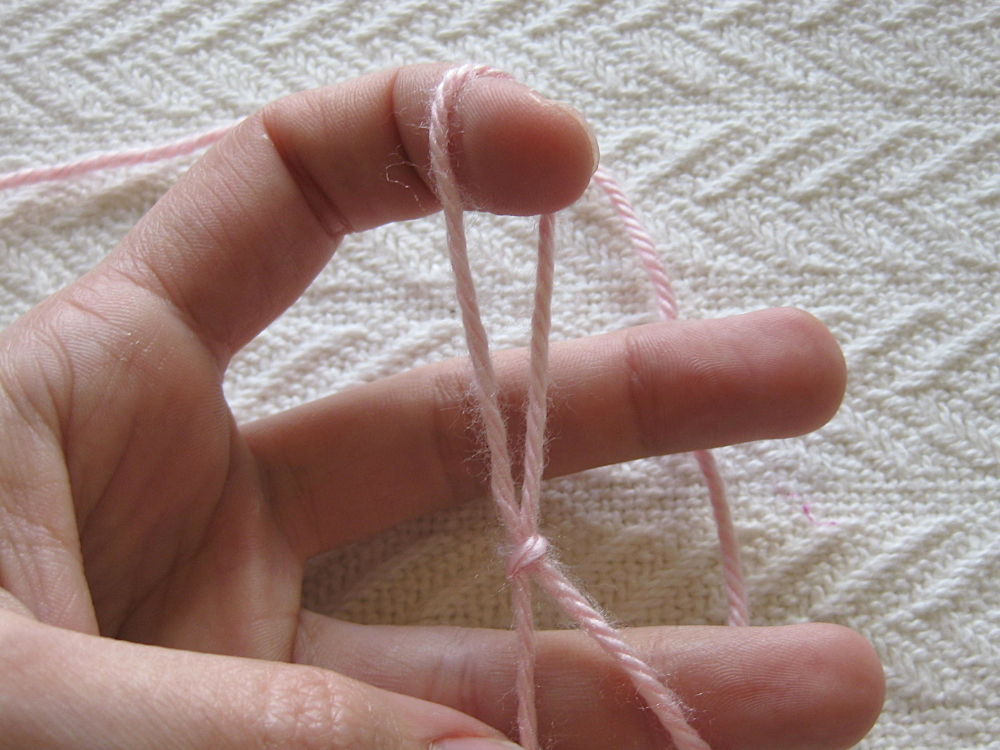
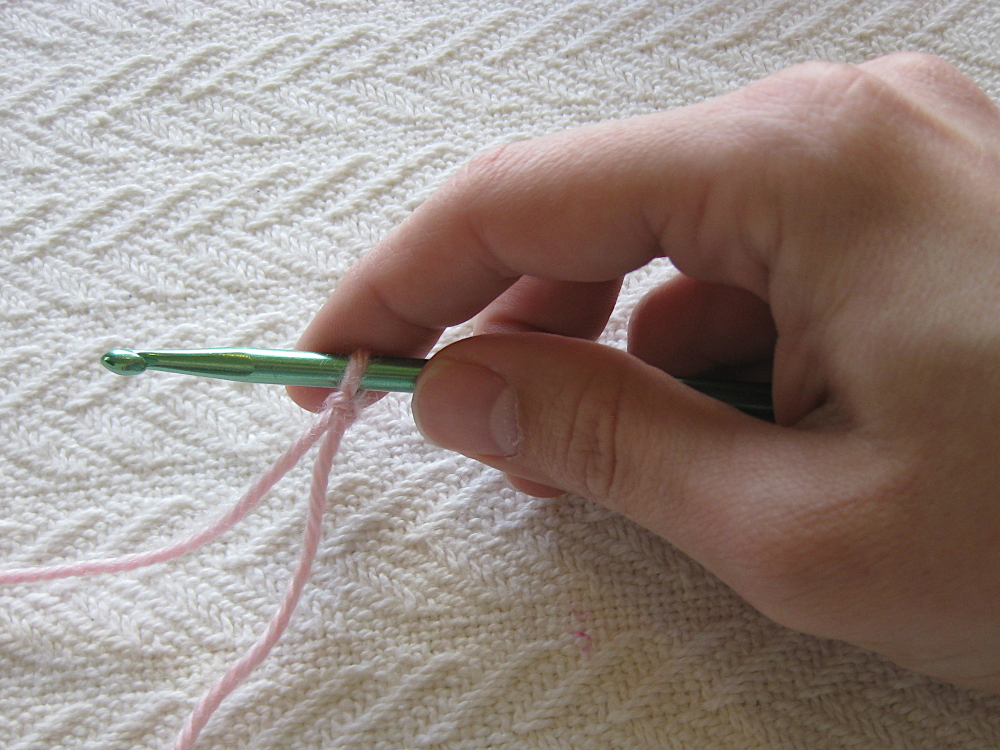
If you pull on the working end, it will shrink the slip knot. If you pulled it far enough, the knot would come undone! Now, insert your crochet hook in the loop, and pull on the working yarn to snug the loop around the crochet hook. You don’t want to make this super tight.
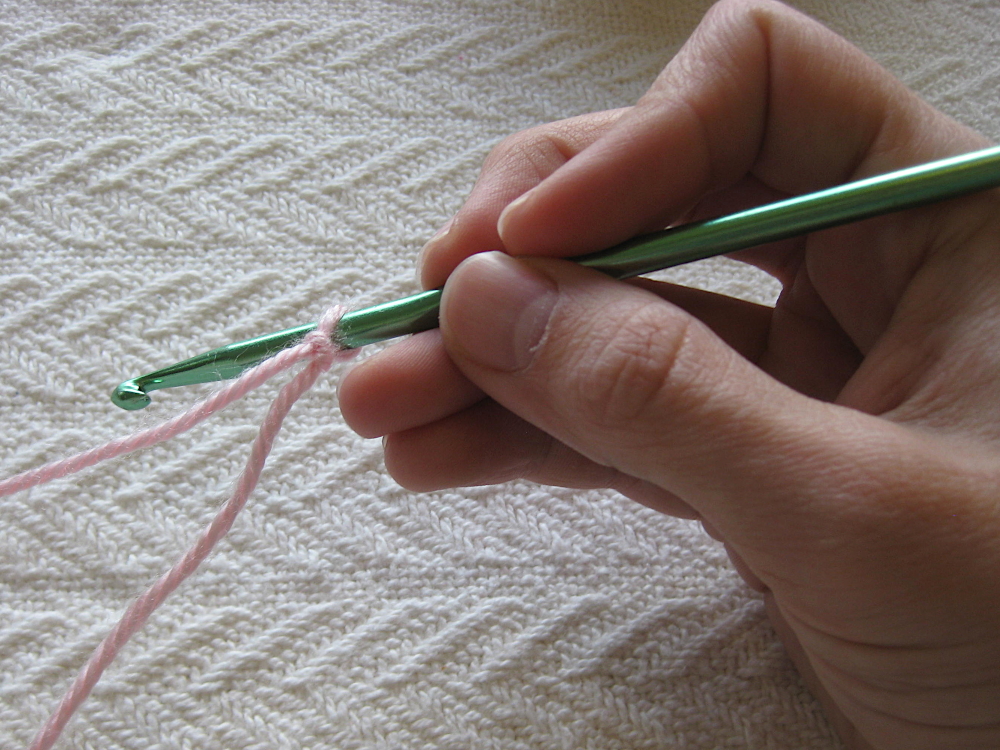
How to Hold a Crochet Hook and Yarn
There’s no one right way to hold a crochet hook. Two of the most common ways are the “knife hold” and the “pencil hold.
For the knife hold, you hold the hook as though it were a knife, with your hand on top and the hook lying across your palm.
For the pencil hold, you hold the crochet hook as though it were a pencil – simple enough. You should experiment with different holds to find what’s most comfortable for you. When I first learned to crochet, I used the pencil hold. Now I find the knife hold more comfortable. Both work fine.
Holding the yarn is one of the more important and trickier parts of crocheting. This is where you can control the tension of your stitches, or how loose or tight they are. I like to hold my yarn by putting the yarn over my left index finger, under my second and third fingers, and over my pinky. I find this gives me plenty of control of the yarn. Again, you can play around with how you hold the yarn in your left hand if you’d like.
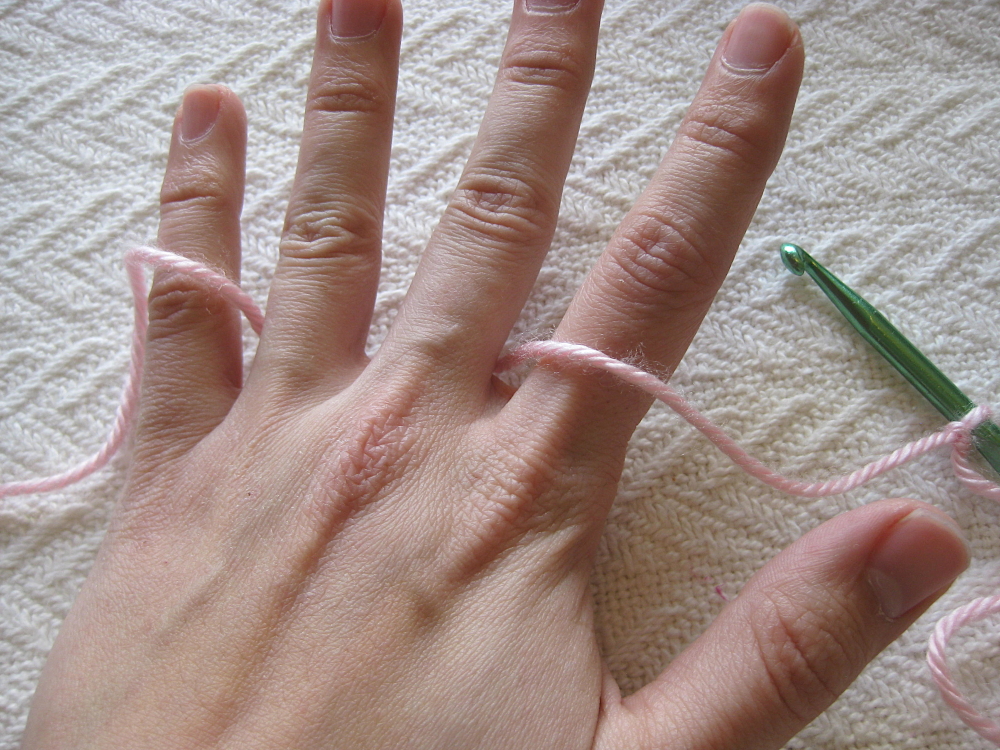
With my yarn in my hand, I use my thumb and my middle finger of my left hand to hold the stitches that I’m working on to give myself more control.

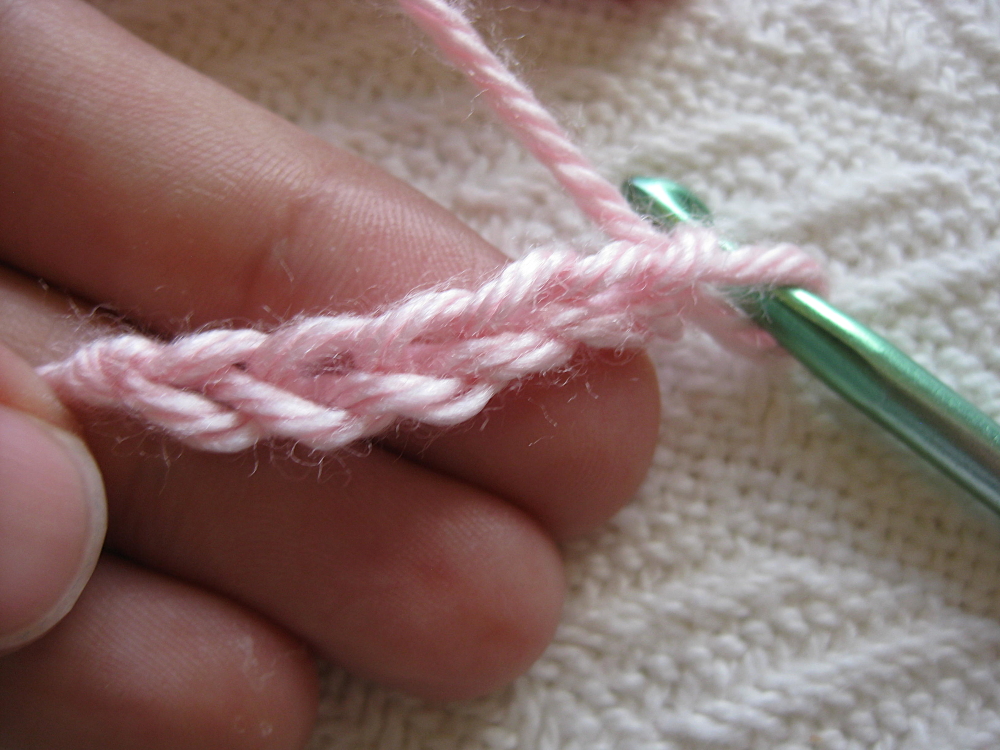
Making a Starting or Foundation Chain
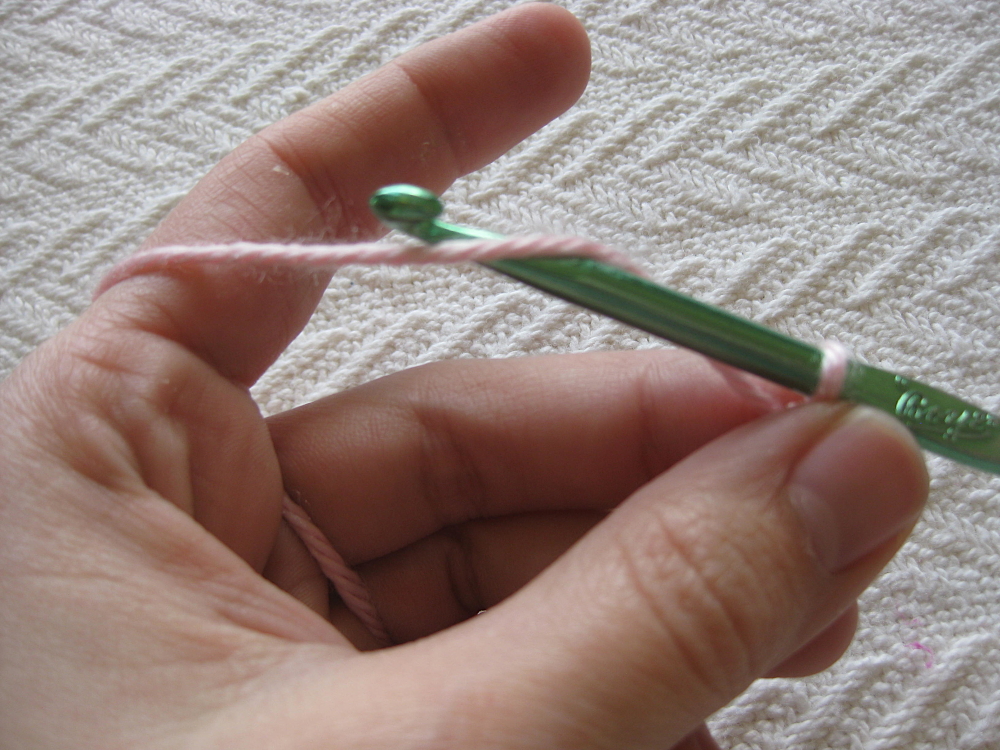
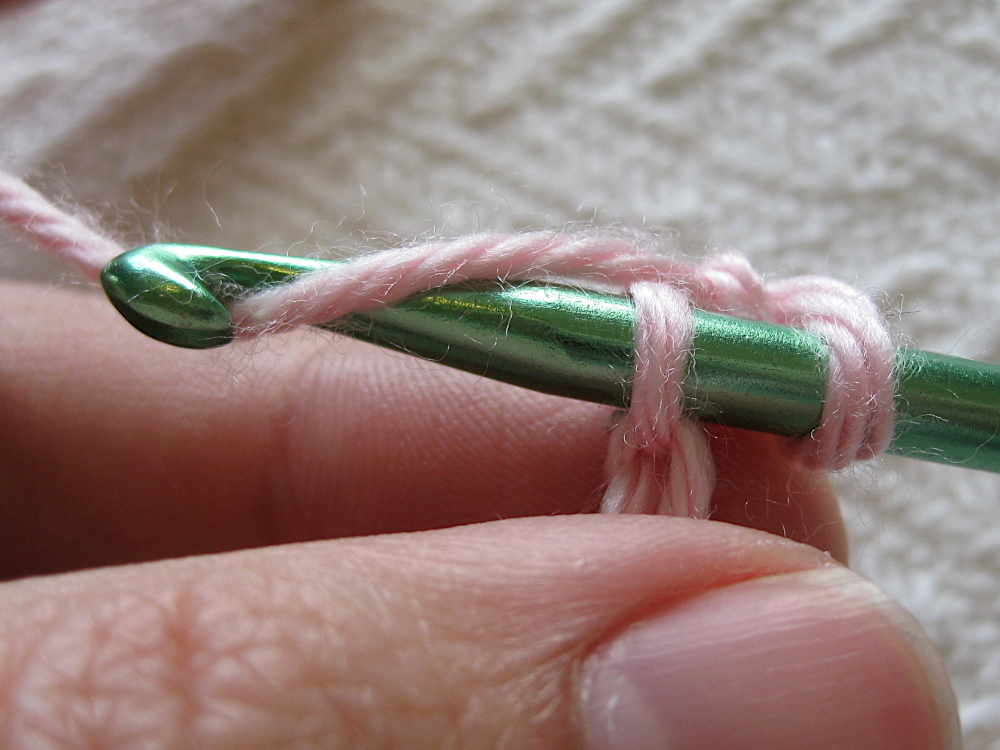
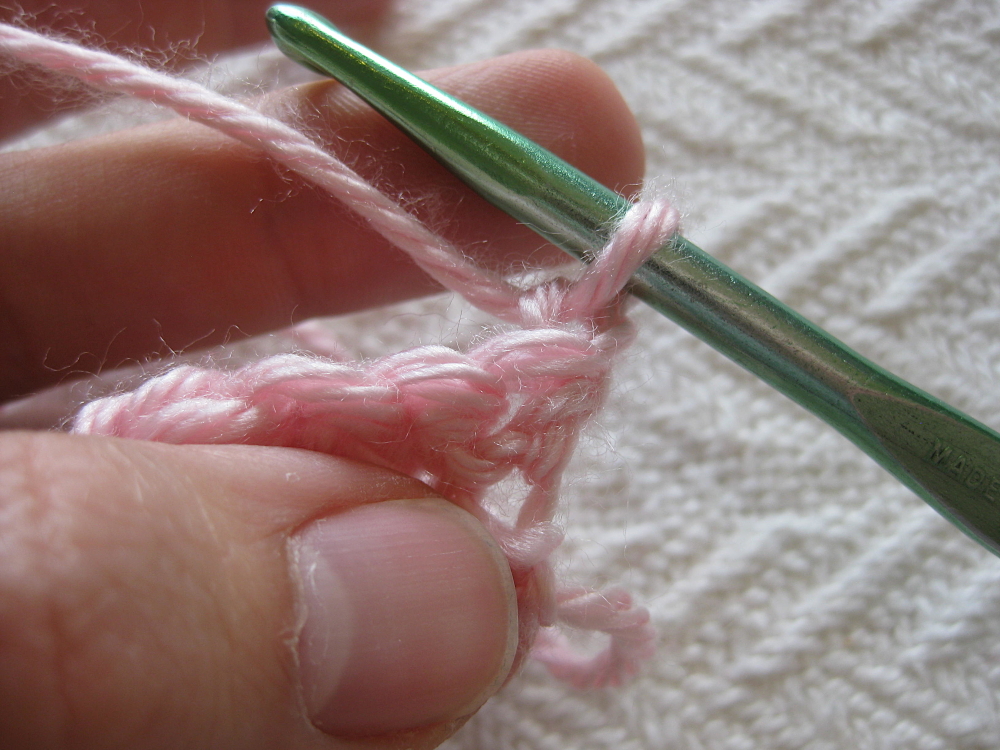
The first part of most crochet projects will be a foundation or starting chain. When you get more comfortable with crochet stitches, there are some other ways to start a project, but for now, stick with the starting chain. The first thing you need to do is yarn over. A yarn over is when you put the yarn over the hook… or I actually put the hook under the yarn. It ends up the same. Make sure the yarn goes over the hook from the back to the front, as shown below.
Now, you’re going to pull that yarn through the loop on your hook to make a chain stitch. It’s easier to pull the hook through if you turn it so it faces down as it goes through the loop. This makes it so it fits through easier, and the yarn is less likely to slip off the hook.
Once you’ve pulled that yarn through the loop. you can push your crochet hook forward for the next stitch. Congratulations, you just made your first crochet chain stitch!
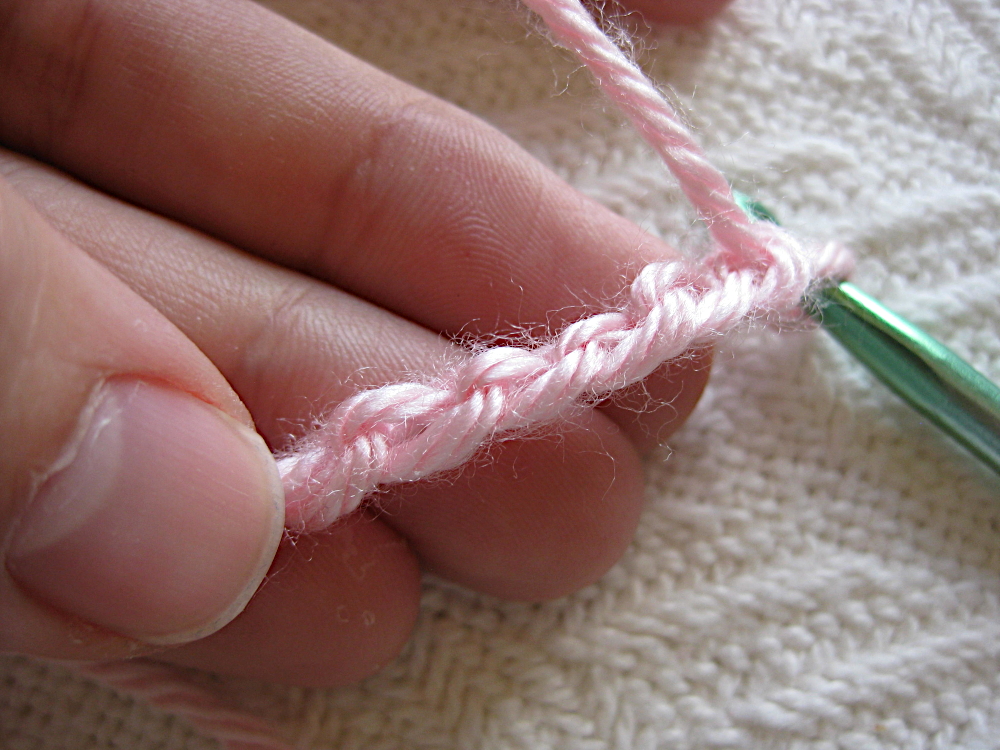
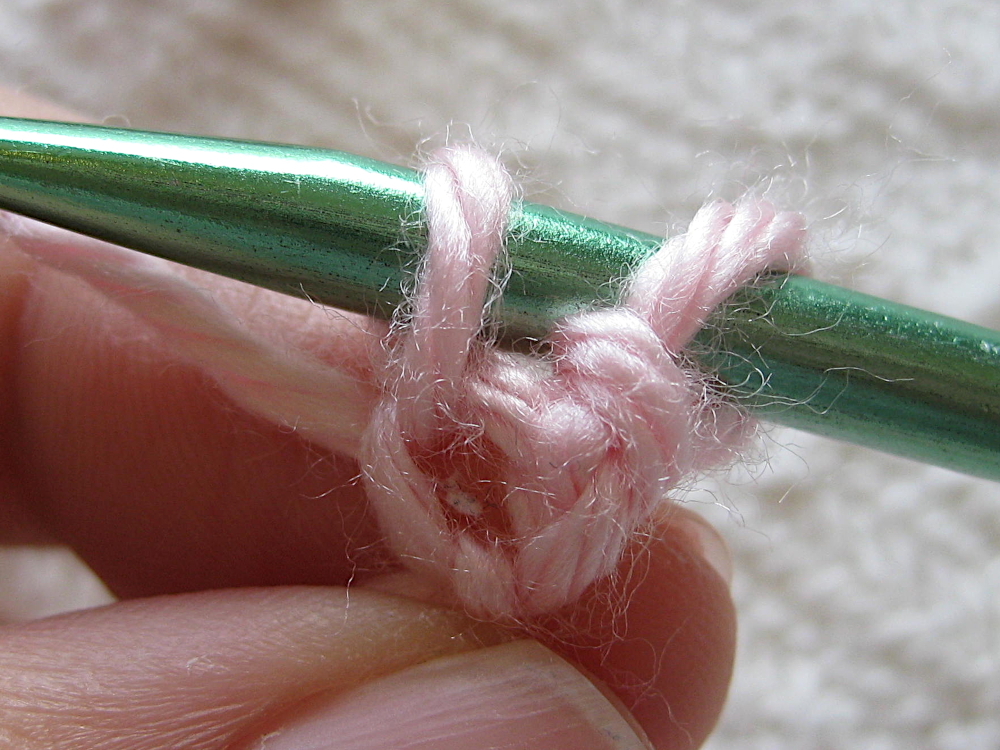
Anatomy of a crochet chain stitch
Once you’ve worked a few chain stitches, I want you to stop and look at the chain. One side of the stitch will have two strands of yarn that make a V shape. The other side of the chain will have a single bump. We call this the back bump.
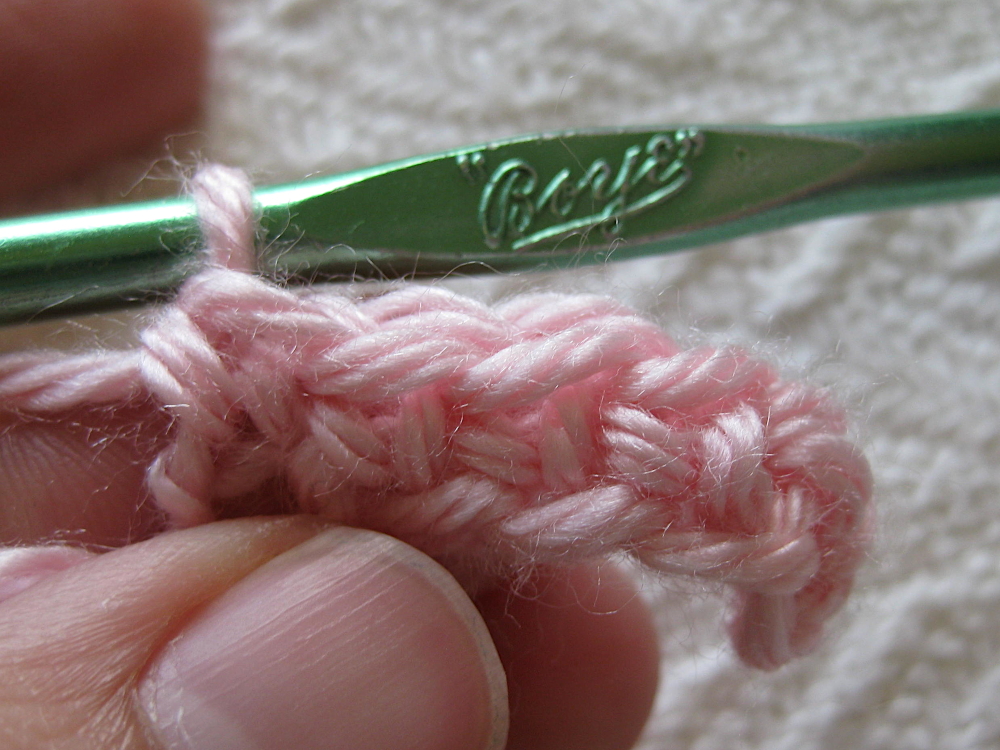
How to Single Crochet
Whoo! All that, and we’re finally ready to learn the single crochet stitch! This is one of the most commonly used stitches in crochet, and it’s also one of the easiest to make, so it’s a good one to start with. The first row, you’ll be working into that starting chain you made. A single crochet is about one chain high, so for the edges of rows, we do a chain stitch and this counts as the first single crochet.
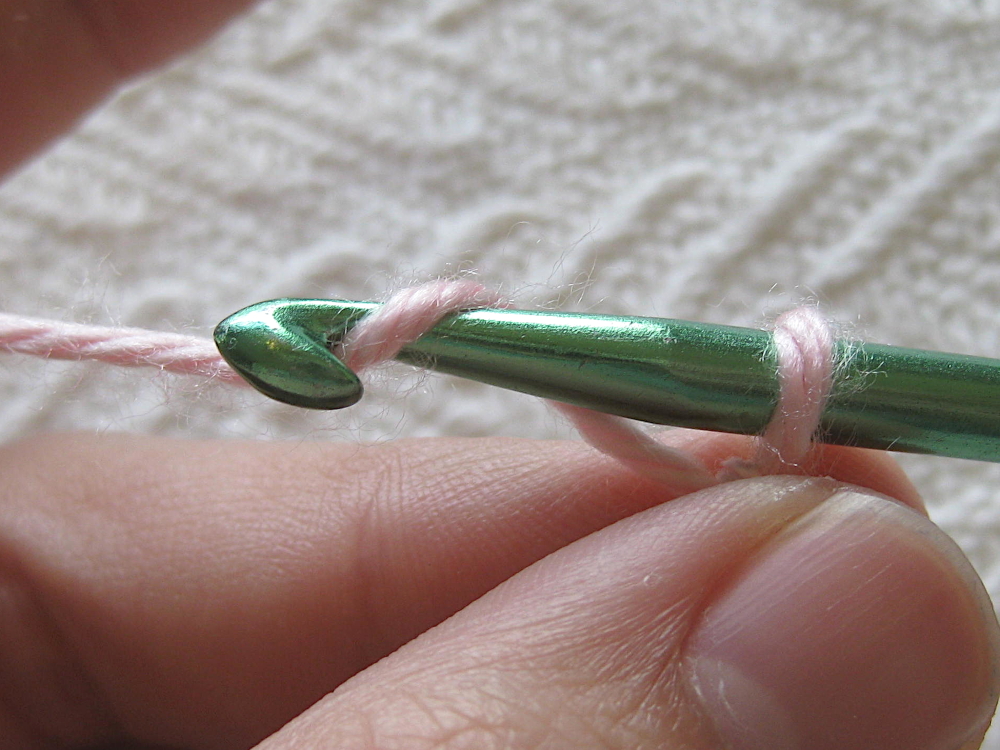
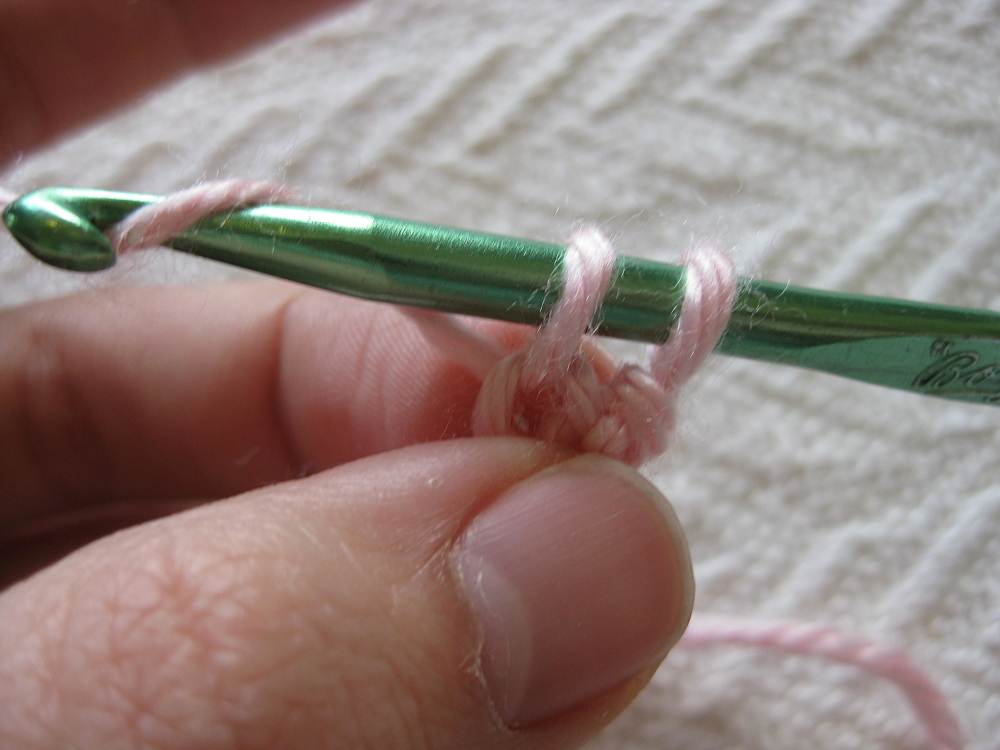
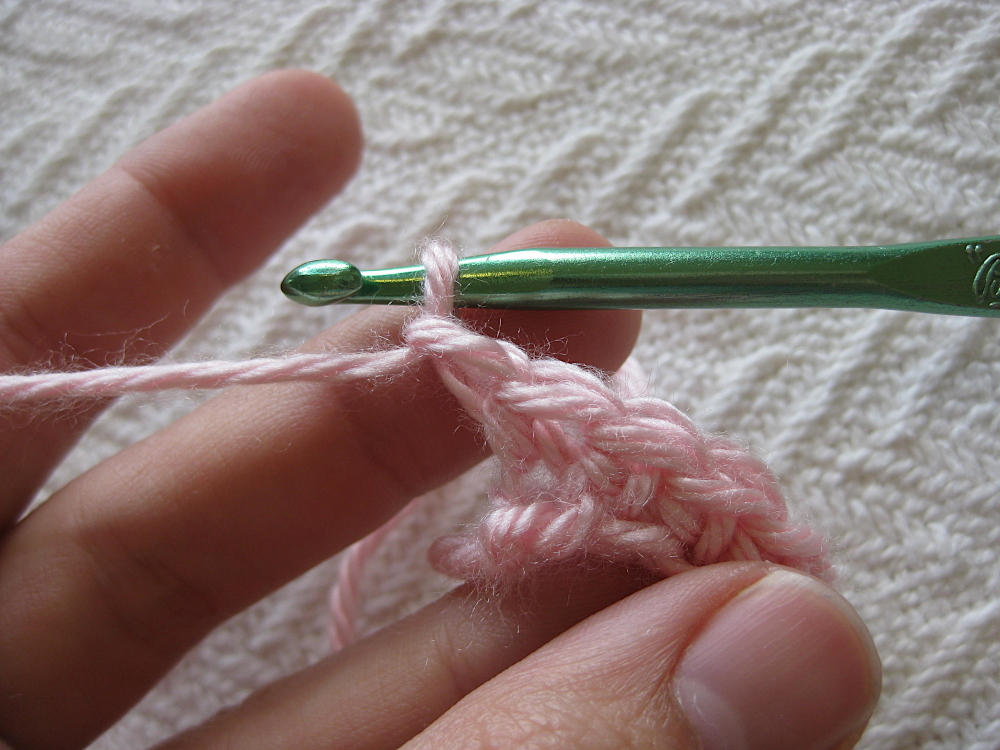
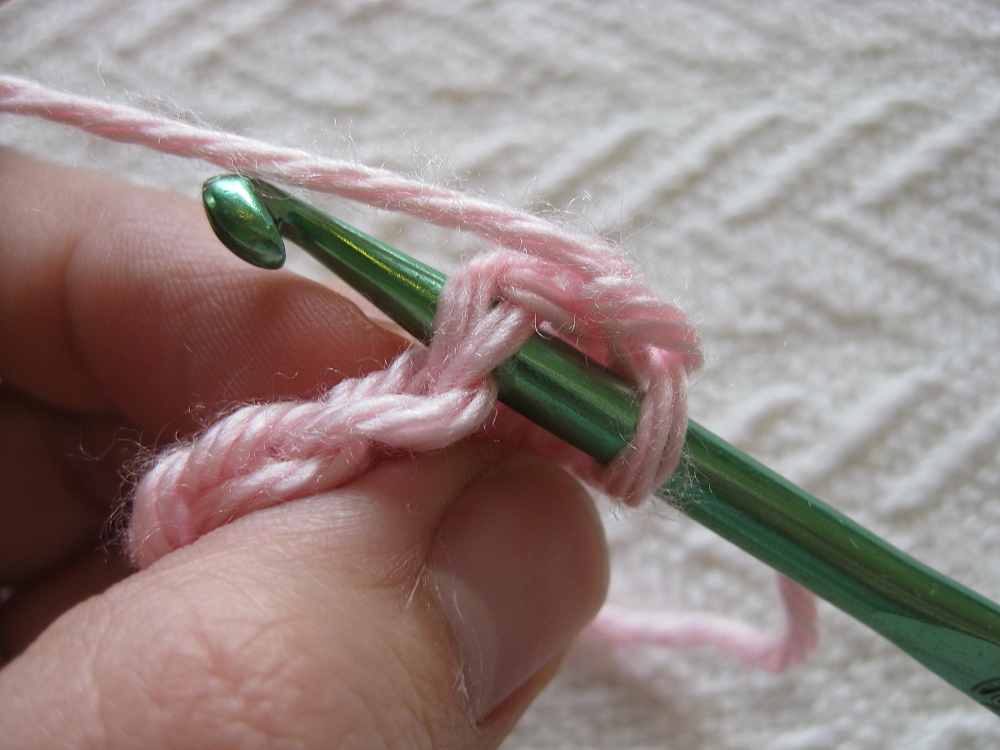
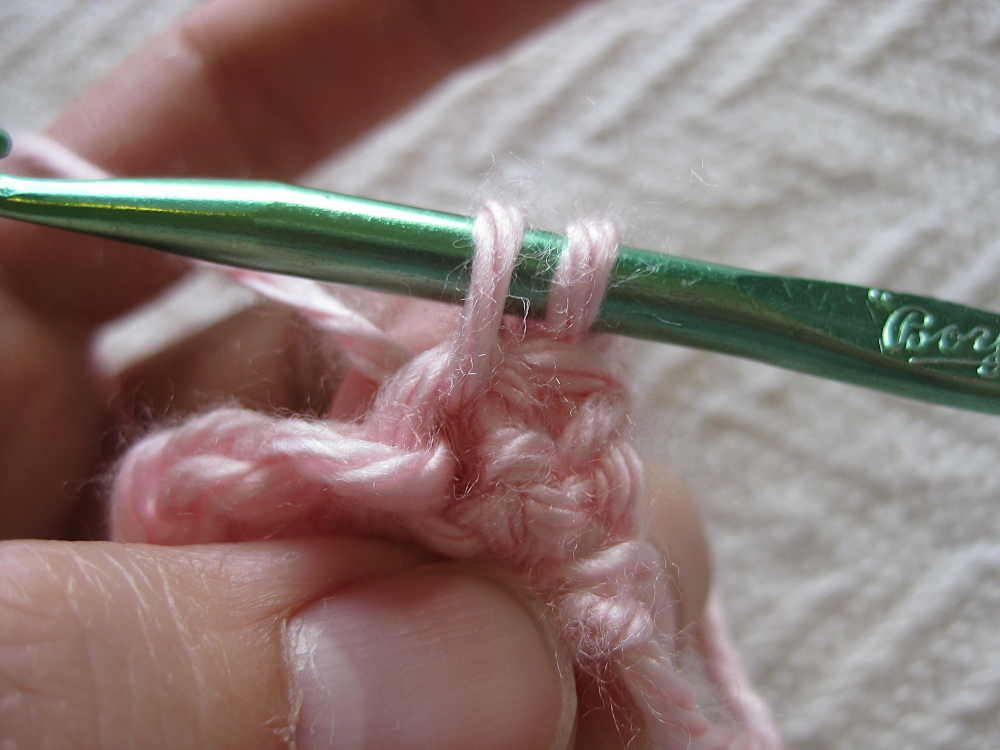
To do the next single crochet, insert your hook through the back bump of the next chain stitch.
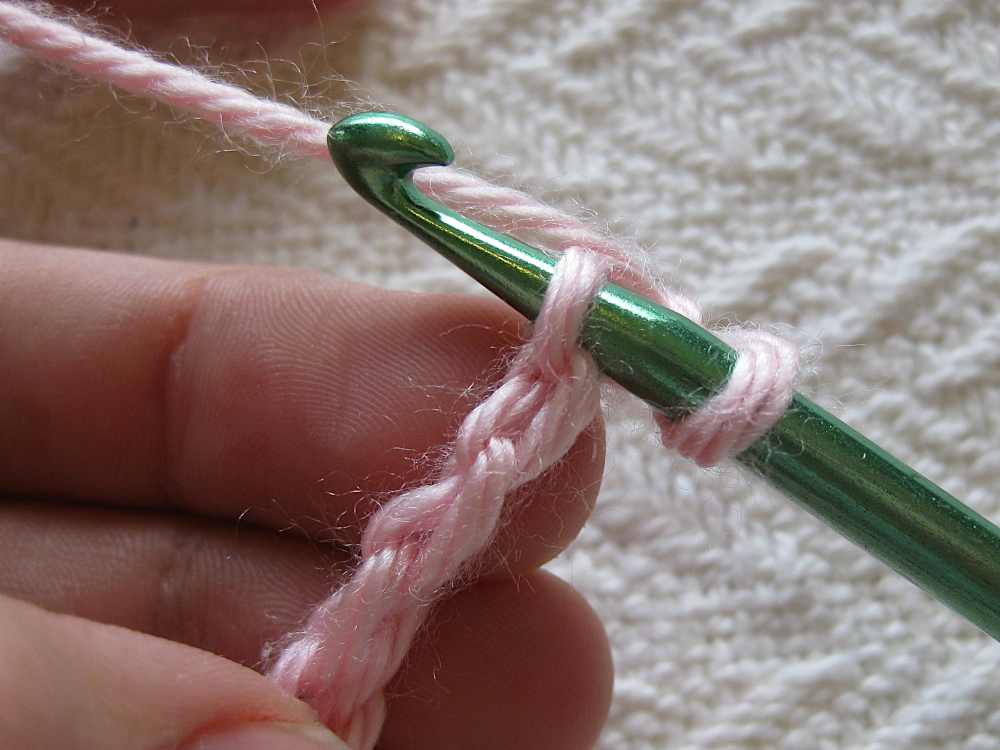
Now yarn over, just like you did to make a chain, and pull that yarn through the first loop on your hook (the back bump of the chain)
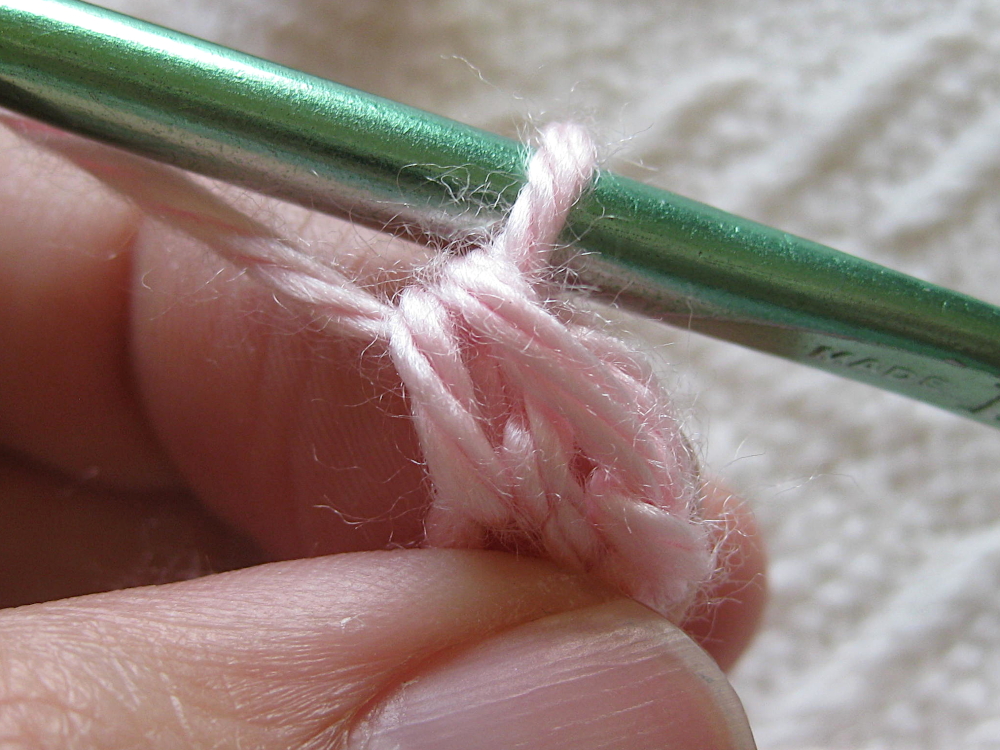
Now you should have two loops on your hook still. Yarn over, then pull through both the loops on your hook. Congratulations, you just made your first single crochet! Now, continue working single crochets into each back bump along your starting chain.
When you get to the end of the chain, you’ll turn the work around and work single crochets along the row you just made. First, do one chain stitch (in a pattern, it’ll be written as chain 1, ch 1, or ch1), then turn the project around. The chain you just made counts as the first single crochet. So to work the next single crochet, yarn over, and insert your hook in the next single crochet (sc) stitch (you’re skipping the first sc because the chain counts as the sc for that stitch). When you insert your hook, make sure you go under both of the loops on top of the sc from the previous row.
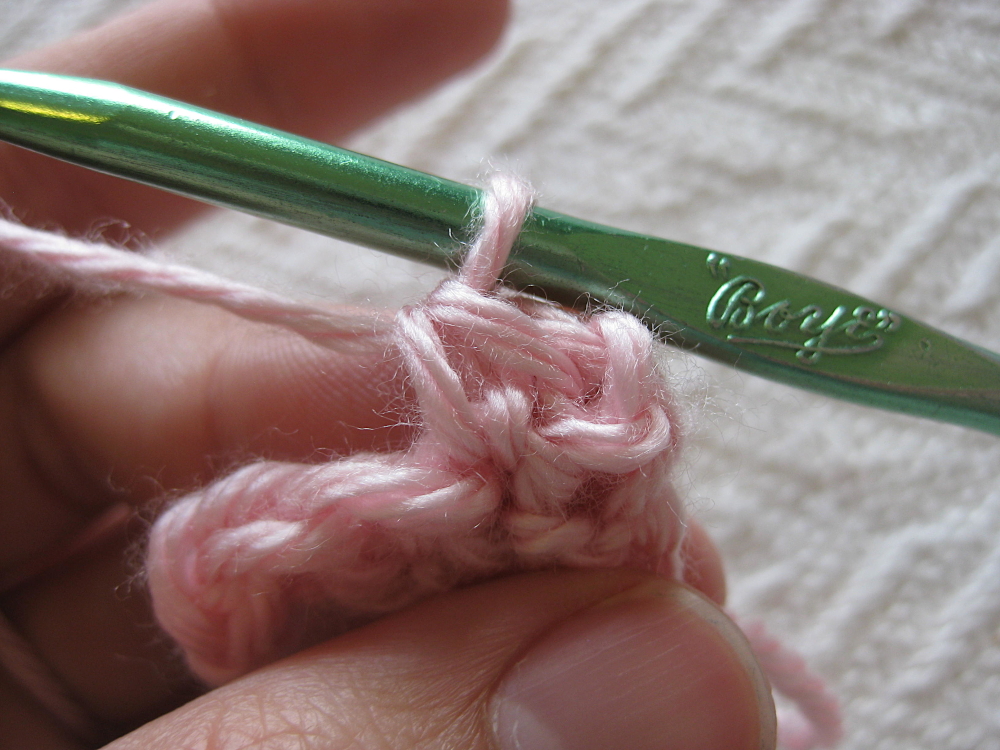
Congrats! You now know how to single crochet!
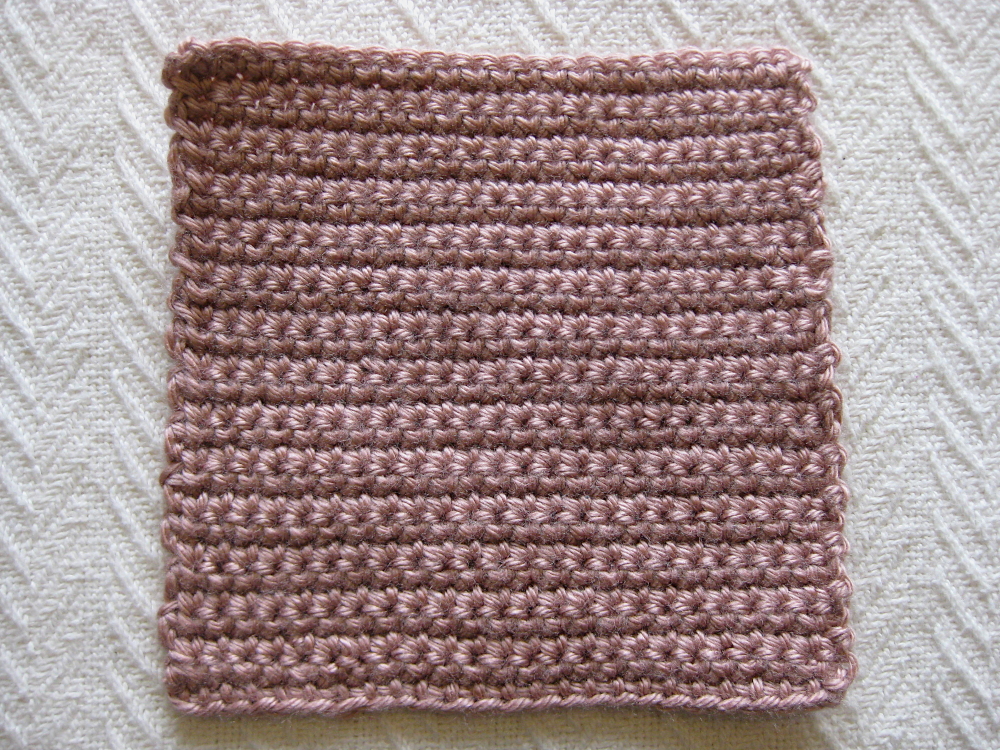
Making Your 6-inch Single Crochet Square
If you want to follow along with your blanket squares project, you’ll need to make a 6-inch square of single crochet. You could make this a different size, if you’d like, but I just randomly picked 6 inches. For me, it took 25 single crochets per row and 28 rows to make six inches. This number might not be the same for you depending on what yarn you choose, what hook you use, and your tension. So I recommend doing a little experimenting. Maybe make a small square and measure it to see how many stitches you’ll need. Most of all, have fun!
Once you’ve got the technique down, a great project to hold you through until next week’s lesson is to make some wash cloths. If you get some 100% cotton yarn (like Lily Sugar and Cream, available at many craft stores), you can use the same square pattern you just made to make some colorful wash cloths. If you’re ready for the next lesson, how over to How to Slip Stitch Crochet. For more tutorials, check out the Tutorials page. Happy Crocheting!