
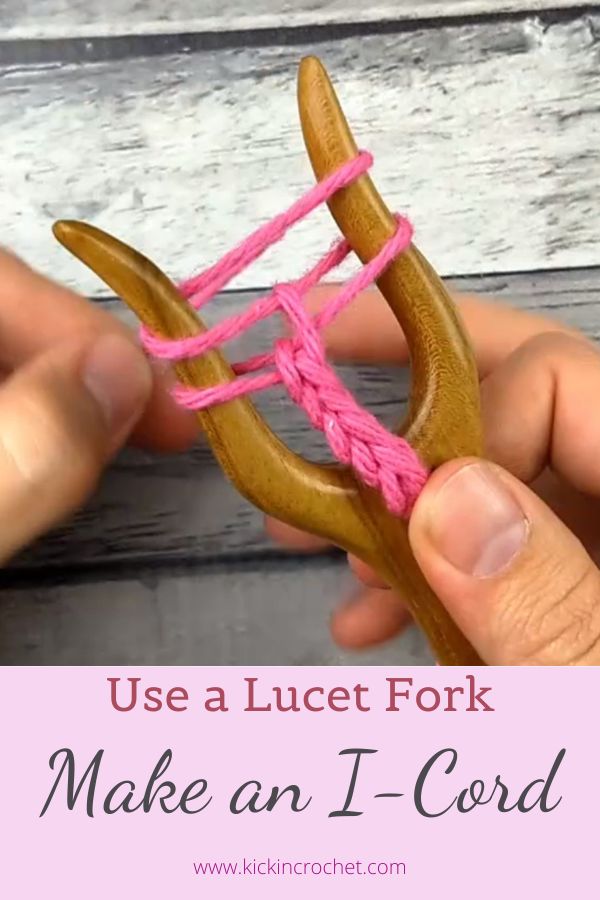
Making an I-cord with crochet is… maybe possible, but certainly not easy, so I’m going to show you how to make an I-cord easily using a Lucet Fork. I-cords need not be solely for knitters any longer! This tool is so simple but it really makes the job much easier. I-Cords are useful for straps (hello summer tops!), drawstrings, cords, edgings on finished items, etc. Read on for a photo/written tutorial, as well as a video to show you how to use one!
*Disclosure: Some of the links in this post are affiliate links, which means if you click on them and make a purchase I may, at no additional cost to you, earn a commission. Read full disclosure here.
Supplies
You can pick up lucet forks online at a variety of retailers. Mine happens to be from Furls crochet (and I think it’s beautiful), but that’s not important. In fact, you don’t necessarily need a dedicated “lucet fork” at all. The little hole for the yarn to go through is not at all required to make this work, so if you have a tool with two tines and a center that yarn can weave through, you can make it work!
- Whatever Yarn you want to make an I-Cord out of (honestly, anything can work!)
- Lucet Fork
Lucet Fork I-Cord Video Tutorial
How to Use a Lucet Fork to Make an I-Cord
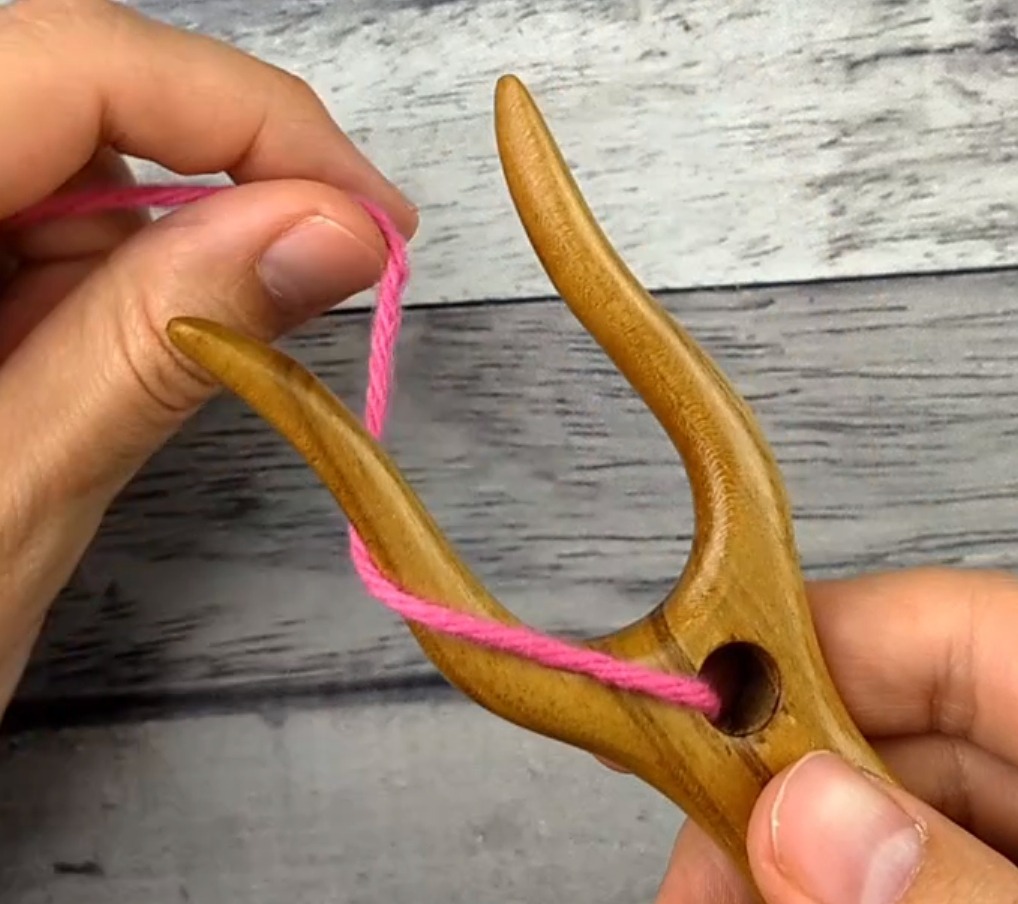
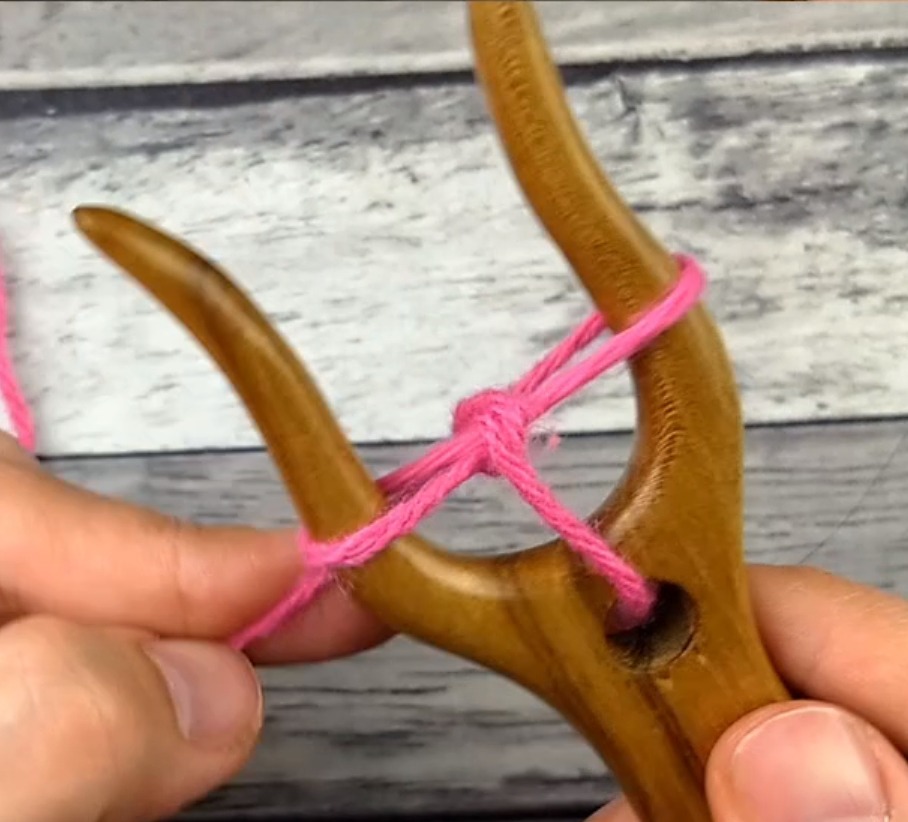
There are only a few simple steps involved in making an i-cord, and once you get them down, you’ll be able to make one of these beauties quickly! I’m going to walk you through it step by step with a video tutorial. Start off by inserting the yarn tail through the hole in the lucet fork. This isn’t strictly required – you can just put the yarn through the middle of the fork instead and hold it in the back. It’s necessary to do it that way, actually, if you’re using a thick yarn. Hold the yarn steady against the lucet fork.

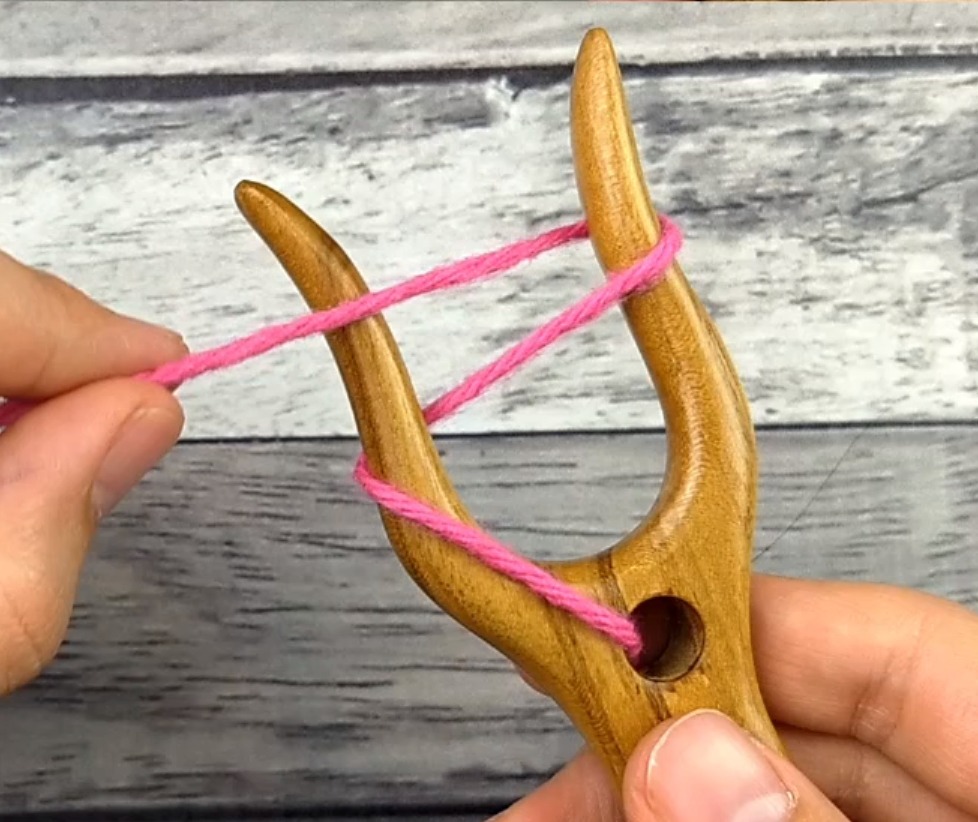
Wrap the yarn around the left tine of the fork, from front to back (note – you can wrap it the other way if you’d like, just make sure you reverse direction for all the steps).
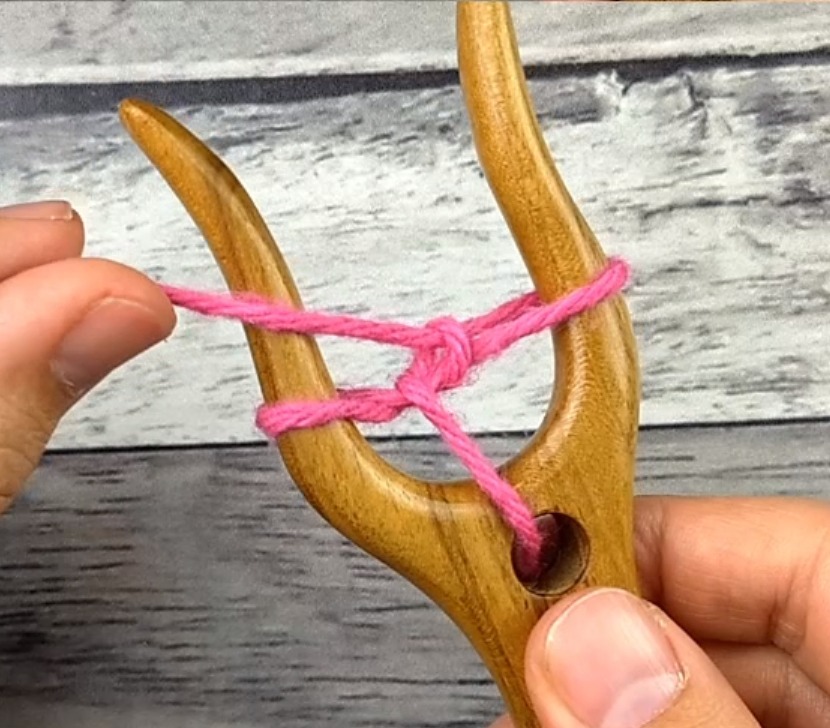
Take the yarn up through the middle, then around the right tine, again front to back.

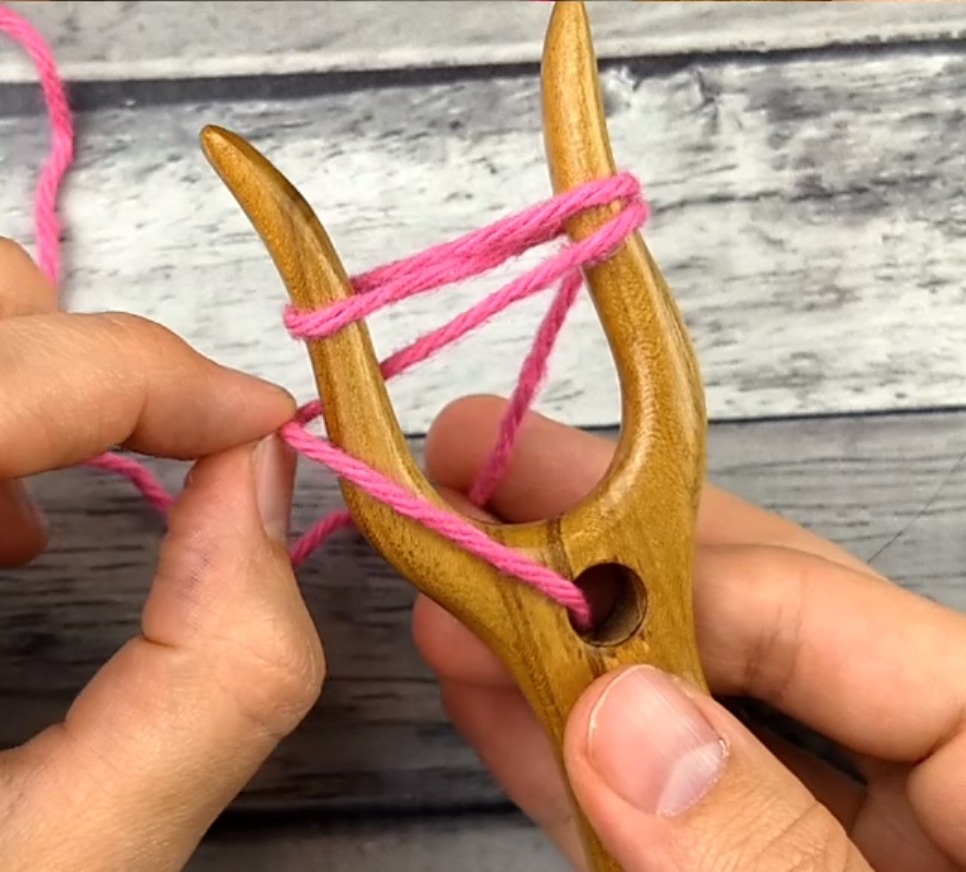
Now bring the yarn back up through the middle again, and around the left tine for the second time, still front to back.
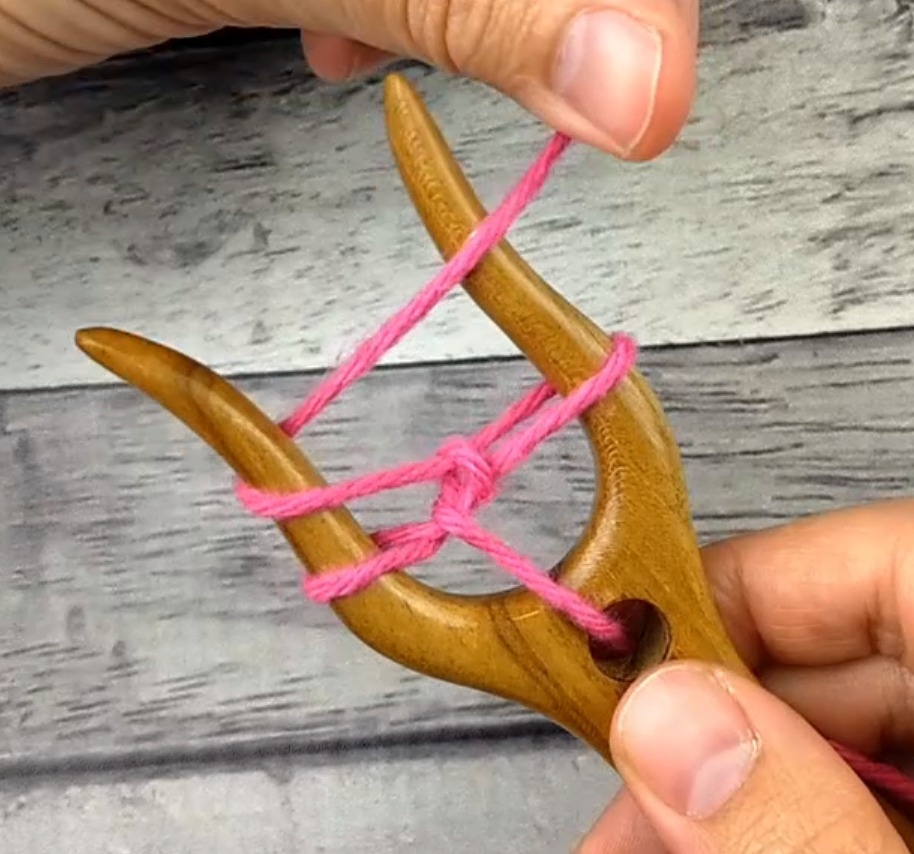
One more time, bring the yarn up through the middle, then around the right tine again, front to back.

Hold the yarn tail with your right hand (or whichever hand is holding the lucet fork). Gently pull the bottom loop on the left tine up and over the top of the other loop and the top of the tine, and release it. You should still have one strand on the left tine of the fork. Gently wiggle the yarn tail back and forth a bit to tighten up the yarn, but you don’t want it to be super tight.
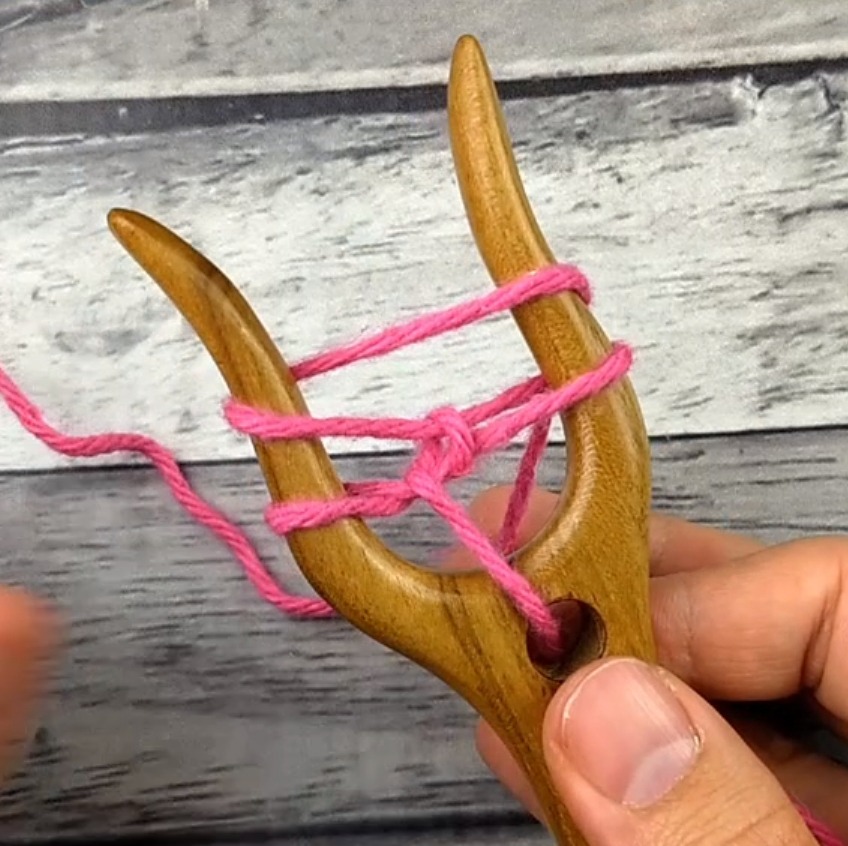
Now do the same thing on the right tine – take the lower loop and lift it up, over the top loop, and over the tip of the tine. Gently tighten up the yarn tail. You should end up with one loop on each tine of the fork.
Now that you’ve gotten things started, you’ll repeat the next four steps over and over until you have your i-cord as long as you want it to be! Take the yarn tail up through the middle of the fork, and wrap it around the left tine (front to back, again!).
Now bring the yarn back up the middle, and around the right tine, front to back.
Hold the yarn tail with your right hand again.
Now you’ll pull the lower loop up and off the left tine of the lucet fork, then the right tine. Gently tighten up the i-cord. Continue in this manner – weave around the left, then the right, then pull the bottom loops off the left, then the right, then tighten – until your i-cord is as long as you want it to be! When you’re done, pull the icord off the lucet fork, and cut your yarn. You’ll have two loops on the top of your i-cord.

Don’t pull your yarn, or you’ll unravel the i-cord! You could tie this off any way you’d like, but I like to pull the yarn tail through each of those two loops, tighten it up, and then tie a knot. That’s it, you’re done!
