
I remember the first time I saw the Jasmine Stitch. I was completely taken in by how beautiful it is. This stitch is a showstopper. It is simply stunning! However, as I learned to do it, I realized that I wasn’t seeing anyone increasing or decreasing the stitch, and I wanted to try making a shawl. So I figured it out myself! In this tutorial, I’ll explain how to increase and decrease the jasmine stitch. If you’re new to jasmine stitch, you can grab a PDF jasmine stitch tutorial to learn the basic stitch!

Increase and Decrease Jasmine Stitch YouTube Video Tutorial
How to Decrease Jasmine Stitch
Decreasing was the first thing I figured out how to do, because it’s what I need to use to make the jasmine stitch shawl that’s pictured (free pattern coming soon!). There are two decrease techniques that I’ll show you. One is when you want to decrease on an edge of the project, as for the shawl, and the other is when you want to decrease in the middle of a project.
Decreasing on an Edge
Normally, when you turn a row in jasmine stitch, you make an additional chain puff, then turn and work back along the row like normal. To decrease on the edge, you simply don’t make the turning chain puff! It’s actually easier to decrease than it is to have a straight edge with jasmine stitch! Let’s walk through it step by step. First, work all the way to the end of the previous row. This type of edge decrease always happens at the beginning of the new row rather than at the end of the previous row. Of course, you could use the other type of decrease (that you’ll learn next) if you want to decrease at the end of the previous row. Anyway, work to the end of the previous row, as shown.

Next, pull up a loop and turn your work. Yarn over and insert your hook in the same stitch and pull up a loop twice, just like you normally do for a jasmine stitch.

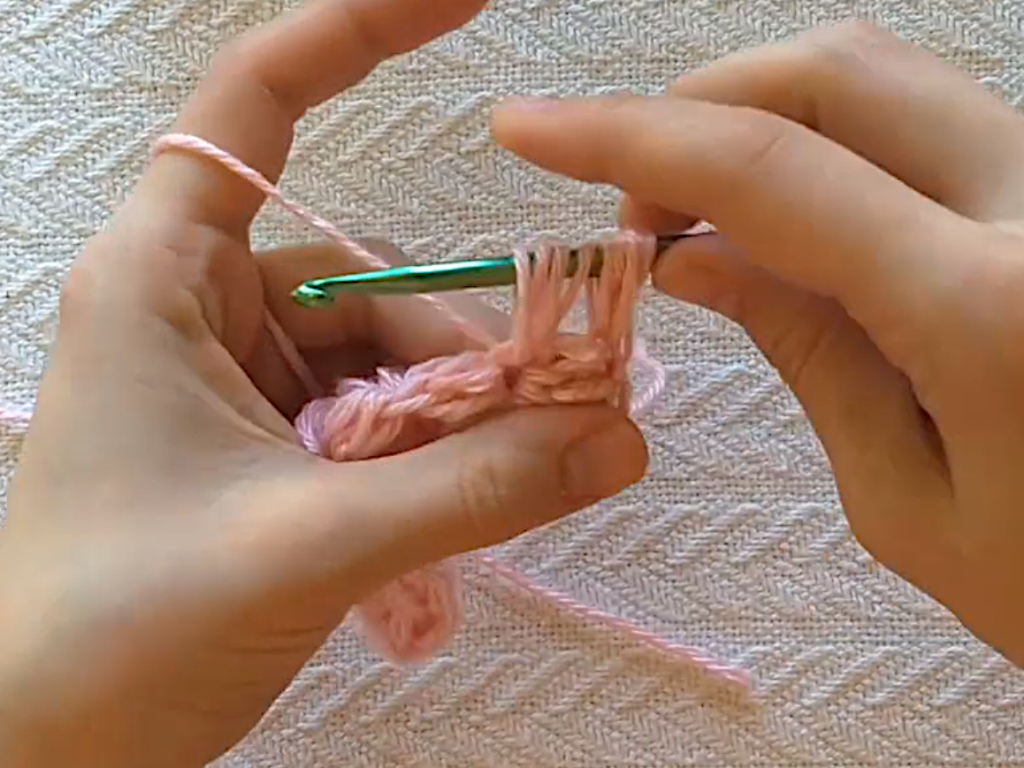
Yarn over and insert your hook in the next stitch and pull up a loop twice, just like normal. Now you should have two “bunches” of loops on your hook.
Now, a normal jasmine stitch would do this one more time, but since we’re doing an edge decrease, we’re going to finish off the stitch now. Do a normal jasmine stitch finish. Ta da! That’s a jasmine stitch edge decrease.

Decreasing in the Middle of a Project
To decrease in the middle of a project, you’re going to work the first part of a jasmine stitch as normal up until the point where you have three “bunches” of loops on your hook. Yarn over, insert your hook in the next stitch, and pull up a loop twice so that you have four “bunches” of loops on your hook instead of three (you worked into an extra stitch… this will decrease your stitch count).

Now, finish the stitch as normal. This is a decrease worked in the middle of a project rather than on an edge.

How to Increase Jasmine Stitch
Just like for decreasing, there are a few options for increasing. You can increase at the end of a project or in the middle of a row. Let’s start with increasing on an edge.
Increasing on an Edge
To increase on an edge, work all the way to the end of the previous row. Normally, when you turn at the end of the row with jasmine stitch, you’ll make a puff chain, then turn and work back across the row. To increase at the end of a row, you’ll simply make two puff chains instead of one, then work back across the row. Of course, you could increase by more than one stitch easily by making additional puff chains on the edge!


Increasing Mid-Row
To increase in the middle of a row, I have two techniques. The one shown in the video actually increases by two stitches. To do this, you’ll make an extra puff chain wherever you want your increase to be, then keep going with regular jasmine stitch.


I’m making a jasmine stitch ripple blanket right now (stay tuned for that free pattern, as well!) so I had to modify that mid-row increase slightly to work with that pattern. I’ll do a photo tutorial for that when I post the blanket pattern, but if you want to only increase one stitch-worth mid-row, you won’t make the chain puff. Instead, you’ll work a normal jasmine stitch, just leave off the 3rd “bunch”, so only work the first two parts of the normal jasmine stitch for the increase stitch.
That’s it! I hope you enjoyed this tutorial on how to increase and decrease jasmine stitch and learned something new! If you’d like to check out a project that uses the Jasmine Stitch, take a look at the Jasmine Baby Shirt pattern. Don’t forget to sign up for the newsletter to get all the latest news and updates!
I’m more to this stitch, but I have it down pretty good. My plan is to make an Afghan using Premier Puzzle yarn, 5 weight. My question is how to do a border…