Come check out the new video tutorial and learn how to crochet Give it a Whirl lace! After making myself a new lace crochet earring holder (see the tutorial here!), I decided to make another one for a good friend. This friend has been giving me free haircuts lately, because she’s wonderful and kind and realizes that I can’t afford to pay $50 every month to get my hair cut (the curse of short short hair!).
This time I wanted to try to make up a new lace pattern on my own. Now, I’ve never actually designed a serious lace pattern before. I’ve modified some things I already knew, and I’ve done some very simple lacey things like the diamond scarf (which I love), but this was my first foray into making a lacey lace pattern completely from scratch.

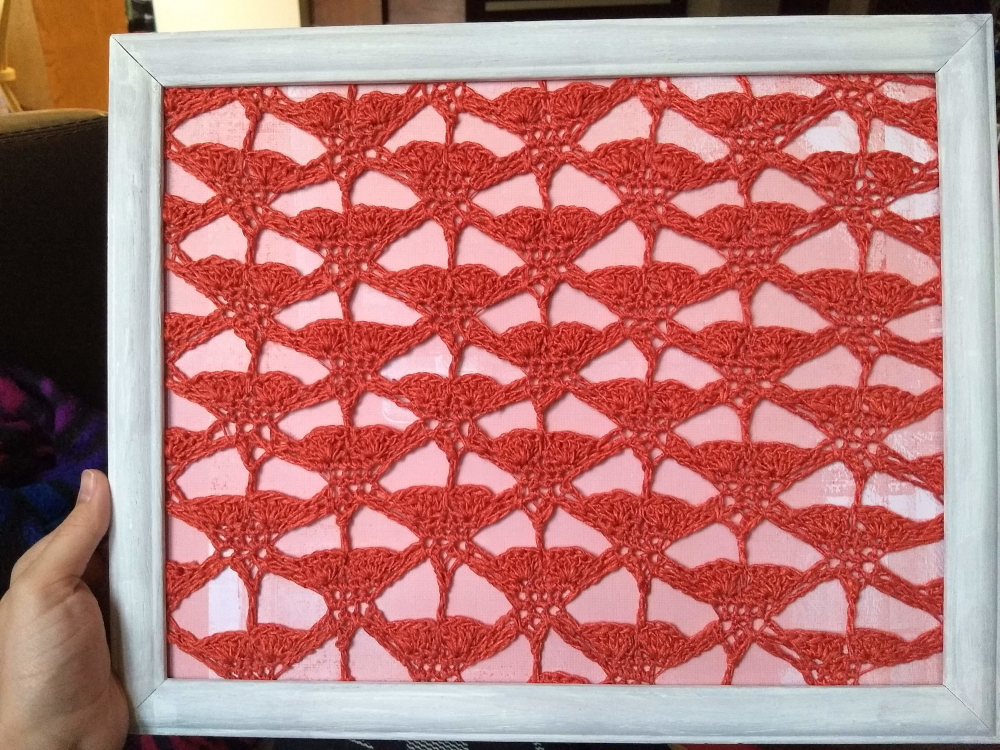
I couldn’t decide what to name it. People told me it looked like poppies, mermaid tails, dancers, uteruses (yup), hearts, trees, etc. I think it looks very different right side up versus upside down, too! I went with “give it a whirl” because it reminds me of tops, or dancers, and because I gave lace-making a whirl.
*Disclosure: Some of the links in this post are affiliate links, which means if you click on them and make a purchase I may, at no additional cost to you, earn a commission. Read full disclosure here.
Crochet Lace Tutorial Video
If you just want to get straight to the tutorial, here’s the video link! Don’t forget to grab a copy of the free stitch diagram chart below, and follow along to make your own lace!
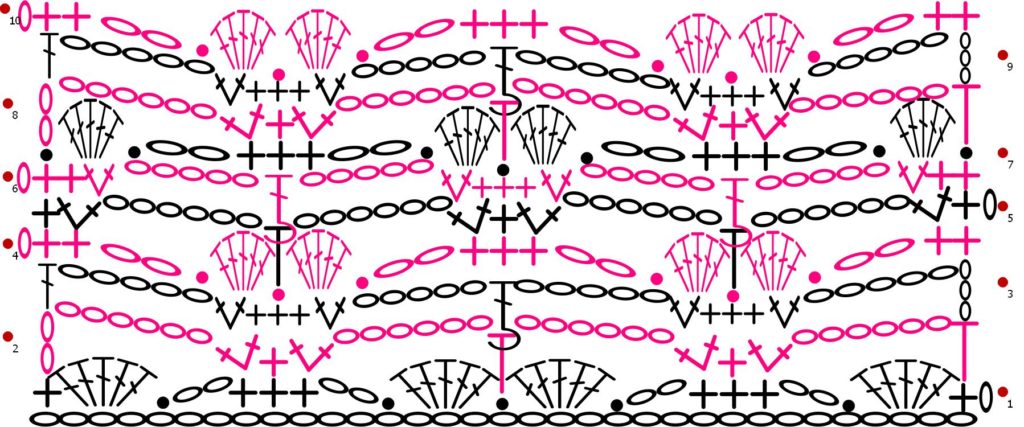
Important note: for rows 4, 7, and 10, when you do the three single crochets, the first and last one should go over both the chain from the previous row AND the chain from the row below that, to hook them together. This forms the angled base of each motif! Also, remember to subscribe to my YouTube channel and be the first to hear about new videos!
The evolution of the lace
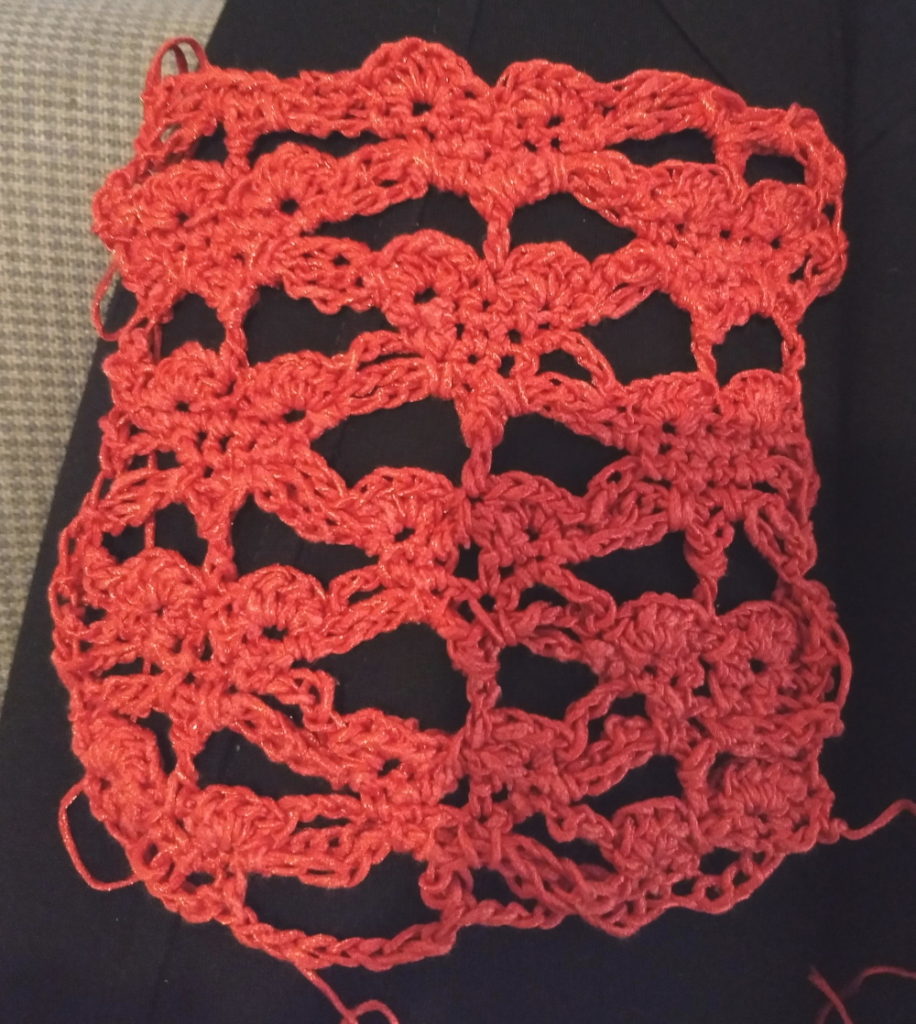
I really hate taking things apart. If I find a mistake while I’m working, I often have a great debate about how bad it would be to leave it in there, versus how bad it would be to take out a row or two… most of the time, if I’m not crocheting for a customer, I would rather leave that mistake than frog it! That being said, this project was frustrating. It took a lot of trial and error. Here’s a fun picture showing some early variations on this theme. The bottom is one of my first attempts, and as I went up, I continued to make changes, as you can see each motif getting more well-defined.
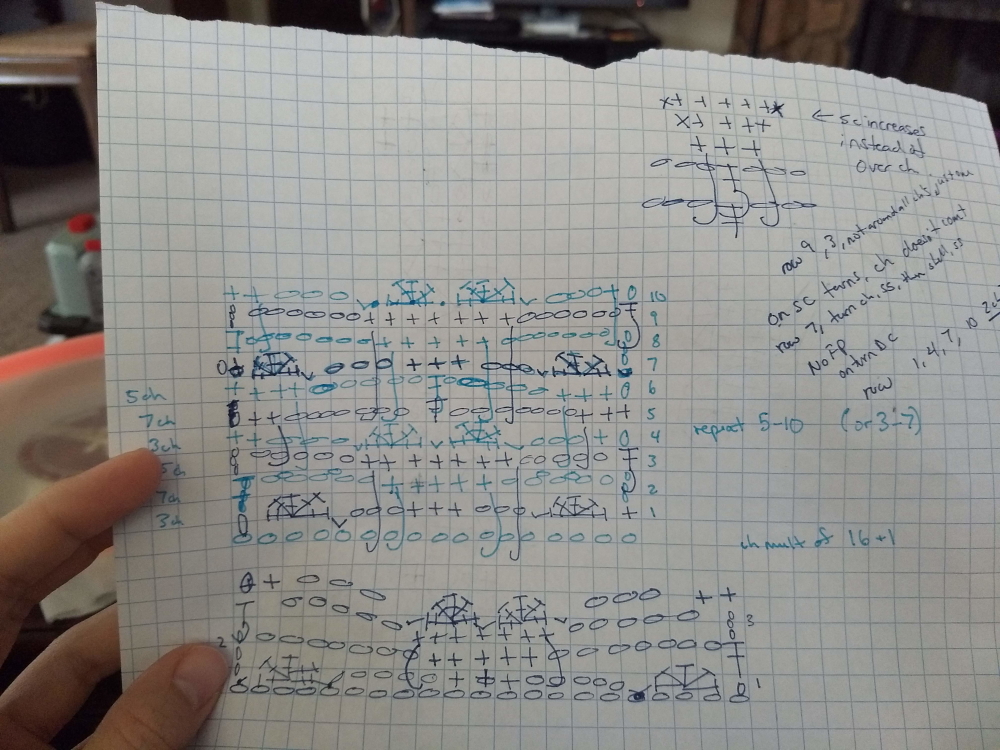
I also had several sheets of paper with crochet charts scrawled on them, crossed out, and rewritten.
As I continued working on it, the pattern continued to improve.

I originally was going for a heart motif, and I do think this design looks quite a bit like hearts when it’s not stretched out.

However, when you start stretching it, as I had to do for the earring holder I was making, it starts to look quite different, which is why I didn’t give it a “heart” name.
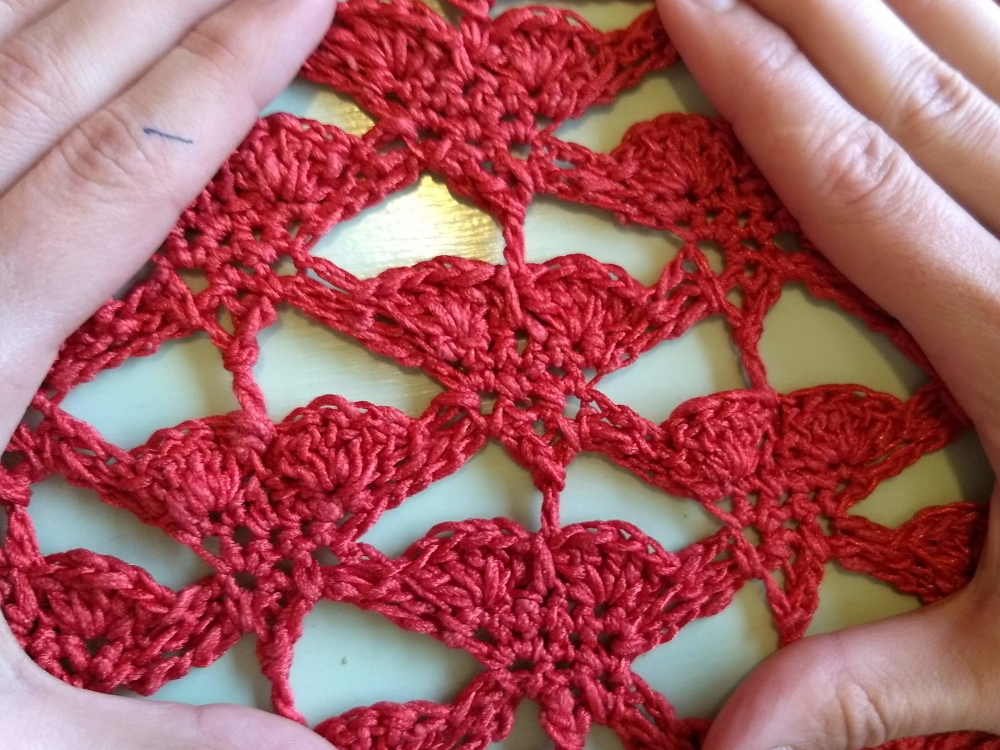
As I mentioned before, I think it also looks totally different upside down… and I ended up framing it upside down to give to my friend! Which way do you prefer it?