
This tutorial was originally published on my old kickincrochet blog in August 2013
One of the most frustrating things I came across as a beginning crocheter was that my starting chain was always always infuriatingly too tight. It didn’t seem to matter how loose I made the chain, it always caused my projects to pinch and pull in funny ways. Then, one day, I learned the base chain double crochet. This is by far my favorite way to start a crochet project. It’s a little tricky to master at first but once you get the hang of it I promise you’ll love it. It gives your starting rows much more normal stretch, and if you’ve bought any of my patterns, you’ve probably noticed that I use this stitch a lot. You can also do base chain single, half double, or treble crochet.
Here is a photo tutorial on how to do a base chain double crochet (these are the same pictures I used in my shells and beads legwarmer pattern) .
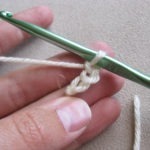
1. Start out with a ch3. This counts as your first dc.
2. Yarn over, insert hook through first chain and pull up a loop
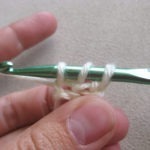
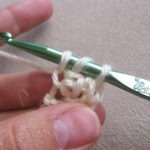
3. ch1
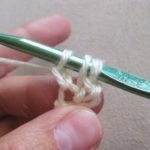
4. Yarn over and pull through two loops on hook twice to finish dc
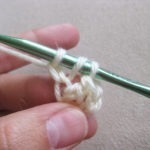
5. For next st (and each subsequent stitch), yarn over and insert hook through ch1 of previous base chain double crochet stitch, pull up a loop.
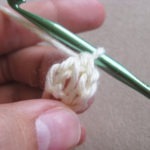
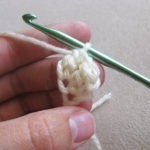
6. ch1
7. yarn over and pull through two loops on hook twice to finish dc
You can also begin a base chain double crochet in the middle of a row of dc to make arm holes and button holes. To do this, you would yarn over, pull up a loop in your next st as normal, then ch1 to start the base chain, finish that dc, and continue with base chain double crochet. To reconnect to the previous row, when you insert your hook into the ch1 of the base chain double crochet, also insert through the stitch you want to reconnect to and pull up a loop through both loops, then finish the dc as usual. I used this technique in my spiral neckwarmer pattern (for the buttonholes) and in my toddler shrug pattern (for the arm holes).
Happy Crocheting!