
Last week we covered how to decrease crochet, and this week we’re talking about how to increase crochet. When you’ve mastered both of these skills, you’re ready to start making all sorts of shaped things – fitted garments, stuffed animals (amigurumi, in the crochet world), hats, etc. Let’s get started!
*Disclosure: Some of the links in this post are affiliate links, which means if you click on them and make a purchase I may, at no additional cost to you, earn a commission. Read full disclosure here.
Supplies
If you’re following along in the Learn to crochet series and you plan on joining your sample squares together at the end of the project, I recommend using the same yarns throughout. You’re welcome to use whatever you’d like, but here’s what I used:
- Worsted weight yarn of your choice (I used Caron Simply Soft)
- Size H crochet hook – I love these Odyssey hooks from Furls Crochet!
- Yarn/Tapestry Needle for weaving in ends.
How to Increase Crochet YouTube Video Tutorial
How to Increase Crochet
To me, Increasing is actually easier than decreasing. To decrease, we had to combine multiple stitches into one, thereby decreasing the number of stitches from one row to the next. To increase, we are going to do the opposite. We are going to make multiple stitches where one stitch was in the previous row.
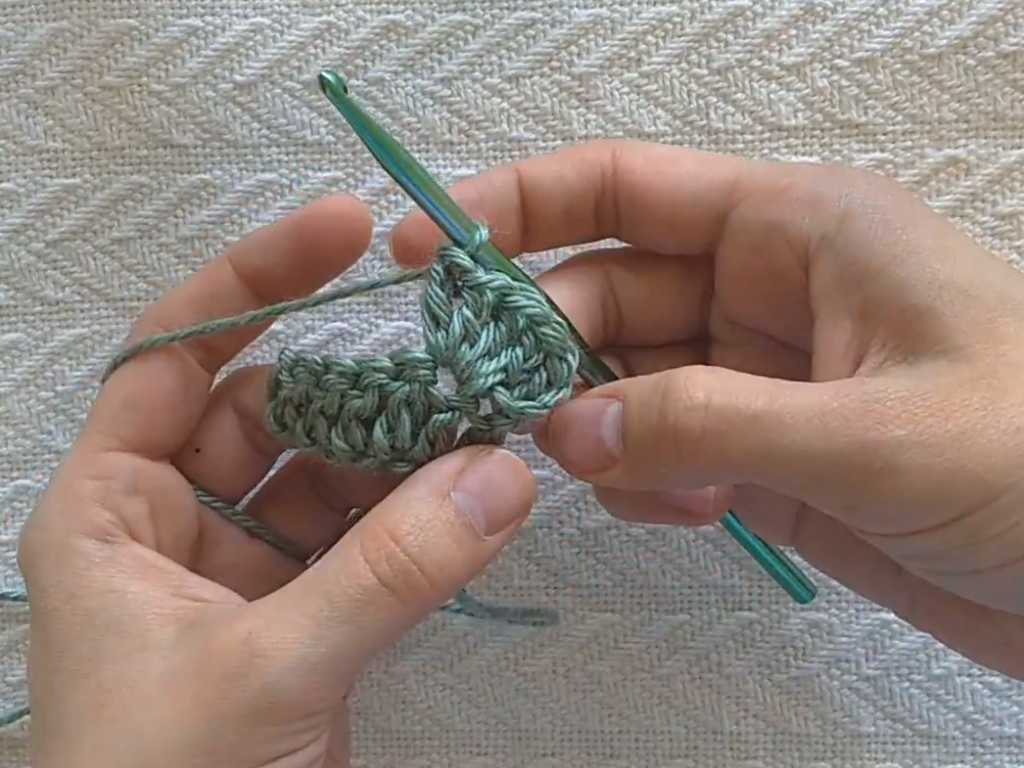
Just like with decreases, you can work increases with a variety of different crochet stitches. To work an increase, you’ll work one stitch as normal, but then you’ll work the next stitch in the same stitch from the previous row instead of moving onto the next stitch. You can even make more than than two stitches in the top of one stitch from the previous row. This is how you make things like shells and fans! For the mitered square below, we’ll end up working three double crochet in the same stitch to increase our stitch count.
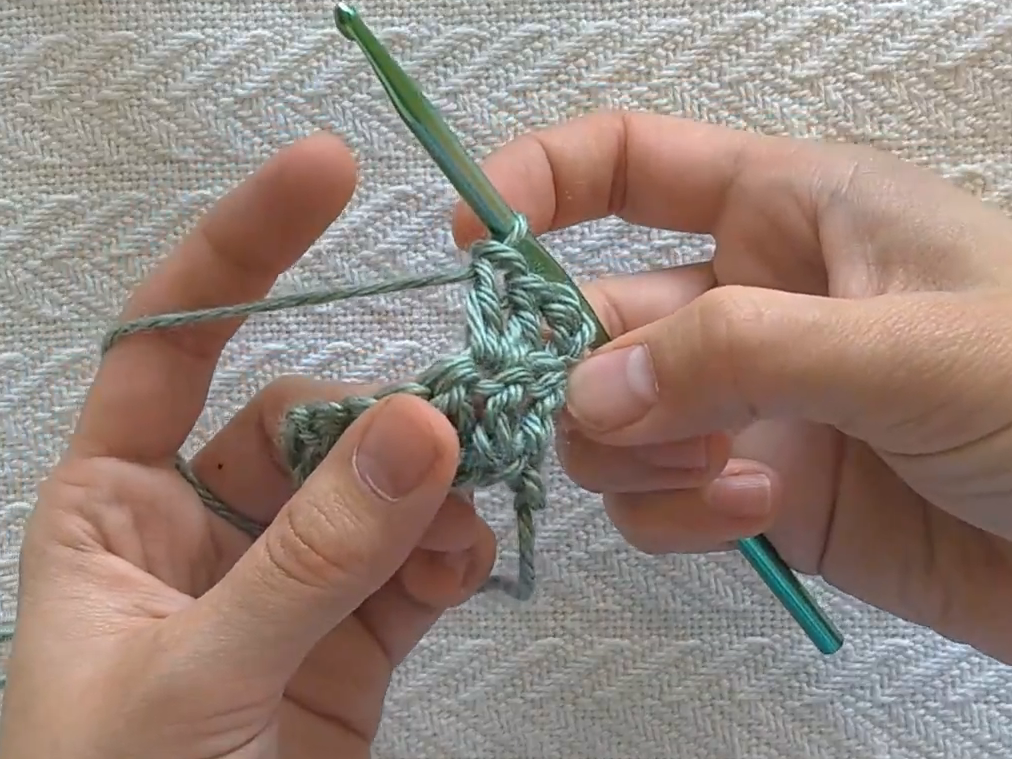
Mitered Square with dc Increases
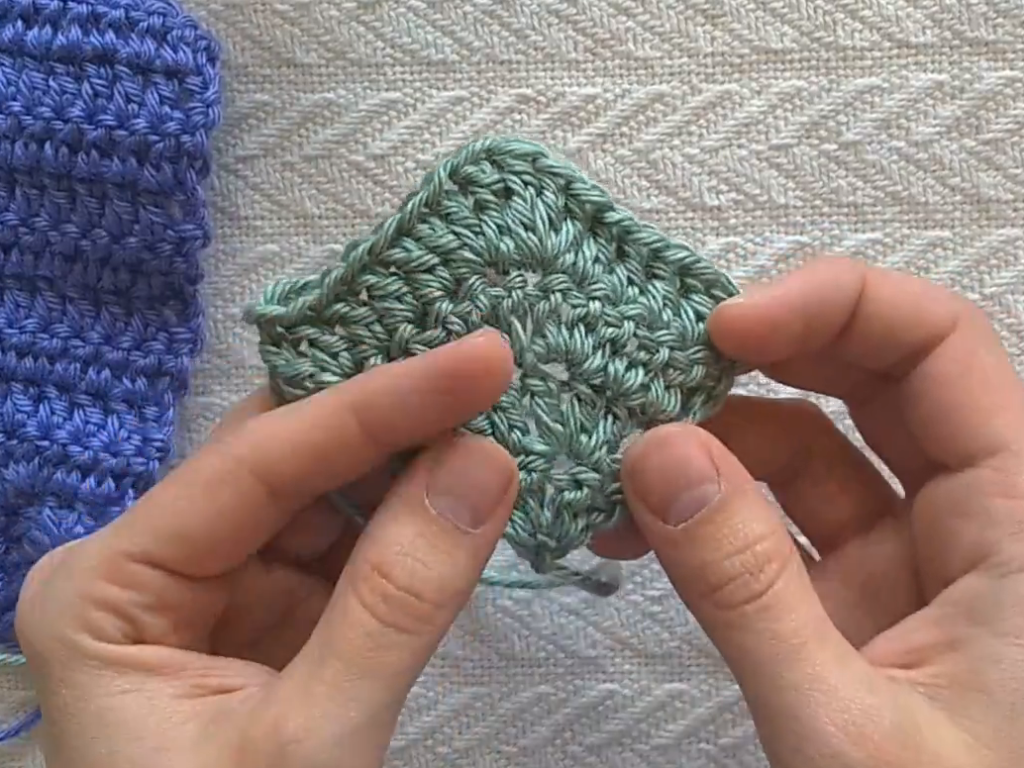
To make a mitered square with double crochet increases, we’re going to have to add four stitches each row. We’ll do that by doing 3dc in each of the two center double crochet’s in each row. To make a six inch square, I had to continue until I had 48 stitches along the outer row. I’ll also share a quick tip for getting a pointer end on your square’s last row!
- ch4, 3dc in 4th ch from hook (4dc)
- ch3, turn, 3dc in each of next two sts, dc (8dc)
- ch3, turn, dc 2, 3dc in each of next two sts, dc 3 (12dc)
- ch3, turn, dc 4, 3dc in each of next two sts, dc 5 (16dc)
- ch3, turn, dc 6, 3dc in each of next two sts, dc 7 (20dc)
- ch3, turn, dc 8, 3dc in each of next two sts, dc 9 (24dc)
- ch3, turn, dc 10, 3dc in each of next two sts, dc 11 (28dc)
- ch3, turn, dc 12, 3dc in each of next two sts, dc 13(32dc)
- ch3, turn, dc 14, 3dc in each of next two sts, dc 15 (36dc)
- ch3, turn, dc 16, 3dc in each of next two sts, dc 17 (40dc)
- ch3, turn, dc 18, 3dc in each of next two sts, dc 19 (44dc)
- ch3, turn, dc 20, 3dc in each of next two sts, dc 21 (48dc)
Notice how each row increases the number of dc before and after the increases by 2. You could continue indefinitely, making a super huge mitered square, if you wanted to!
How to get a pointier square
As promised, here’s your tip for making your mitered square just a little bit more pointy on the corner for the last row. Important – only do this on the last row, or you’ll end up with a diamond rather than a square!
Instead of 3dc in each of the two center stitches, do 2dc and a triple crochet for the first increase, and then a triple crochet and 2dc for the second increase. This way your two very center stitches of your last row are a little bit taller, giving you more of a pointed end!
I hope you enjoyed this tutorial and learned something useful. Keep crocheting, and don’t forget to subscribe to the YouTube channel for the latest videos and sign up for the mailing list below!